Hamskea Hybrid Pro Set Up Tips

OR Archer

WKR
Joined
Feb 29, 2012
Messages
3,034
Location
Mesa,AZ
KER4o2.jpg


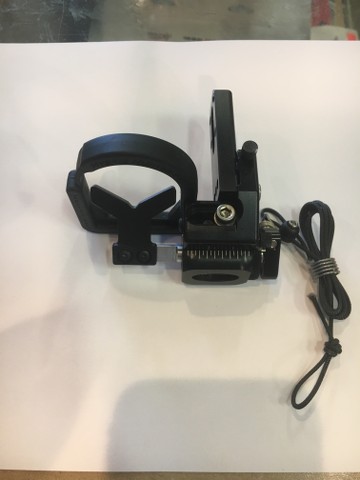
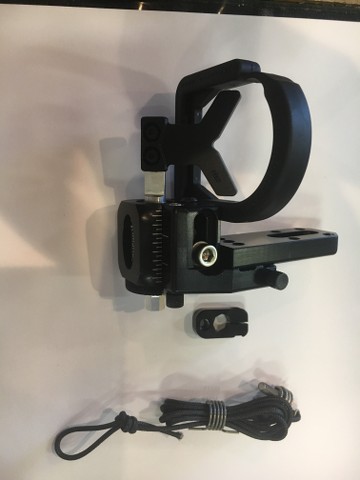
So here is how I set up the Hamskea Hybrid Pro rest. This is my preferred way of doing it and it may help some of you guys out who are having issues getting it to work. Take from this what you will. It's not the definitive way of doing it but I feel it's probably the best functioning way of setting it up.

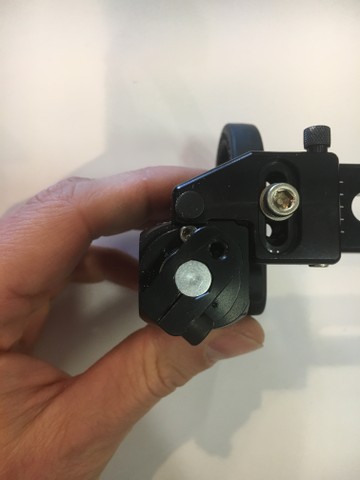
Step 1. Remove the screw that is holding the spring in place. This will allow you to remove the activation arm from the rest body.
TmjdiJ.jpg


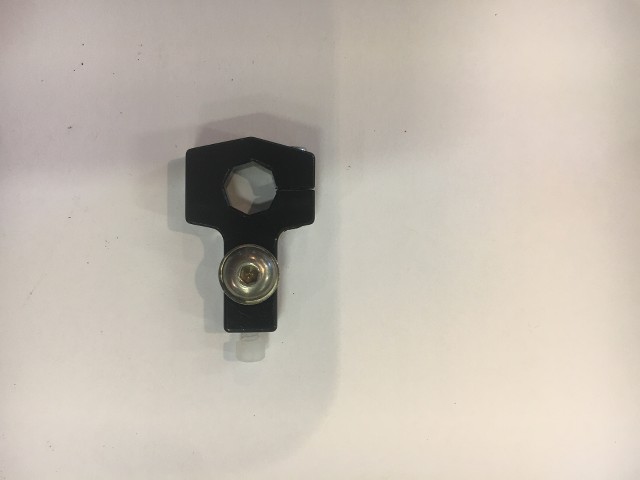
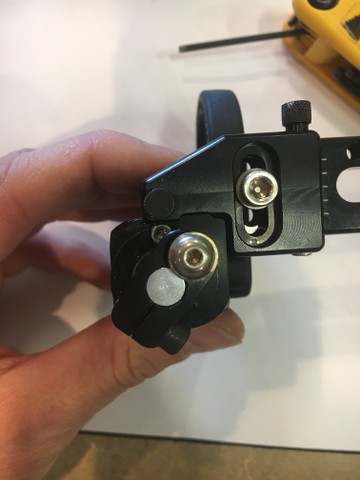
Step 2. I replace the screw that attaches the activation arm with a bit heavier duty bolt. This allows me to get a good tight mount when reattaching the activation arm. I prefer to use a bolt like this.
1w29Iy.jpg


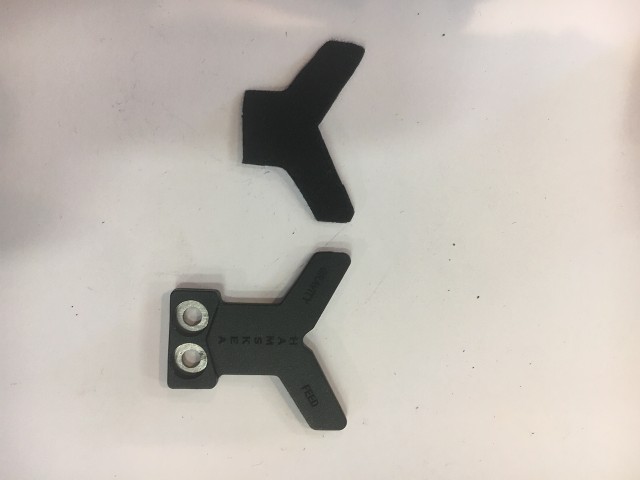
Step 3. Take the activation arm and flip it over. Put it back on the rest body and use the heavier duty bolt to secure it to the rest body.
rLhqNu.jpg


Step 4. For this next part you will need a small washer and another small screw. This will go in the threaded hole on the activation arm. This will give you a secure location to attach your activation cord. I also highly recommend NOT using the supplied rest cord that comes with the rest. Its garbage. Use a thicker higher quality material. I prefer to use Pine Ridge Nitro Loop material for rest cords.
FDGJj0.jpg


Step 5. Now remove the launcher blade. For this step I like to use a thin felt to cover the launcher. This quiets the rest and prevents premature wear of the teflon cover. Lay the blade down on the felt and trace around it. Cut it out and place it on the blade so that it slightly overlaps the edges. Now reinstall the launcher blade.
yQMgYO.jpg

kvg5T3.jpg


Step 6. Now you can mount the rest and set your rest height and center shot to your desired location for your bow. I prefer to swap out the supplied mounting bolt as well and use a standard size. Most allen wrench sets don't include that size so having a standard size bolt that I can easily tighten with a standard set of allen wrenches is best.

Step 7. Now you can attach your activation cord. I always start at the front of the cam closest to the riser. This is a good neutral starting position. l will use a standard d-loop knot to secure the cord to the limb. I will also tie around my knot a few times with some serving using over hand knots just for added security. I will grab the cord and pull on it several times to get a good cinch on the knot as well.
D0fntd.jpg

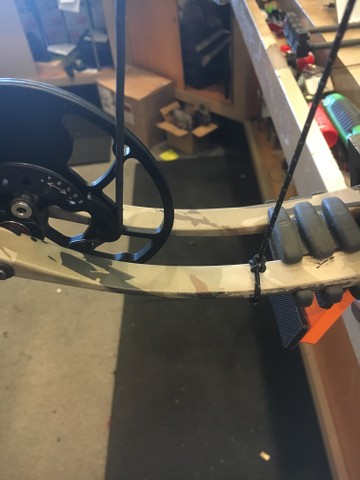
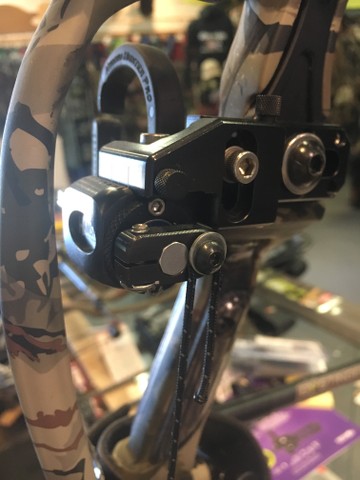
This is my personal bow. As you can see I have my cord mounted a bit further up toward the riser for my set up. This is where my personal bow tuned best.
 
Last edited:
OP
OR Archer

OR Archer

WKR
Joined
Feb 29, 2012
Messages
3,034
Location
Mesa,AZ
Step 8. Now you're ready to attach the activation cord to the activation arm. You only need to put enough tension on the cord to hold the launcher blade down with no slop. It does not have to be as tight as a guitar string.
W6xIb1.jpg


Step 9. Your rest is now in a functional state and ready to be used. Hopefully this little tutorial will help some of you guys out who are having troubles or for anyone who may be interested in using this rest. I personally think its the best limb driven rest on the market right now.

One last bit of information. Hamskea does make an alternative activation arm for doing set ups like this. I don't care for it but it may be easier for some guys as it eliminates sourcing different bolts and what not. Here is what it looks like:
HSgQw9.jpg
 
OP
OR Archer

OR Archer

WKR
Joined
Feb 29, 2012
Messages
3,034
Location
Mesa,AZ
If anyone has any questions on this set up process post your questions here and I will do my best to answer them as best I can in a timely manner.
 
Joined
Jul 23, 2013
Messages
1,257
I will most likely be asking questions!!! lol my rest should be here this next week. I loved the rest the first time I played with it.... Except for the spring and cable clamp... THis fixes it
 
Joined
Jul 23, 2013
Messages
1,257
Step 8. Now you're ready to attach the activation cord to the activation arm. You only need to put enough tension on the cord to hold the launcher blade down with no slop. It does not have to be as tight as a guitar string.
W6xIb1.jpg


Step 9. Your rest is now in a functional state and ready to be used. Hopefully this little tutorial will help some of you guys out who are having troubles or for anyone who may be interested in using this rest. I personally think its the best limb driven rest on the market right now.

One last bit of information. Hamskea does make an alternative activation arm for doing set ups like this. I don't care for it but it may be easier for some guys as it eliminates sourcing different bolts and what not. Here is what it looks like:
HSgQw9.jpg


With Step 8 do you not have any trouble withe the d loop slipping out from behind the washer?? Seems since there isnt any kind of groove or anything to keep the rope there it might slip out.
 

Brendan

WKR
Joined
Aug 27, 2013
Messages
3,871
Location
Massachusetts
While we're at it, anyone have a good source for that felt or the limb pads other than Hamskea? Ideally, in slightly larger quantities too....
 
OP
OR Archer

OR Archer

WKR
Joined
Feb 29, 2012
Messages
3,034
Location
Mesa,AZ
I've never had any slippage on the activation cord. It's in there pretty tight. If you're concerned with that you can always serve the tag end to the rest of the cord. I've also used the cord clamps from QADs and Ripcords to secure the tag end instead of serving it together. Hope that answers your question.
 
OP
OR Archer

OR Archer

WKR
Joined
Feb 29, 2012
Messages
3,034
Location
Mesa,AZ
While we're at it, anyone have a good source for that felt or the limb pads other than Hamskea? Ideally, in slightly larger quantities too....

I'll see if I can find the name of the place we get our felt from.
 
Joined
Mar 6, 2013
Messages
3,066
While we're at it, anyone have a good source for that felt or the limb pads other than Hamskea? Ideally, in slightly larger quantities too....

I bought probably 15-20 4"x8" sheets off eBay or amazon around 5 years ago. Been good stuff and I think I paid about $15
 
Joined
Sep 22, 2014
Messages
16
Moleskin works great. Will hold up for 5 months of shooting every day before it wears. Even then its quiet. The pice in the picture is 15 months old. That bow gets shot atleast once a week for 100 arrows or more.
 

Attachments

  • 1499656120208316154396.jpg
    1499656120208316154396.jpg
    85.8 KB · Views: 167

Brendan

WKR
Joined
Aug 27, 2013
Messages
3,871
Location
Massachusetts
Bolts are 8-32

I believe 8-32 x 3/8 Socket Cap Screw for the one that compresses to the "axle". I think 8-32 x 1/4 Button Head Socket Cap Screw plus a #6 washer for the one that secures the limb cord. Both are available at my local hardware store, but the second was only available in 3/8" length.

If you want to wait a day or two - I'll confirm what works best when I replace mine. Everything available at McMaster.com - but you'll probably end up with a box of 100 for about $3-$4 plus $6 shipping :D
 

Brendan

WKR
Joined
Aug 27, 2013
Messages
3,871
Location
Massachusetts
Ok, think I'm all set with felt or moleskin. Anyone have a better source for these? Seems like I'm always moving one or setting up another bow and don't have enough. Looks to be 3M VHB adhesive backed rubber...

14e057ceeb75aa1b47dd857b9c28cfdb.jpg


a9d2842fc222bbf884328f7838f4b9c9.jpg
 
Joined
Feb 29, 2012
Messages
3,508
Location
Washington
Bolts are 8-32

I believe 8-32 x 3/8 Socket Cap Screw for the one that compresses to the "axle". I think 8-32 x 1/4 Button Head Socket Cap Screw plus a #6 washer for the one that secures the limb cord. Both are available at my local hardware store, but the second was only available in 3/8" length.

If you want to wait a day or two - I'll confirm what works best when I replace mine. Everything available at McMaster.com - but you'll probably end up with a box of 100 for about $3-$4 plus $6 shipping :D

Sure let me know. Certainly appreciate it! As for the 3M material a sims min limb saver works too... cut a slice in the top for a groove.


Sent from my iPhone using Tapatalk
 

2Stamp

Lil-Rokslider
Joined
Oct 7, 2014
Messages
219
Location
Wyoming
Question. What is the function of the spring you discarded? My pro shop set mine up, seems to work just fine. I'm wondering if your setup has longer lasting advantages, or is this just your personal preference?

Good info BTW.
 

Brendan

WKR
Joined
Aug 27, 2013
Messages
3,871
Location
Massachusetts
Bolts are 8-32

I believe 8-32 x 3/8 Socket Cap Screw for the one that compresses to the "axle". I think 8-32 x 1/4 Button Head Socket Cap Screw plus a #6 washer for the one that secures the limb cord. Both are available at my local hardware store, but the second was only available in 3/8" length.

If you want to wait a day or two - I'll confirm what works best when I replace mine. Everything available at McMaster.com - but you'll probably end up with a box of 100 for about $3-$4 plus $6 shipping :D

Ok - for the Second Screw for the limb cord. Looks like 3/8 will be a little long, 1/4 a little short. But, either should work. 3/8 will protrude out the back, and 1/4 won't engage all the threads. I'll probably try to use a 3/8" as long as it doesn't hit anything - I'd advise the same because you should be able to get those locally at a Home Depot / Lowes or anywhere with a good bolt selection.

For the Washers - #6 is a little small for a #8 screw, but will thread on and be a snug fit and have a smaller diameter than a #8.
 
OP
OR Archer

OR Archer

WKR
Joined
Feb 29, 2012
Messages
3,034
Location
Mesa,AZ
The spring is supposed to prevent the launcher arm from "bouncing". I remove it because if it becomes stretched in the field the rest will not function properly. That is why this is my preferred method to setting this rest up.
 
Top