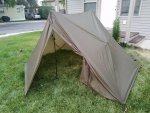
I've been DIY'ing my own gear for a while now and figured I'd share a project I completed last year before elk season - DIY ZPacks Duplex. When I started this project I knew I wanted to make an ultralight shelter with the following parameters:
- Able to pitch with my trekking poles (no need to carry or manufacturer extra poles which keeps the weight down significantly)
- A solo shelter with enough room for plenty of gear i.e. able to store my bow, pack, boots, everything inside with me
- Big enough to fit two people if we store gear outside under my DIY sheep tarp
- Durable, which probably means I go with a 1.6 oz silpoly material over a 1.1 oz silpoly material (since it is a small shelter, the weight penalty will be minimal) If you have used silnylon before, i suggest you check out silpoly as it is much easier to work with, and has no bias stretch
I started the design by searching through the various ultralight manufacturer websites for potential designs (HMG, kifaru, ZPacks, tarptent, etc). I decided to go with the ZPacks Duplex based on several factors including the very positive independent reviews, the spacious floor plan, and the ease of construction (2 rectangles and 4 triangles).
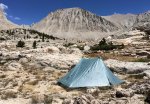
Here is the ZPacks Duplex.
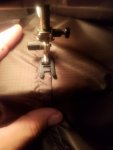
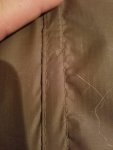
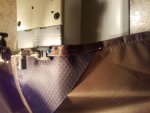
I started the design process by measuring my trekking pole's max height (54-inches) which will determine the rest of the dimensions. The average max height for carbon ultralight trekking poles if 52-inches, so I ended up going with 52-inches making the shelter more universal (in case I end up getting new trekking poles that are shorter). With the height set at 52-inches, I maximized the spacing between the poles by using the max material width (assumed to be 1.6oz silpoly from ripstopbytheroll.com) of 58-inches minus 2-inches for seam allowance, leaving me with 4'8" between the poles. I then decided to go with a hexagonal shape and made each side 4'8". This shape leaves enough room between the poles to fit 2 sleeping pads/bags in the 2-person configuration, and if I go down to a 1-person configuration it will leave me with plenty of vestibule space for all my gear. Next I had to decide if I wanted a ridgeseam in the design. The seam would be an entry point for water, but it would also be reinforcement for the tension forces between the two trekking poles that are applied during the pitch of the tent. I decided to go with a ridge seam as it will be a stronger design. I then laid out the sides onto a flat rectangle, 58-inches wide and used sketchup to determine I needed 27'11" of fabric. I ordered 10 yards of 1.6oz silpoly from ripstopbytheroll.com as well as 1/2 yard of HyperD 300 for the reinforcement, and 1 yard of gossgrain for the tie-out points and waited for the material to arrive. I also ordered 1/2-inch basting tape from SailRite to use in the seam making process to help me achieve a true double felled seam (not a french felled, or feaux felled seam). I used this method when making a Kifaru Tut hybrid and it worked out very well.
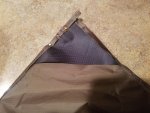
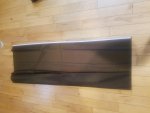
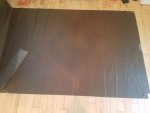
Once the material arrived I started the lay-out process on the hardwood floors, using tape to hold the material down as I measured, marked, and cut it. When it came to the triangles for the sides (which were not equilateral, or right angle triangles) I used string to triangulate the location of the apex and marked it out.
- Able to pitch with my trekking poles (no need to carry or manufacturer extra poles which keeps the weight down significantly)
- A solo shelter with enough room for plenty of gear i.e. able to store my bow, pack, boots, everything inside with me
- Big enough to fit two people if we store gear outside under my DIY sheep tarp
- Durable, which probably means I go with a 1.6 oz silpoly material over a 1.1 oz silpoly material (since it is a small shelter, the weight penalty will be minimal) If you have used silnylon before, i suggest you check out silpoly as it is much easier to work with, and has no bias stretch
I started the design by searching through the various ultralight manufacturer websites for potential designs (HMG, kifaru, ZPacks, tarptent, etc). I decided to go with the ZPacks Duplex based on several factors including the very positive independent reviews, the spacious floor plan, and the ease of construction (2 rectangles and 4 triangles).
Here is the ZPacks Duplex.

I started the design process by measuring my trekking pole's max height (54-inches) which will determine the rest of the dimensions. The average max height for carbon ultralight trekking poles if 52-inches, so I ended up going with 52-inches making the shelter more universal (in case I end up getting new trekking poles that are shorter). With the height set at 52-inches, I maximized the spacing between the poles by using the max material width (assumed to be 1.6oz silpoly from ripstopbytheroll.com) of 58-inches minus 2-inches for seam allowance, leaving me with 4'8" between the poles. I then decided to go with a hexagonal shape and made each side 4'8". This shape leaves enough room between the poles to fit 2 sleeping pads/bags in the 2-person configuration, and if I go down to a 1-person configuration it will leave me with plenty of vestibule space for all my gear. Next I had to decide if I wanted a ridgeseam in the design. The seam would be an entry point for water, but it would also be reinforcement for the tension forces between the two trekking poles that are applied during the pitch of the tent. I decided to go with a ridge seam as it will be a stronger design. I then laid out the sides onto a flat rectangle, 58-inches wide and used sketchup to determine I needed 27'11" of fabric. I ordered 10 yards of 1.6oz silpoly from ripstopbytheroll.com as well as 1/2 yard of HyperD 300 for the reinforcement, and 1 yard of gossgrain for the tie-out points and waited for the material to arrive. I also ordered 1/2-inch basting tape from SailRite to use in the seam making process to help me achieve a true double felled seam (not a french felled, or feaux felled seam). I used this method when making a Kifaru Tut hybrid and it worked out very well.
Once the material arrived I started the lay-out process on the hardwood floors, using tape to hold the material down as I measured, marked, and cut it. When it came to the triangles for the sides (which were not equilateral, or right angle triangles) I used string to triangulate the location of the apex and marked it out.


