DIY Tipi plans...seeking feedback.

mlsthmpsn

FNG
Joined
Dec 12, 2017
Messages
11
Location
WI
I'm going on a backpack hunt in SW CO this September. I'm finalizing plans for a DIY tipi in the 4- to 6-man Seek Outside range. I have two versions drawn up, one is 8-sided the other 10. I'm leaning toward the 8-sided because I can easily get the tipi, liner and stuff sacks made from 30yds. Plus its a bit less sewing and also less cordage and guy outs. However, it's 9" narrower in diameter when set up, which translates to approximately 20 sq ft of space.

Here are some pictures for what I have planned. You can see the patterns have the spaces for seam allowances included. (The black rectangle is 63" wide by 30yd long)
tipi patterns.jpg

tipi sizes.jpg


I'm probably going to use the RSBTR MTN XL silnylon material that is 63-64" usable width (I can measure exact because I have leftovers from a pack cover out of this material). I plan to do two zipper doors opposite each other, with bug netting. The liner will be about 2/3 the wall height (or less) to accommodate the stove jack and sufficient clearance.

Any of you experienced tipi users or diy-folks have any recommendations on one over the other? Or anything you'd change or add? I was think I could stretch out the 10-sided version a little wider for better use of the raw material, but then it gets to be a pretty flat angle for the sides.

I'd really appreciate any feedback or thoughts...just need to kick this around somewhere outside my head for a bit before I place orders.

Thanks,

MT
 
Last edited:
OP
mlsthmpsn

mlsthmpsn

FNG
Joined
Dec 12, 2017
Messages
11
Location
WI
Another plus for the smaller footprint is site selection, especially where I'm headed this fall.
 
Joined
Jan 11, 2016
Messages
902
Location
Broomfield, CO
I'm not an expert so this is completely from the peanut gallery, but for a 4 or 6 man size tipi with the 10 side your doors may be getting pretty narrow.
 
OP
mlsthmpsn

mlsthmpsn

FNG
Joined
Dec 12, 2017
Messages
11
Location
WI
I'm not an expert so this is completely from the peanut gallery, but for a 4 or 6 man size tipi with the 10 side your doors may be getting pretty narrow.


My plan is to just run the zipper up in place of one of the seams between panels. This way, you can use only one panel (and stake the other down) or two full panels wide.

Full opening at ground level on the 8-side would be 9' 4", and full on the 10-side would be 8' 2".

Never even crossed my mind about he width of things...thanks!
 

Beendare

WKR
Joined
May 6, 2014
Messages
8,306
Location
Corripe cervisiam
My take

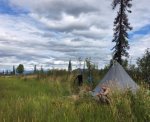
I made one almost exactly the size of your drawing, appx 13' dia.....and 8'4" tall [for the REI pole] I probably could have gone 12' dia as I sewed in a short wall at the base for more ventilation, a big improvement over my other tipis. If I had a do over I would plan on leaving it about 6" short of the ground....and come in 4" around the perimeter sewing a wall of bug mesh around the entire thing.
first lake.jpg

I can get 3 guys in mine with gear no problem. I did drawings for 8,10 and 12 sides....ended up with the 12 as it was a better use of fabric. I think mine was 21 yds. I used the RSBTR 1.6 oz silpoly...which isn't as wide as the Mtn fabric.

There is a trade off with more seams. The advantages to more seams; they do make it stronger....and with smaller panels it sheds winds like nothing I've ever seen [60 mph in Alaska last year didn't even phase it. The smaller panels shrink less too when its cold. I had about 6" left for seam bias....room to spare, I could have cut it closer.

The disadvantages; more sewing, a little more weight.

The 8 panel will take the wind fine I'm sure....but you will get more sag with the bigger panels on a cold night. I think its more about maxing out the fabric width. FWIW, remember on your layout, your triangle will be right angles....you have to calculate from the short side. So essentially you are trimming off a triangular piece at the base of each triangle to equal out your tipis perimeter. Allow extra fabric on the 2 pieces where your zipper goes.

The door opening isn't an issue, IMO.

Vents are key....I have one big vent....I might sew in another at some point.

Sew your reinforcing cone while you are working around...or at least start sewing it in at the 1/2 way point while its easy to get to.

A tip I wish I would have known; Work in one direction and its all about rolling and going....while keeping the one side smooth. I pinned everything at first....but then as I got going I made 5/8"/ 1 1/4" marks on my machine so I just rolled and sewed. If you are off by a little bit its only an issue if the panel puckers...if its flat....you are good. I guarantee I can do one in 1/3 the time now.

Stove jack; You want the center pole support but not too close...the heat can weaken your pole. Allow at least a foot....16"-18" is best.

Fell free to PM me if you have any questions.
 
OP
mlsthmpsn

mlsthmpsn

FNG
Joined
Dec 12, 2017
Messages
11
Location
WI
FWIW, remember on your layout, your triangle will be right angles....you have to calculate from the short side. So essentially you are trimming off a triangular piece at the base of each triangle to equal out your tipis perimeter. Allow extra fabric on the 2 pieces where your zipper goes.
Could you explain this a bit more?

Also, as far as cutting panels and sewing them against the grain of the ripstop, does that matter much if it's only slightly skewed (vs 1 panel being 90 against the other panel grain as a worst case)


Thanks. I'm looking forward to getting this thing going!
 

Beendare

WKR
Joined
May 6, 2014
Messages
8,306
Location
Corripe cervisiam
Could you explain this a bit more?

Also, as far as cutting panels and sewing them against the grain of the ripstop, does that matter much if it's only slightly skewed (vs 1 panel being 90 against the other panel grain as a worst case)


Thanks. I'm looking forward to getting this thing going!

Each triangular piece will need both bottom angles the same...you will have to allow enough fabric to do that as you have to trim the base of each triangle accordingly.
 
OP
mlsthmpsn

mlsthmpsn

FNG
Joined
Dec 12, 2017
Messages
11
Location
WI
Each triangular piece will need both bottom angles the same...you will have to allow enough fabric to do that as you have to trim the base of each triangle accordingly.

My plan was to cut them at an angle to the length of fabric, like the image shows. Would this cause problems with the ripstop being at an angle instead of verticle?
 
Top