


Wildcat Composites Ultralight Tikka T3X Stock Review
By Tye Abell, Guest Contributor
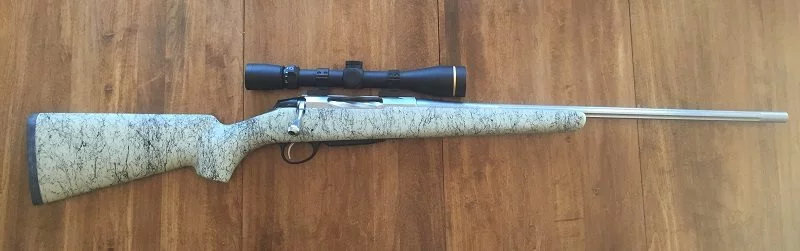
What follows is both a review and how-to article for finishing an aftermarket stock. I bought my Tikka T3x Superlite 30.06 used last winter off of Rokslide, and planned to replace the stock to lower the overall weight of the rifle. Starting weight for the rifle, with my Leupold VX3i 4.5-14×40 scope and spiral fluted bolt, was 109 ounces (6.8lbs). The factory stock weighs in at just over 28 ounces.
In my search for finding a lighter stock, I was alerted to Wildcat Composites based in Alberta Canada. I looked over their website and Facebook page and noticed they were producing a Tikka stock for the T3 and T3x. With aluminum pillars in place and sanded/filled, the stock was coming in at just over 17 ounces. I was intrigued by this option, so I gave Wildcat a call and discussed the stock with them. After a short conversation, I was convinced this was the best option for my desired outcome.
Figuring in the additions I’d need to make (recoil pad, bedding, and paint) I estimated the total finished weight of the stock would end up in the 20-22 ounce range. At a cost of $413 for the stock and roughly $125 for materials, an opportunity to save 6-8 ounces was well worth the effort.
I placed an order in early January and conversed with Wildcat over the phone and through Facebook messaging to check on the build process. I received the stock in mid-February, and conducted a test fit of the stock. Wildcat inlets their stocks very aggressively knowing that they will be bedded; as such, upon initially installing my action, the magazine wouldn’t lock in place, but loosening the action screws a half a turn allowed for everything to work. I anticipated that properly bedded, this wouldn’t be a concern.
The only other small issue I ran into was that the bottom “metal” of the Tikka, at the rear of the trigger guard, on the upper side, has a small pillar of plastic. I broke this off not knowing it was there, as the Wildcat stock didn’t have a hole in this location. Ultimately that small piece didn’t serve a purpose, so there was no reason for concern.
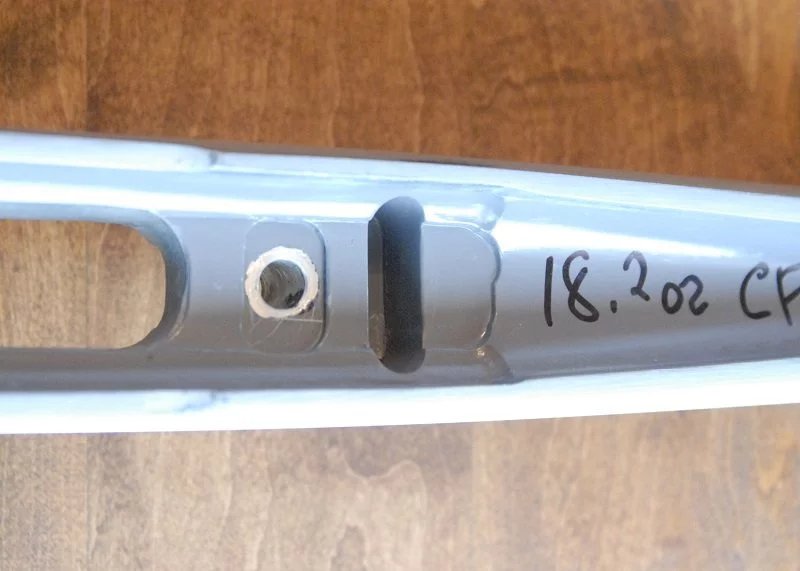
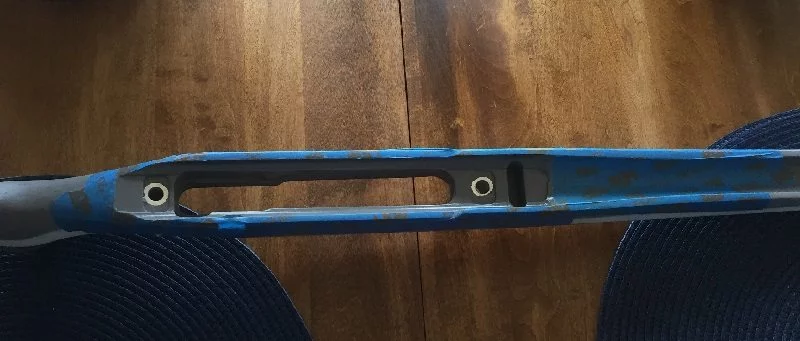
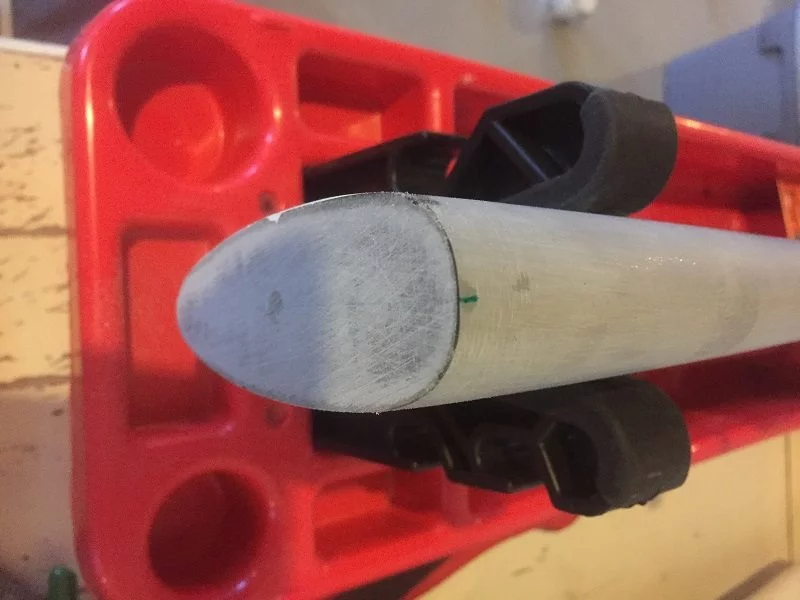
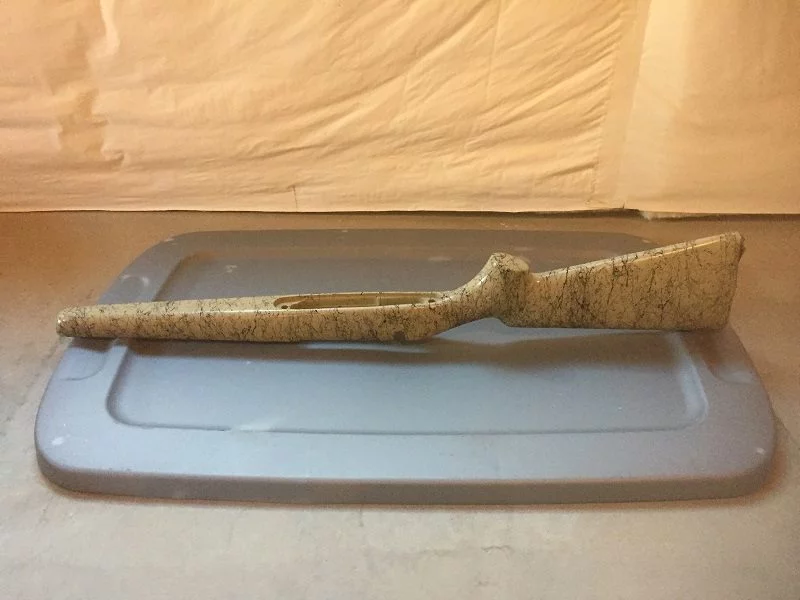
The pictures below show the condition of the stock when it was received and pulled out of the box.
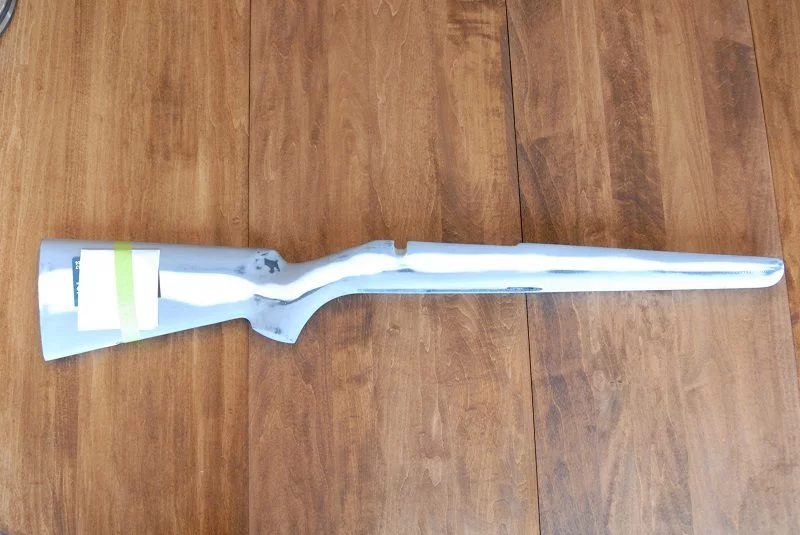
As you can also see, Wildcat included the weight of the stock in the barrel channel, and mine happened to come out slightly heavier at just over 18 ounces.
I then moved on to checking the Length of Pull (LOP). The LOP and pitch as the stock came from Wildcat worked well for me, accounting for the 0.6” pad I would install. Had either been an issue, the process for cutting the stock would have gone as follows:
Once the LOP and pitch are determined, mark the cut line on the stock. Using a fine toothed hack saw, cut the stock down and sand the cut marks to remove any splinters. To prepare the stock for adhering the pad, Wildcat advises to cut into the stock foam about a quarter inch in and down from the edge to create a pocket for the five minute epoxy to ensure proper adhesion of the pad to the stock.
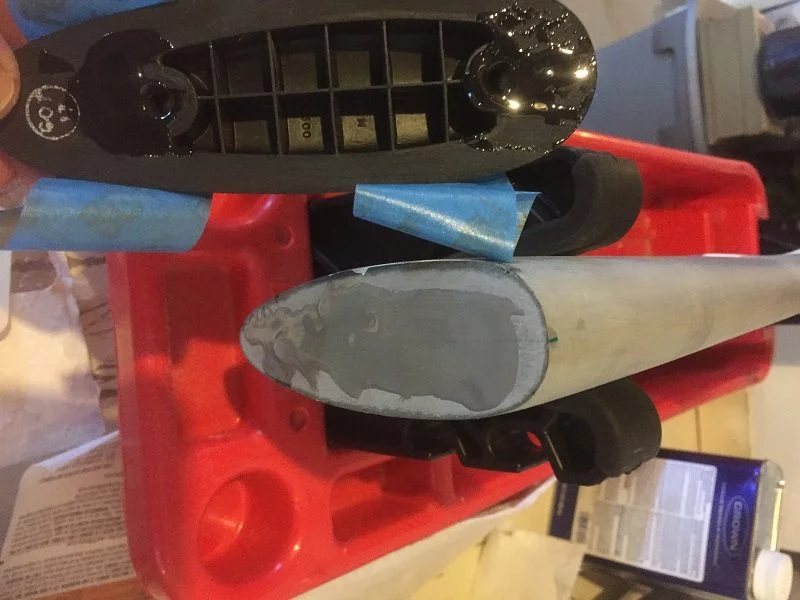
My friend, cooperjd here on Rokslide, has bedded a few rifles over the years and likes to work with Wheeler’s bedding kit, so I ordered one for myself. In preparing the stock, I first taped the stock off to ensure bedding didn’t adhere to areas of the stock outside the action recess.
Then I removed my trigger assembly, which is held in place with one hex head bolt on a Tikka. After that I glued my recoil lug onto my action to hold it in place during the process. From there I applied Scotch tape to all of the open areas of my barreled action that I did not want bedding material to penetrate.
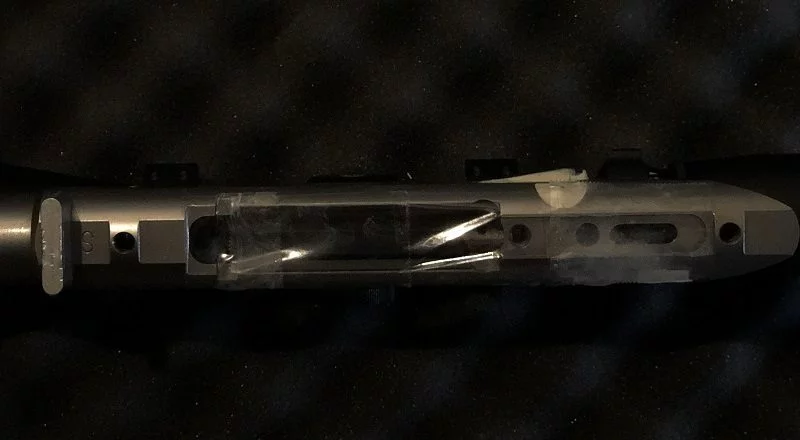
After that, I filled in any other areas (bolt recess on stock, bolt release on action, etc.) with the clay provided in the Wheeler’s kit to ensure bedding did not penetrate those areas. Cooperjd had the idea to also create a few “dams” of clay in areas we didn’t want bedding material to flow into (barrel channel in front of the lug and magazine recess). Once that prep was completed, I applied release agent to the barreled action, action screws, bottom “metal”, inside of the pillars, and magazine recess of the stock.
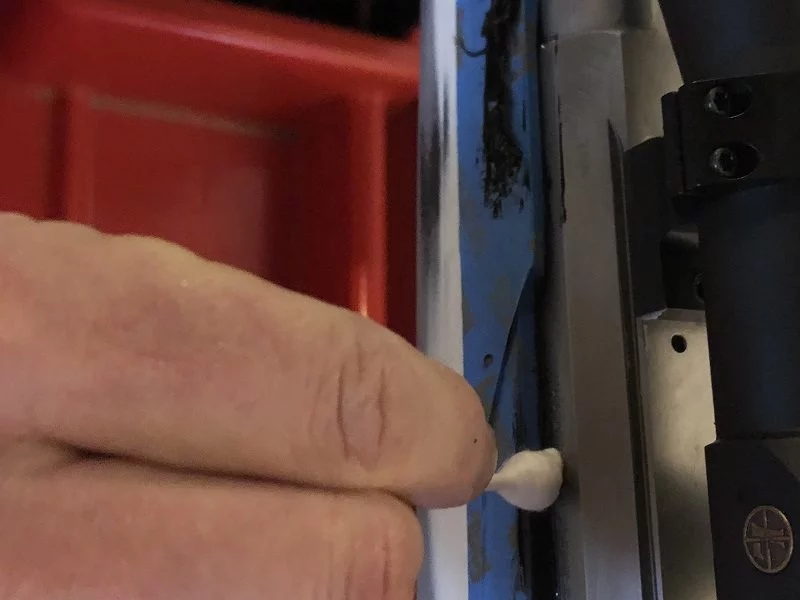
It’s advised to apply release agent to the areas you do not want bedding material to adhere to at least 12 hours before the bedding process. From there we applied painter’s tape to the stock where we anticipated additional bedding material to flow onto. The last step before mixing the bedding compound was to insert oversized Q-tips into the action screw holes, and to apply one final coat of release agent in the form of Kiwi polish.
We mixed the bedding compound for application following the instructions provided. There’s no need to be frugal with the bedding material, but don’t go overboard unless you really enjoy using a lot of Q-tips to clean bedding material off of your action. We applied a generous amount of material around the lug and front action screw, then applied a generous amount around the rear action screw.
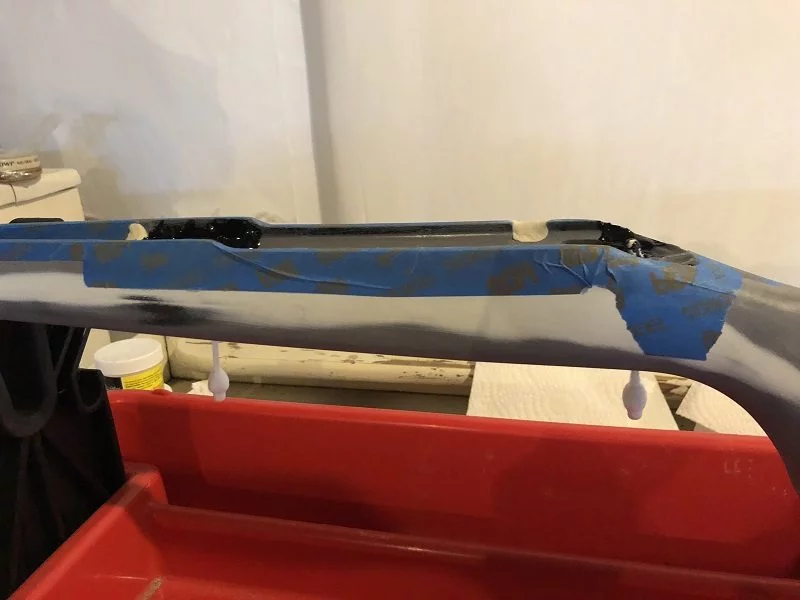
After that, I added a few of the microballons provided within the kit to thicken the material before applying along the edges of the action above the magazine recess.

Once the material was in place, we removed the Q-tips from the screw holes and set the action in place. From there, I inserted the action screws and torqued to 20 in-lbs. While tightening the screws, we used a lot of Q-tips with WD40 sprayed on them to wipe bedding material off the action, barrel, stock and anywhere else it had migrated to during the process.
The Q-tips help ensure a nice clean line of bedding material and the WD40 helps the Q-tips move easily.
The next morning, after roughly 12 hours, I backed the action screws out one turn before re-tightening as called for in the instructions and removed the painter’s tape that I could get to. Then, after the required 24 hours for curing, I removed the barreled action and cleaned up any excess compound with a small chisel to ensure proper functioning of the rifle.
Removing the action went well, with two minor notes. My recoil lug broke free from where it was glued and was permanently placed in the stock. My action screws were “stuck” into the pillars due to excess bedding material that had penetrated into those areas. I used a punch to knock the screws out, and then drilled the holes clean, with no ill effects.
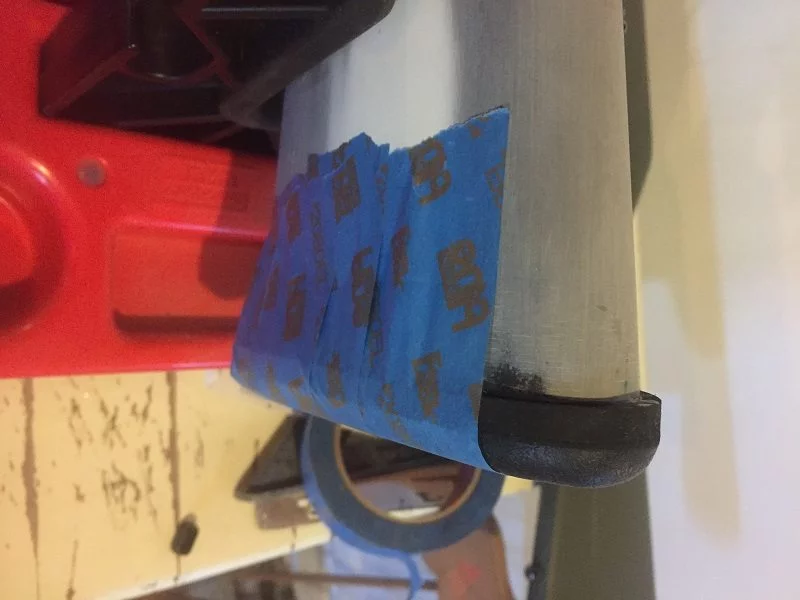
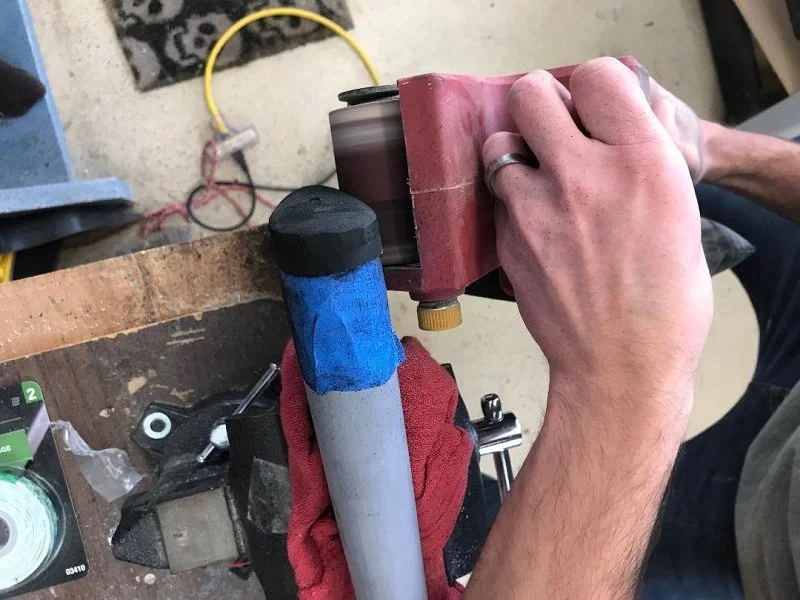
With the action bedded, I then prepared to install the 0.6” decelerator pad. The first step was to sand the butt of the stock and the pad surface to ensure good adhesion.
I then wiped both surfaces down with a degreaser and allowed them to dry. From there, I marked the centerline of the stock and the pad before preparing the 5-minute epoxy for application. Once I had the pad in place on the stock, I used some painter’s tape to aid in “clamping” the pad to the stock, and left that in place for 24 hours.
After the 24 hour curing time, I went over to cooperjd’s home to grind the pad to profile.
This process went faster than I anticipated but was not without its learning points. I first applied painter’s tape to the stock to protect it. After this, I took 60 grit sandpaper and began sanding the pad.
The 60 grit easily removed the majority of the material, and I took my time trying to ensure I kept the lines of the stock in mind while grinding the pad to shape. One major hiccup occurred when I noticed some of the pad’s bare metal showing through. I’m still not sure how this occurred, as there was ample pad remaining on the edges of the exposed metal, and I wasn’t using the edge of the sander, but take note to be careful in that region.
Once I had the profile close, I then took some 150 grit, and hand sanded it down the remainder of the way.

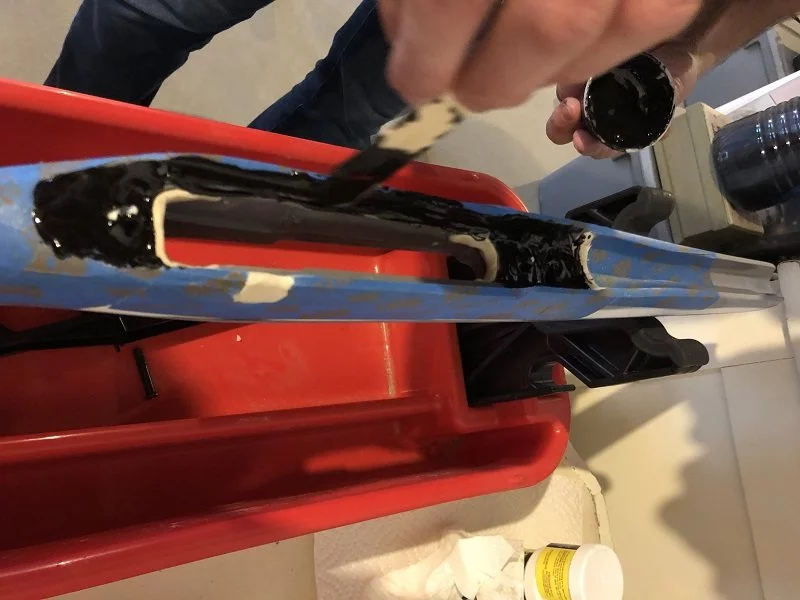
After this, I taped off the stock and pad to isolate the area where the metal was exposed, then sprayed some Flex Seal on that spot to add some material back.

Back at home, I weighed the stock at 21 ounces (including the recoil lug), right in the range I’d anticipated.
With the pad in place and bedding completed, I was ready for the final step: paint. I first covered the butt pad in painter’s tape and placed a small amount of tape over the recoil lug to keep paint off that area. I then sanded the stock with some 220 grit and wiped it down with degreaser to ensure a clean and rough surface.
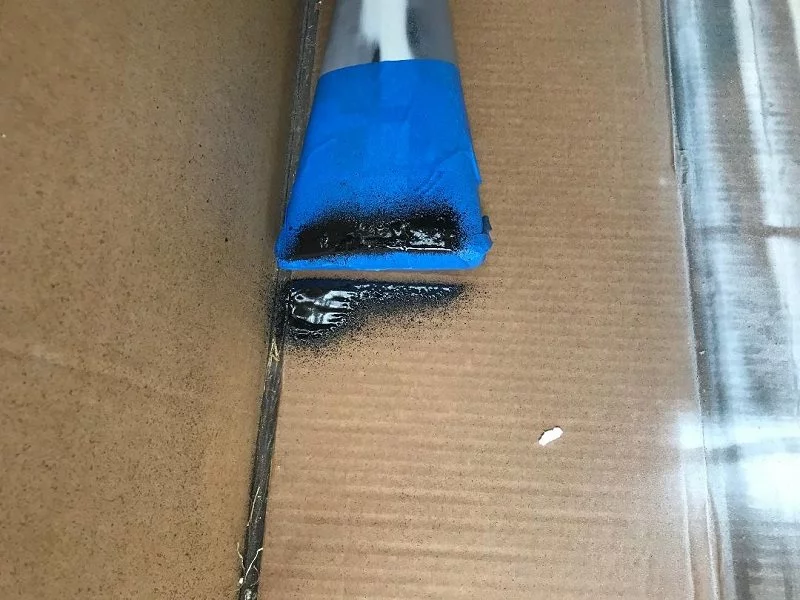
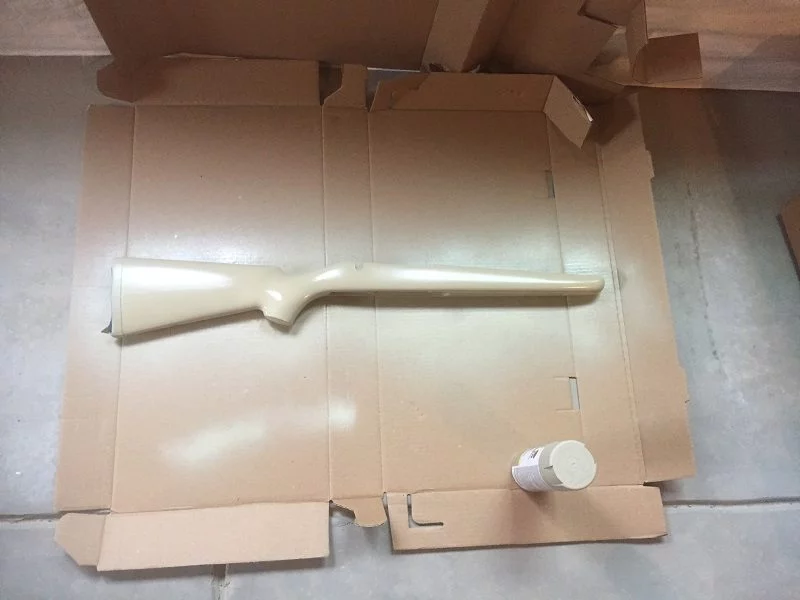
Color wise, I chose a grey primer, so I sprayed two coats of it onto the stock. I followed that with two coats of my tan top coat.
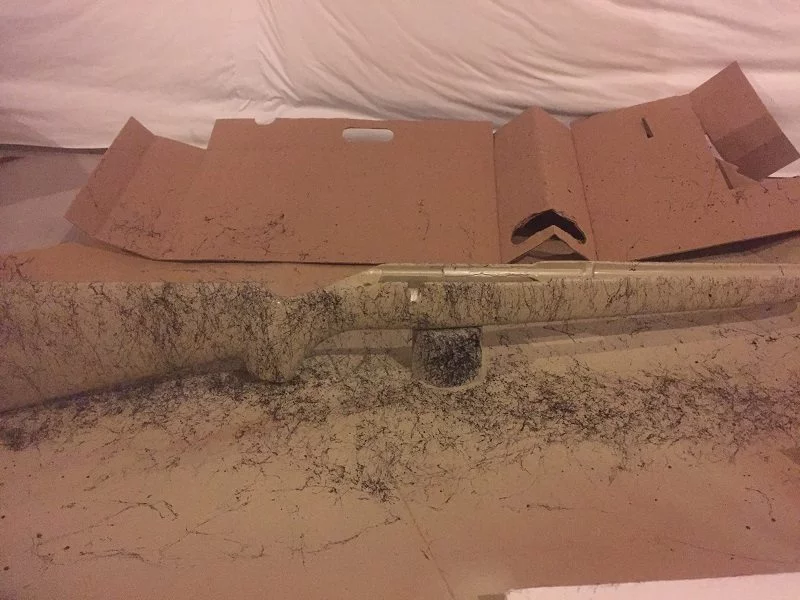
Then followed that with a coat of marble black paint to provide some texture and achieve the marbled look that I prefer (I highly advise that you practice on a piece of cardboard prior to application on the stock).
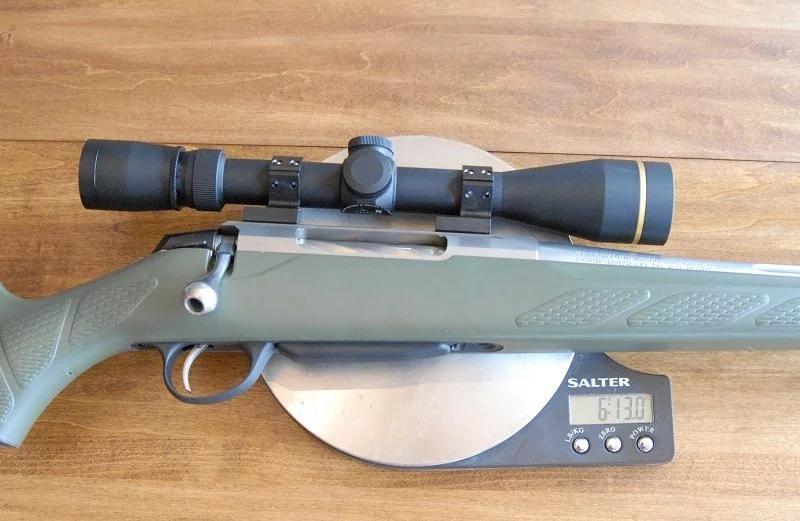
The final coat of clear matte sealer was applied afterwards to ensure a lasting finish. Once the paint had cured for 24 hours, I reassembled the rifle and weighed the finished product. Total weight savings for the project ended up at seven ounces, and total time spent on the project over four weekends came out to roughly five hours (insert pic 19 and 20 of final rifle and scale weight).
Expense-wise with the bedding kit, paint, stock (shipping and insurance), butt pad and epoxy, total cost came out to right at $550. For me, it was well worth the time and effort to achieve a custom Tikka that is just over 100 ounces or 6.25 lbs.
Overall, the gun slightly improved accuracy wise with the Wildcat Stock.
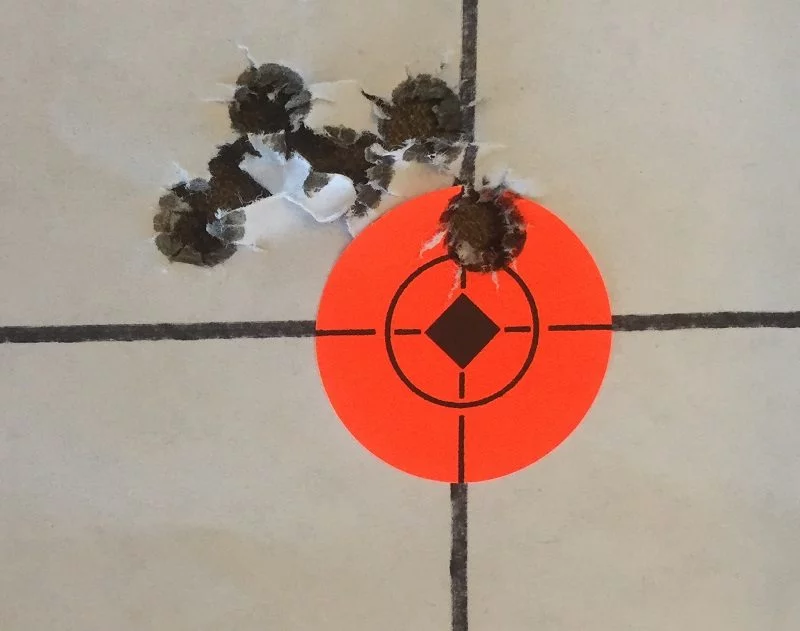
The stock is extremely strong and I noticed zero flexing or issues after firing multiple rounds at the range.
I’m a novice gunsmith, but with research and time, nothing involved was overly daunting. I highly recommend Wildcat Composites as an aftermarket stock option for anyone out there seeking an ultralight, ultratough, and well-built product.
You can ask Tye questions or discuss this article here.


