DIY Down Quilt-HELP

Jxferg7

Lil-Rokslider
Joined
Feb 14, 2019
Messages
215
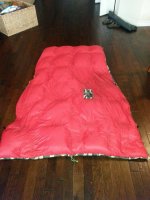
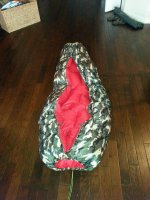
Just throwing this out there to see if there is anyone who has experience in any type of DIY Down Quilt/Blanket/Unerquilt. Couple years ago i make a DIY Woobie using APEX and now want to try something with Down and have some questions on baffling and working with down. ANY HELP out there? I tried using the search engine but didn't find anything.
 
Joined
Jul 30, 2015
Messages
5,698
Location
Lenexa, KS
I remember seeing some stuff on backpackinglight.com or something like that. They have a MYOG - make your own gear section. A google search should find it. There are some really smart and helpful people on that forum.
 

gumbl3

WKR
Joined
Nov 27, 2016
Messages
514
Location
Texas
I've made two.. they're freaking awesome

As for the baffles, I used 3 or 4" net for the baffles. Attached all the strips to one side of the quilt then I put the two pieces together and I'd sew a horizontal row then a vertical, spacing it out so that the down can move throughout the quilt. You can see the seam lines in the picture.

For the down, do yourself a favor and put a tent up in the house, using an extension tube from a vacuum I'd cover one end, put the other end of the tube down in the down sack and cram as much into the tube as I could. Then I'd put the tube in the quilt and try to force the down at as far down into the quilt as I could. You'll find out, that stuff goes everywhere, if you work slower it seems to help

Was out in it last night, was 32 when I got up this morning and there were times I had my arms outside the quilt to vent some heat, this thing is stupid warm.
 

Attachments

  • quilt1.jpeg
    quilt1.jpeg
    262.5 KB · Views: 85
  • quilt2.jpeg
    quilt2.jpeg
    299 KB · Views: 86
Joined
Apr 1, 2019
Messages
310
Location
Western Washington
I've made two.. they're freaking awesome

As for the baffles, I used 3 or 4" net for the baffles. Attached all the strips to one side of the quilt then I put the two pieces together and I'd sew a horizontal row then a vertical, spacing it out so that the down can move throughout the quilt. You can see the seam lines in the picture.

For the down, do yourself a favor and put a tent up in the house, using an extension tube from a vacuum I'd cover one end, put the other end of the tube down in the down sack and cram as much into the tube as I could. Then I'd put the tube in the quilt and try to force the down at as far down into the quilt as I could. You'll find out, that stuff goes everywhere, if you work slower it seems to help

Was out in it last night, was 32 when I got up this morning and there were times I had my arms outside the quilt to vent some heat, this thing is stupid warm.
Where did you source your materials? And what was the total cost?
 
OP
Jxferg7

Jxferg7

Lil-Rokslider
Joined
Feb 14, 2019
Messages
215
I've made two.. they're freaking awesome

As for the baffles, I used 3 or 4" net for the baffles. Attached all the strips to one side of the quilt then I put the two pieces together and I'd sew a horizontal row then a vertical, spacing it out so that the down can move throughout the quilt. You can see the seam lines in the picture.

For the down, do yourself a favor and put a tent up in the house, using an extension tube from a vacuum I'd cover one end, put the other end of the tube down in the down sack and cram as much into the tube as I could. Then I'd put the tube in the quilt and try to force the down at as far down into the quilt as I could. You'll find out, that stuff goes everywhere, if you work slower it seems to help

Was out in it last night, was 32 when I got up this morning and there were times I had my arms outside the quilt to vent some heat, this thing is stupid warm.
Mind if i DM you a few questinos i have before i buy the material. The material appears to be about double what i have into the APEX quilt i made a couple years ago and appears to be a lot more time consuming but I am ready to tackle this. This way i will have a synthetic and down quilt option.
 

gumbl3

WKR
Joined
Nov 27, 2016
Messages
514
Location
Texas
Sure.. Feel free to message me if you want. Like others said, also search the MYOG forum thread on backpacking light, that's where I got most of my ideas.

Think everything but the down fill came from rip stop by the roll. The down was by far the most expensive part, probably a couple hundred a few years ago, the rest probably around 60 or 70. I think I got 950 down, it came in almost a burlap sack
 

mereside

FNG
Joined
May 6, 2020
Messages
47
Location
uk
I made one from hammockforums.net
Found a pattern and there is an exel calculator for down fill and baffle size to get your required rating well worth it, as others have said the downs the expensive part but overall you still save and get what your after, regards Wayne.
 

mereside

FNG
Joined
May 6, 2020
Messages
47
Location
uk

wvtradbow

FNG
Joined
Apr 6, 2012
Messages
20
Location
Almost Heaven West Virginia
Has anyone tried to “modify “ an old down comforter?? I found a old down comforter and was gonna try to do something with it , haven’t started that project yet , I need to hone my sewing skills first
 
Joined
Jan 6, 2021
Messages
42
Just joined and saw this post. I made a down Karo step design last year. Everything mentioned above is spot on. Check out "dubber designs" on YouTube. He had several videos on it step by step.

Here is a link to help fill the quilt easily and quickly. "Down eductor" https://backpackinglight.com/forums/topic/33573/


It isn't that hard of a project. I'll be making the down underquilt next month. Get the down at loosegoosedownsupply.com really good pricing. Also, they have some videos on their site.

Hope this helps.
006c170e031a95c4e4f640889cac0e4c.jpg


Sent from my SM-G781U using Tapatalk
 
OP
Jxferg7

Jxferg7

Lil-Rokslider
Joined
Feb 14, 2019
Messages
215
Just joined and saw this post. I made a down Karo step design last year. Everything mentioned above is spot on. Check out "dubber designs" on YouTube. He had several videos on it step by step.

Here is a link to help fill the quilt easily and quickly. "Down eductor" https://backpackinglight.com/forums/topic/33573/


It isn't that hard of a project. I'll be making the down underquilt next month. Get the down at loosegoosedownsupply.com really good pricing. Also, they have some videos on their site.

Hope this helps.
006c170e031a95c4e4f640889cac0e4c.jpg


Sent from my SM-G781U using Tapatalk
Thanks a lot man, great info! Do you remember how much you put into your pictures project? Or any idea of a temp rating you’ve experience with your down quilt?
 
Joined
Jan 6, 2021
Messages
42
Thanks a lot man, great info! Do you remember how much you put into your pictures project? Or any idea of a temp rating you’ve experience with your down quilt?
The Karo step style quilt takes longer to sew but it is easier to fill and less messy, at least for me. It was my second project and I took it slow so I didn't make any mistakes. I would estimate it took me about 6 to 8 hours from cutting, layout, sewing in baffles, seams, etc until it was complete.

I put in 16 ounces of down and I'm estimating it should be good for roughly 20-30°F. There is 3 inches of loft throughout the quilt and per Enlightened Equipment it should be good to 10°F.


I haven't yet tested it out to that temp though. Being home made I'm a little skeptical on it getting to 10°F plus it weighs just under 23 ounces.

Sent from my SM-G781U using Tapatalk
 
Joined
Jan 6, 2021
Messages
42
I used Argon 67 from dutchware. 3 yards for outer shell and 3 yards for inner shell. That is $60 plus shipping.

The down was from Loose Goose and is $135. I think I got that on sale though for $115.

I used some Kam snaps to help close it up if I want and they also help me to keep it on my pad with another piece of ripstop that lays underneath my pad. I also have some shock cord around the top to do the same in the hammock.

Sent from my SM-G781U using Tapatalk
 
Top