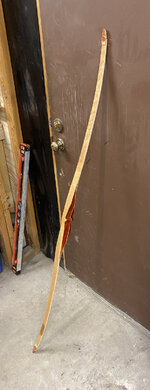
DIY Longbow

Kindo

WKR
Joined
Dec 31, 2015
Messages
465
Location
Hudson, WI
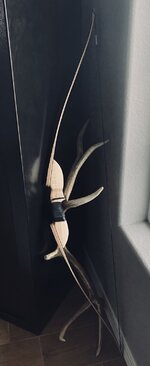
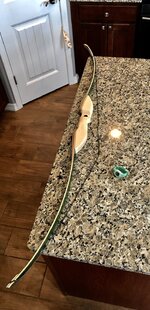
Since 2020 started off in the crapper and I found myself with way more time on my hands, I decided to take a shot at making my own bow.

This won’t be so much a build along as I have done most of the work already over the span of 2-3 months (pre and post hunting seasons). I am currently at about 90% completion and should have it completely wrapped up in the next couple of weeks.

I built this bow and all of the associated equipment with pretty average tools. I did buy an oscillating sander and a bandsaw which helped but a belt sander would’ve done the job too. I was presented too good of an offer to pass up the other tools.

I should also note, I don’t really know what I’m doing. I bought a book, read a ton online, reached out to a few folks for their expertise and consumed about 3 cases of Busch lattes trying to figure out how not to screw this up. YMMV.

Here she goes....

First off, you need to figure out your design. Don’t do what I did and try making your own design. I’m sure it is close to other bow designs but I just eyeballed some similar bows and made my measurements for the reflex and deflex. Those measurements were made about 85 lattes or so ago so I couldn’t tell you exactly what they were.
If you decide to take on something like this, talk to Kenny at Kenny’s archery or Bingham’s Archery and just buy a template.
FE7EA77B-CCB3-4824-9AF7-7D647C83E274.jpeg
66BA611A-C13D-4D08-B2C2-AD53CEAC72DB.jpeg
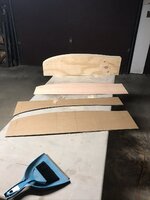
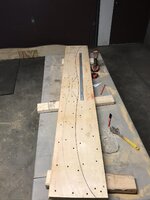
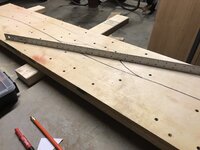
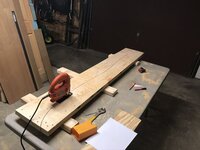
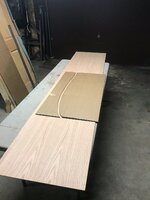
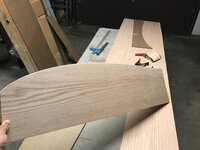
First I sketched the design onto cardboard, then transferred to some 1/8” plywood. I then screwed two pieces of 3/4” poplar or birch plywood together along with some wood glue to get my form to 1.5” (this will be the width of my blank and my laminates). I then transferred the design to the 1.5” thick plywood stack and cut it out.
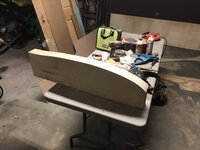
Note: there are now separate halves of the bow form, each made out of the (2) 3/4” pieces and rough cut to the dimensions needed.
F0730A1F-532C-4F20-88B9-B04AF418D3D0.jpeg
At this point, it’s crucial to have a square surface across all of the form to avoid developing any twist in the limbs.
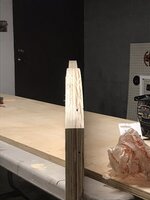
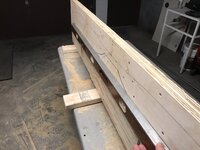
To do this, you put all 4 pieces of the 3/4” plywood together and square it up. I found that a square, pencil and belts sander worked great for this. Once you get close, then use a sanding block.
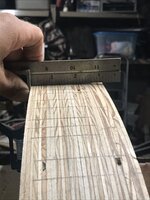
44B93A12-022D-44BE-B3B9-37F0F0D24712.jpeg
Basically, slap the square up, where you don’t see light, put a line, sand all the lines off and re-check and repeat. I heard a router and stencil could work really well for this when cutting out the form but I didn’t have that available.
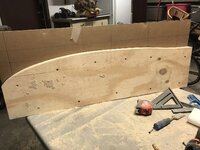
A5BC5895-0177-46CC-9F9E-A41549D83FF2.jpeg
76648421-9D26-42D5-8B00-6A056F086B98.jpeg
Square up and attach the two halves and boom, the form is done! Well....sort of.
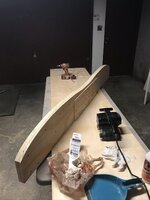
093581B4-45BF-4ABA-9618-171008295B12.jpeg
 
OP
Kindo

Kindo

WKR
Joined
Dec 31, 2015
Messages
465
Location
Hudson, WI
Now making this form, was probably the most time consuming aspect of this project. If the form is screwy in any way, you could do the rest of the project perfectly and it would still come out like trash.

Once I had the form for the back of the bow made, I could begin the belly portion of the form.

But first, let’s enjoy one more buschy treat while we admire the lovely humps of our new form.
75D2EC6D-5285-405E-9EE8-E5130245ECC2.jpeg

Next, we trace out our current form and cut for the belly form. I’m thinking of modifying the belly portion for future bows and I think I can just make a new belly portion to mate up with the back portion? 🤔

7A6026A6-7503-482D-8BCD-ADD03B39720F.jpeg
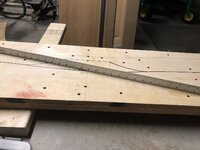
From there, throw a straight edge from corner to corner to see how square the form is.

Note: a 2x10 could be used for making the form but the likelihood of it twisting/warping is much greater than plywood. Plywood has multiple layers of wood with multiple perpendicular layers of wood grain which makes it stiffer/more rigid in its current form.
4D52F858-6A8B-4953-B0B4-817273013BA3.jpeg
CEAB7F19-15BC-4006-B7AB-FA10FAD3E5E5.jpeg
FBD72234-A21C-4A26-8B61-A02360018725.jpeg
Cut it out, slap it on the back form and again, test for square.

EF9E8D58-DC2C-4CEB-92AD-E70E84784537.jpeg
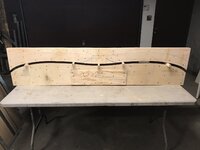
Here I cut some identical blocks to put at various spacing to then test my space between the two forms for equal spacing.
6A0335B0-7BC0-48D0-8CE3-26494B75B422.jpeg
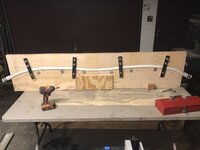
Next came the brackets which I just made out of 1.5 or 2” flat stock from Home Depot.
D1A4D9F4-066F-4A22-92EF-399B93F77368.jpeg
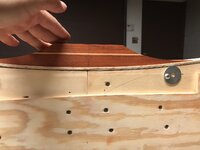
The air hose was cut to length and assembled. Screws and washers were installed on the form to side up and tighten down to keep laminates from sliding around during the glue up.

just need to cut out the space for the riser and we’re good to go.
 
OP
Kindo

Kindo

WKR
Joined
Dec 31, 2015
Messages
465
Location
Hudson, WI
By this point, I started to get sick of the form build. It was monotonous work and was slow moving.
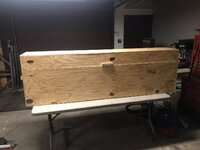
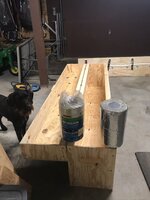
I decided that this was now a good time to just build a box for the bow oven. Basically, figure out dimensions for a box with lights that allows your form to fit inside. I didn’t really document this as it was just building a box.
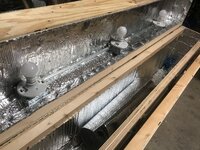
I then lined the box with HVAC duct insulation to help retain heat and installed the three lights. A male extension cord recepticle was installed on the outside of the box. I think it was designed for RVs but it worked well. 4941BF54-B62C-4129-8514-C2341483F347.jpeg
5F5BC9C9-E0C5-4231-B6B2-117C542314AB.jpeg
26601998-8C9A-42D0-B6D2-06C5A59F6F40.jpeg
For lights, I think I have (2) 175W and (1) 150W. The box gets up to about 175 degrees F after it’s going for 7 hours.

Now it’s time to go shopping for some wood. Drove over to a Rocklers across the river and picked up a hunk of Paduak.
85827F9B-C81C-4FAF-987C-6176D9918F76.jpeg
Ripped some down and put a strip of maple in for character. Then it’s time to cover up the wood with some masking tape and layout how im
427FECB9-A9CD-4933-8F7A-BCFC7DF09957.jpeg
88424E63-E62B-45D8-B6FD-3D0128671FA4.jpeg
3BB7D021-ACB4-4BE4-AFAD-08C7A1910A8A.jpegThis is where I ran into my first snag. My ramps (the curved part on the belly of the bow going up the riser) were a bit too steep for my laminates and I needed to modify it a bit.
D0DD5528-E7B1-40C2-9EFA-4079B4ABEE7C.jpeg
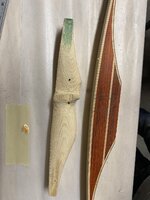
My laminates for my “stack” were all pre-ordered through Bingham’s archery and can be found through many avenues. If you don’t have a drum/thickness sander, I think it’s pretty much impossible to make your own laminates and tapers. I just told them my general design, the length of the bow and what my poundage goal was. I also got to pick out the material and then they put it together. I picked Birdseye maple and clear glass for this bow and went with “action-boo” bamboo parallels for the laminates sandwiched in the middle.

It was about at this point that archery elk season was approaching and the project took a backseat. I had all the components, but just needed the ambition to glue it up and get to work.
 
OP
Kindo

Kindo

WKR
Joined
Dec 31, 2015
Messages
465
Location
Hudson, WI
Having wrapped up our last pheasant hunt in SD the previous weekend and my Packers not making it to the big game, I figured I’d better get some work done on this bow.

I pre-heated all of my components in the bow oven and then quickly layed them out, slathered on the epoxy and stuck it in the form. (I made that sound much easier than it was. I honesty thought I screwed up the whole glue-up until I got home from work the next day). After you put it all together and wrap in plastic wrap, epoxy and plastic wrap are EVERYWHERE and you can’t see what you’re doing.

The next evening, I ground down the sides to remove the excess epoxy and peeled some tape off just to get my first look at everything.
137A8123-EA5B-43BD-BC2C-C78C09B2E769.jpeg
A439AD09-979B-4E3E-B7C5-FF55EC0003AB.jpeg

619DA094-1820-43D5-A7A3-43F4A4F6D7FE.jpeg
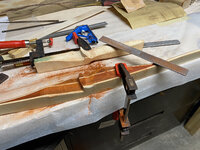
After getting the limbs taped up again, I did a rough layout for the limb profile/taper and then used my sander to bring them down to my lines.

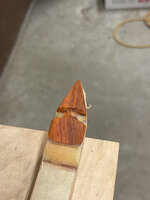
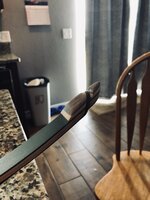
Next, I added some tip overlays and cut the nock grooves. I don’t know if I’ll leave the tips in the arrowhead looking form or not. I may trim them down a bit on the belly side to clean them up and remove a little mass off the tips.
075C434D-34F6-4A4D-A4E2-8D7E99F7602D.jpeg
67B42B90-D206-47DE-A316-263B240D7B35.jpeg
5917F660-8AB6-4CFF-848F-0B2410479783.jpeg
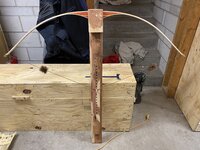
At this point, we can finally check our tiller and see if we have a weak/strong limb and any twisting. I didn’t have a proper string for this (it’s in the mail) but I found a spare for an old recurve and added enough twists to get me close enough for a quick look.
83EF9345-1B96-4CAD-8914-24965D2EB9AB.jpeg
 

Dirtydan

Lil-Rokslider
Joined
May 11, 2016
Messages
214
Looks good. It's a learning experience that more people should do. That way they can understand why we custom bowyers charge what we do. I'd like to tell you that glue ups get easier the more you do them. Yeah, thats's not the case. You just get faster.
Another great resource for how to's is Rustic Archer (Wade Morris). He has some great YouTube vids.
Looking forward to seeing the finished project.
 

zbb

FNG
Joined
Feb 7, 2019
Messages
25
That looks awesome dude. I’ve built three sets of limbs using binghams and I swear the hardest part is cutting the string grooves.
That bow is looking great! This is perfect timing I’m about ready to order a TD takedown longbow kit from Bingham. Im definitely following along.
I know it’s a little late for the op now but something I thought worked really nice was to cut a piece of 1/4 inch hardboard for the form and used my router with a pattern bit to get the actual form square. It was way easier for me sanding the 1/4 inch than an 1 1/2 inch thick form. Also if you run into any snags Bingham is a pretty nice guy and answered any questions I had.

bow I made for my dad. Said he liked it better than his Palmer recurve. Might have just been being nice though.
508E4102-65B2-454B-A00A-84A08A8C8B98.jpeg

My bow I used this year for my first achery elk.


641CB183-021B-4E3F-B400-06AA15E2206E.jpegFBE54945-C0D1-4785-9ED5-D01F2C4B5214.jpeg
 
Last edited:
OP
Kindo

Kindo

WKR
Joined
Dec 31, 2015
Messages
465
Location
Hudson, WI
That looks awesome dude. I’ve built three sets of limbs using binghams and I swear the hardest part is cutting the string grooves.

I know it’s a little late for the op now but something I thought worked really nice was to cut a piece of 1/4 inch hardboard for the form and used my router with a pattern bit to get the actual form square. It was way easier for me sanding the 1/4 inch than an 1 1/2 inch thick form. Also if you run into any snags Bingham is a pretty nice guy and answered any questions I had.

bow I made for my dad. Said he liked it better than his Palmer recurve. Might have just been being nice though.
View attachment 264287

My bow I used this year for my first achery elk.


View attachment 264288View attachment 264289
I’m sure this won’t be my last one and I’ve already got the wheels turning for my second design/style of bow. My goal is to get fairly comfortable here, maybe make a few for family/friends then try something new.

Now that I’m finding I can actually do this, I’m much more comfortable investing some funds into some better tools, including a router table and some good bits.
I think I will also be making some pattern Sanders to help knock out these risers and gain some consistency.

Thanks for the tip though!
 

zbb

FNG
Joined
Feb 7, 2019
Messages
25
I’m sure this won’t be my last one and I’ve already got the wheels turning for my second design/style of bow. My goal is to get fairly comfortable here, maybe make a few for family/friends then try something new.

Now that I’m finding I can actually do this, I’m much more comfortable investing some funds into some better tools, including a router table and some good bits.
I think I will also be making some pattern Sanders to help knock out these risers and gain some consistency.

Thanks for the tip though!
Haha I’ve been looking to build a pattern sander too. Also been toying with getting a drum sander as well. It’s really fun and addicting. I changed the design on mine and am building my wife a bow with that design. I’m hoping to get a little more speed. We’ll see though.
Thanks, I really like your bow too. I built my oven for takedowns so it won’t fit a full size bow. But I might go that route in the future. Who the hell knows, kinda flyin by the seat of my pants here.
 
OP
Kindo

Kindo

WKR
Joined
Dec 31, 2015
Messages
465
Location
Hudson, WI
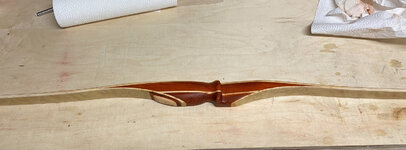
After some initial tillering came the second most stressful portion, shaping the handle and cutting the sight window.
This may sound stupid, but the last time my blood pressure was that high was when I went in to my doctor for a vasectomy.

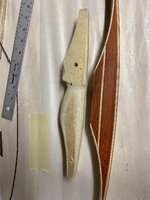
So I thought I would take the cautious route and quick whip up a mock riser out of an old 2x4 and just play around with it. This was a good call in the end as I found I needed a little more material on the lower portion of the grip.
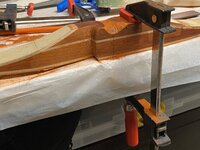
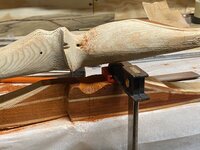
Remember that time I had to modify my ramp angles so that my laminates would mate up with my riser? Yeah, I lost the real estate I needed to properly profile my grip when I did that. After some consulting with some knowledgeable bowyers, I decided to add some laminations to the lower ramp to build that up a bit. 17FBF19A-8ADE-4F90-ADCE-E616756B1BDF.jpeg
516FFD8A-7F7D-4474-8F20-F6630BE17A84.jpeg
D73959F3-5436-4E45-A779-BA5D2AE62F90.jpeg
The 2x4 mock up was quick and dirty so the glue joints were pretty poor.

I was pretty nervous cutting in the sight window so I tried using a spindle sander to tiptoe in. This was a waste of time and my short attention span quickly brought me to my bandsaw where I had already decided my last blade was going to be sacrificial to getting this project done. This saved a huge amount of time and headache and I quickly found my blood pressure settling back down.

I didn’t document any of this but I will add one thing: If you don’t have a decent bandsaw where you can fine tune and adjust your blade to be perfectly square to the table, don’t bother as it will just create more headaches for you.

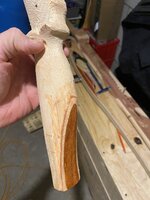
After increasing my comfort level with my wood rasps and file, I got to work on the actual grip, using my 2x4 as a reference guide to what “felt good” in my hand.
D6D0CCD4-BFDE-49D8-9520-EC8A2146A0BF.jpeg
If you decide to do this, just know that a rasp, contrary to what you might think, shapes fiberglass and properly epoxied joints very well.
Just remember this: rasping/filing from glass to backing material: Good. rasping/filing from backing to glass: VERY BAD. This might sound simple but I caught myself about ready to do that multiple times as once you get on a roll it’s tough to stop shaping!
95A7FE3E-6771-4240-9A0D-A929CBA13C62.jpeg
ADF64DD9-BAE3-494B-9B44-E30CA5DC7FDC.jpeg
 
OP
Kindo

Kindo

WKR
Joined
Dec 31, 2015
Messages
465
Location
Hudson, WI
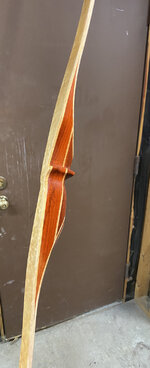
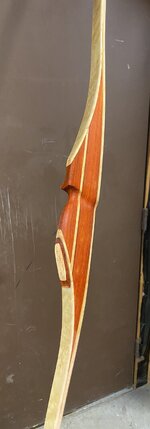
After spending about an hour and a half last night, I was able to get most of my grip done.
I’m going to give it a few days and just randomly pick the bow up throughout that time and see how it feels and if I want to change anything. I think I will radius out the shelf a smidge and do some final shaping in the throat of the grip.

If any of you more experienced guys have some input, I’m all ears and would appreciate any recommendations. I’m also going to make up a leather wrap for the handle and get that on at some point too.
D82B14D5-612B-46A3-98FA-61C62A5E5739.jpeg
C384E323-BE7A-4B6F-BF31-385A903730A4.jpeg
D87B2C2D-0073-42C4-B9A2-3576E1B1ACC6.jpeg
B6B08266-706D-4FB2-8E93-3925D22A5BED.jpeg
 
OP
Kindo

Kindo

WKR
Joined
Dec 31, 2015
Messages
465
Location
Hudson, WI
Looks good. It's a learning experience that more people should do. That way they can understand why we custom bowyers charge what we do. I'd like to tell you that glue ups get easier the more you do them. Yeah, thats's not the case. You just get faster.
Another great resource for how to's is Rustic Archer (Wade Morris). He has some great YouTube vids.
Looking forward to seeing the finished project.
Thanks Dan, I’ll be checking him out tonight.
 
OP
Kindo

Kindo

WKR
Joined
Dec 31, 2015
Messages
465
Location
Hudson, WI
Love that maple. I would definitely radius the shelf a lot more. How's it shoot?
Thanks, I’m thinking the birds eye will really pop when I get a finish on there.
I’m hoping to get the shelf and window finished up this evening.

Unfortunately, my new string won’t be in until tomorrow and I hate to take the first few shots with an improper string on it. The temptation is there though!
 

Felix40

WKR
Joined
Jul 27, 2015
Messages
1,876
Location
New Mexico
Thanks, I’m thinking the birds eye will really pop when I get a finish on there.
I’m hoping to get the shelf and window finished up this evening.

Unfortunately, my new string won’t be in until tomorrow and I hate to take the first few shots with an improper string on it. The temptation is there though!
Might as well add making strings to the list of addictions haha
 
Top