CrzyTrekker
WKR
Backcountry Night Photography: A Primer
Photography is a hobby of mine. I’ve been flattered to have a few of my photographs used commercially to sell outdoor products, and one of my night photos won 3rd place in the 2013 BHA Hunting Photo Contest, but I'm not a pro. Several people on this site and other sites have asked how I take night photographs, so I’m posting this in hopes that it might enrich your ability to take photographs and share memories.
Approximately 33% of your time in the backcountry is at night, so why not document some of that time which is typically spent in camp (base camp, spike camp, or bivy camp). I’m an adventurer as much as I am a hunter, and I savor the entire backcountry experience. Good photos let me share the experience with others.

Choice of Camera:
For night landscape photography, you’ll need a camera with a micro four-thirds, APS-C, or full-frame sensor (or other equivalent sensor). The larger sensors are needed in order to gather more light per pixel. The camera should have the ability to shoot in full manual mode.
I often carry an Olympus micro 4/3 camera, because it’s weather-sealed and the micro 4/3 lenses will be the smallest of the bunch. However, this is not intended to be a camera review. You’ll get incrementally better dynamic range as you step up to the APS-C and full-frame sensors. The difference probably isn’t too important unless you need very large prints for commercial purposes.
It is important to understand what size sensor your camera uses, because you’ll need that information in order to calculate exposure times (more on this later).

Choice of Lens:
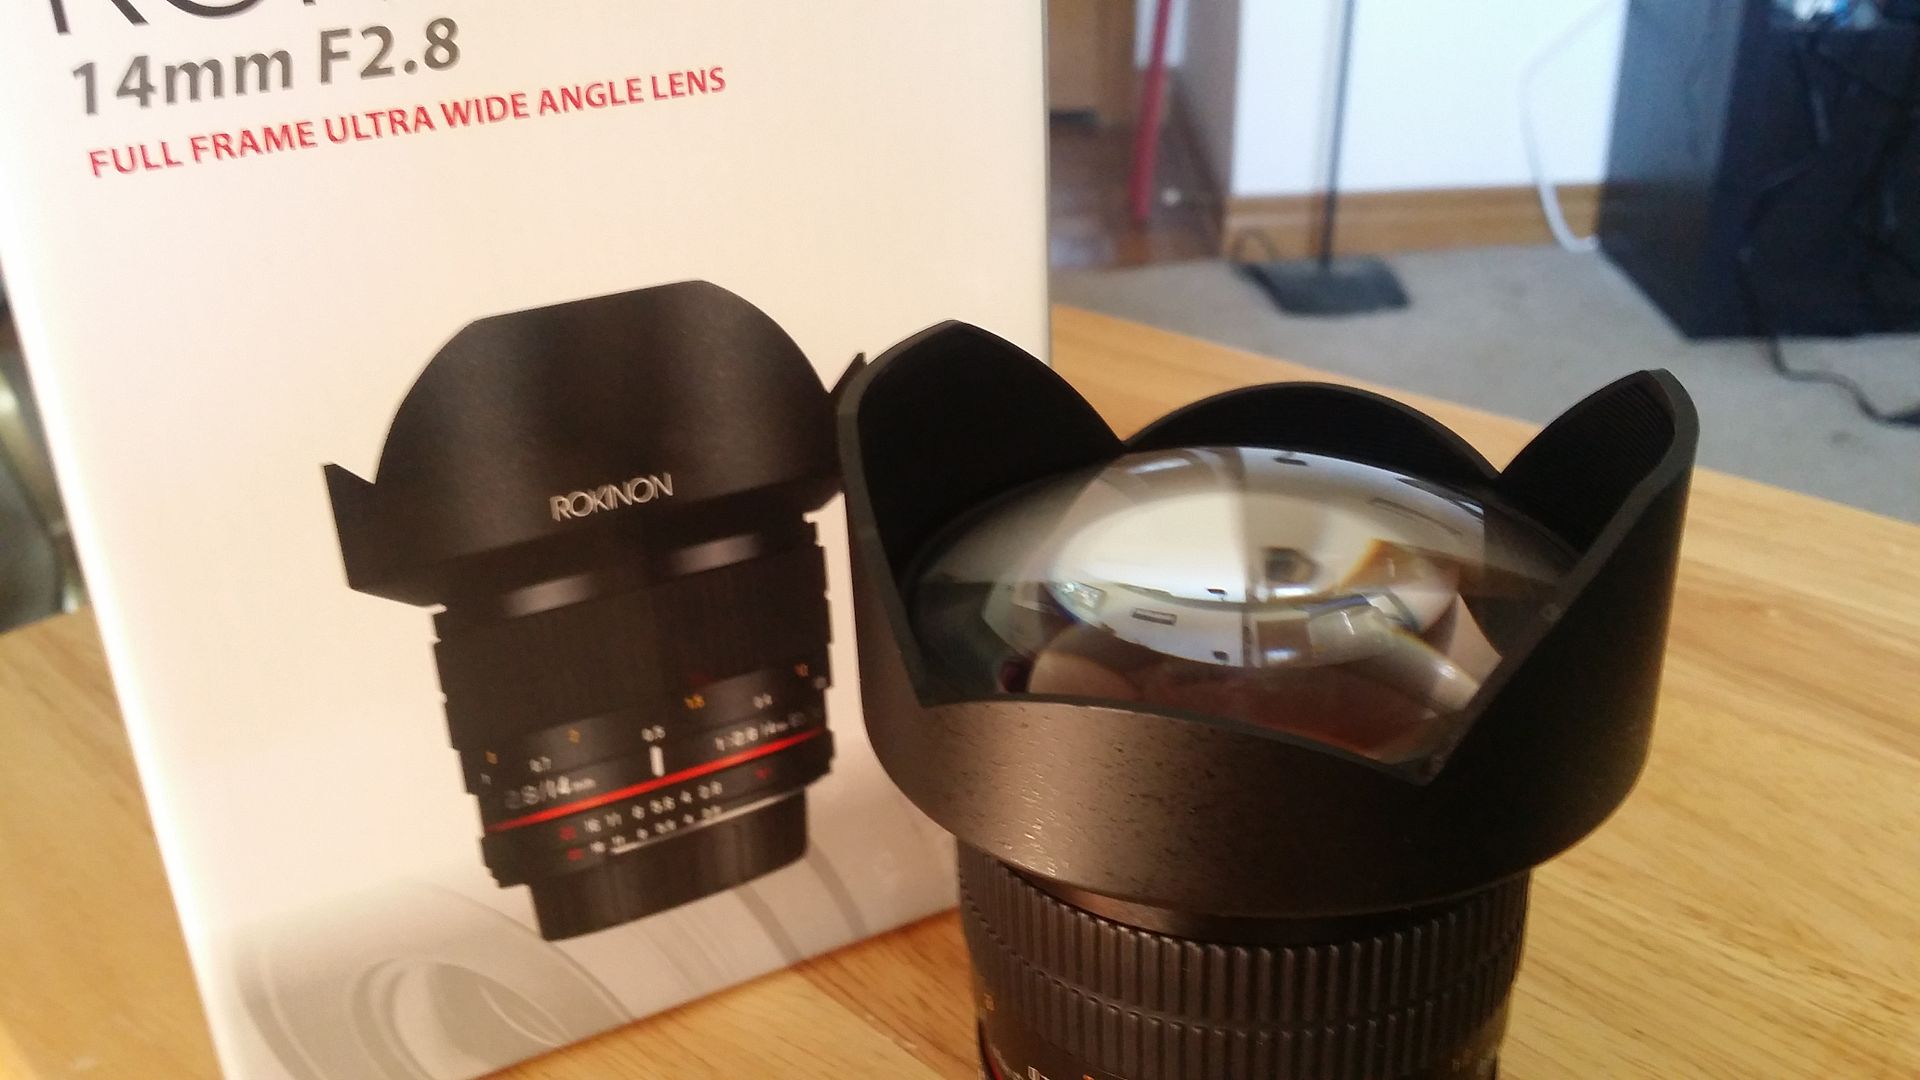
Generally speaking, you’ll want the widest (i.e. a wide angle lens between 16mm and 24mm full frame equivalent is ideal) and fastest (i.e. wide aperture) lens you have for night landscape photography. My personal experience is that kit lenses are usually OK for night photography, but wider are best. I suggest using what you’ve already got.
Ideal Shooting Conditions:
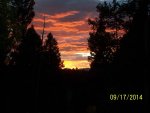
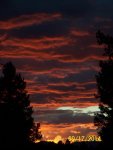
Choose a night within 3-4 days on either side of a new moon. It's very difficult to photograph stars during a full moon, although it allows good photos of the landscape. Cold weather is good because the air is drier, creating less chromatic aberration (which results in poor picture quality). I like to have a quarter-moon low in the sky behind me, because that lights up the landscape just enough for a time exposure, and the stars will still be bright.

Primary Camera Settings:
Shoot in M (manual mode).
Focus on Infinity using manual focus. If you're lucky enough to have an infinity setting on your lens, then set to infinity. My lens has an infinity marking but it's inaccurate and I actually have to adjust the focus to find infinity. Figure out how to focus in the dark before you go out on a photo shoot. When I turn the manual focus ring on my lens, my camera is set up to show 10x zoom in the viewfinder, which allows me to focus crisply on a bright star (infinity). After getting my focus set, I place the camera down on the tripod without disturbing the focus ring, and forget about it.
If you focus on a bright star, then everything else will be in focus beyond a certain distance away from your camera. Thus, if you are also photographing a tent or another subject in the foreground, then that subject must be far enough away to also be in focus. If the stars look good but your tent is blurry, then you need to have the tent further away from the camera.
Set to the widest aperture on your lens in order to gather maximum light for shorter exposure time. The aperture on my lens can be set anywhere between f2.0 and f22, so I always start at f2.0. Your kit lens may be f3.5 or thereabouts when wide open, and while not optimally wide, it will work.
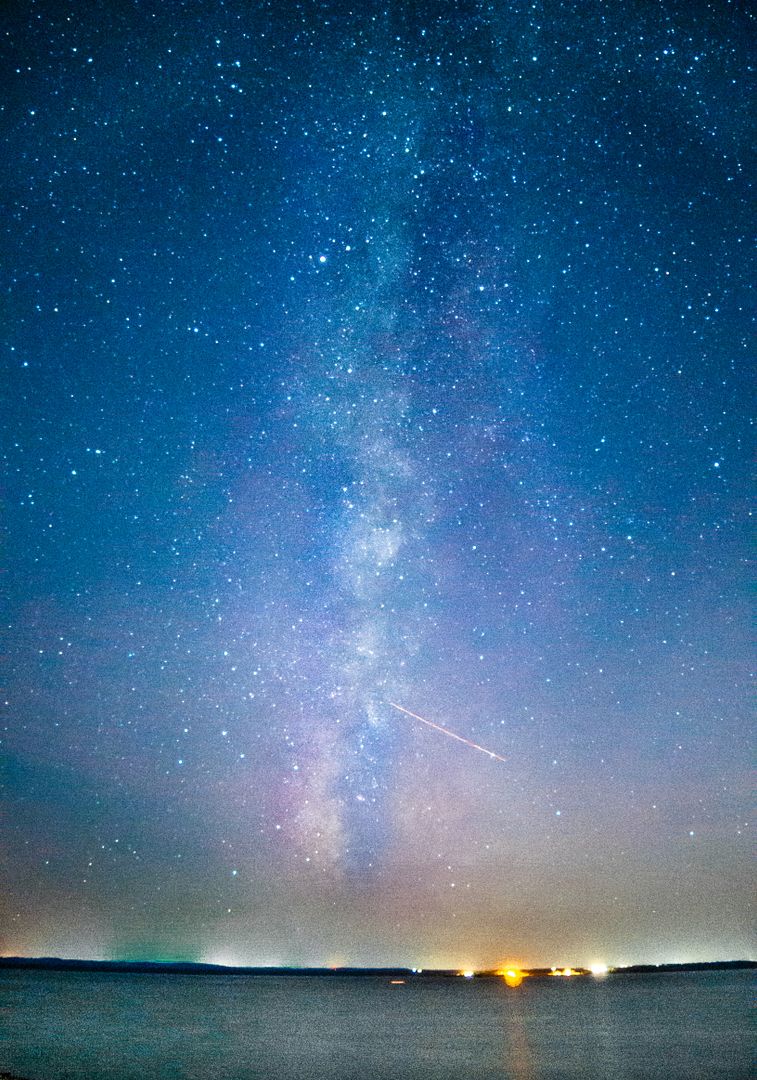
Set an initial exposure time based upon the Rule of 500. The Rule of 500 says that you can shoot for a certain period of time before stars will start leaving trails in your photos. The Rule of 500 works like this: (500 divided by (focal length) equals X seconds). Let’s say you’re shooting an APS-C sensor, which has a 1.5x crop factor. If you’re shooting at 16mm, then the Rule of 500 says you can shoot for 20 seconds before the stars leave trails.
How did I get to 20 seconds? Here's the math: 16mm multiplied by 1.5x crop factor equals 24mm equivalent lens (on full frame). The "Rule of 500" says that 500 divided by 24 (i.e. 24mm) equals 20 seconds.
If you are shooting a M4/3 sensor instead, then the crop factor is 2.0x. I shoot a 12mm lens on M4/3, which is also a 24mm full frame equivalent lens, and gives me 20 seconds before I have star trails. If you’re shooting full frame, then there is no crop factor.
Start with an ISO of 1600, take a test shot, and adjust the ISO incrementally up and down. At this point, you simply take a ton of pictures, running the ISO up and down the whole range. This is called "bracketing" and is the secret to getting at least one useful picture.
If you’re shooting on a bright night (close to full moon or a lot of light pollution), then you might adjust your initial exposure time down to something like 10 seconds, and your ISO to 800. Take a test shot and then bracket your ISO accordingly.
Take photos from different angles and perspectives, and one or two pictures will stand above the rest when you review them later. You will not know which photo looks the best until you get home and put them on a larger computer screen. If I post one good picture on Rokslide, you can bet I had at least 15 pictures that I deleted.

Other Settings and Shooting Tips:
Use a tripod. Lower to the ground is more stable. I backpack with a tiny Manfrotto Pixi Mini tripod. It’s small and light. I improvise by finding a large rock to set up on.
Turn off image stabilization if your camera has it.
Switch on mirror lock up feature if your camera has this setting.
Set self-timer to at least 2-seconds to prevent shaking/blurring.
Consider turning noise reduction off if you are shooting in RAW, because you can eliminate most noise later using Photoshop or Lightroom. Software will usually do a better job eliminating noise from RAW pics than the camera. If you are using JPEGs right out of the camera, then leave your noise reduction turned on.
If you're having difficulty property exposing individual parts of the image (like a campfire or person with headlamp in the foreground) because of uneven light levels, try moving a couple steps away from the light, or move the light source further away from the camera. For example, a very bright campfire close to the camera will tend to dim any stars in the sky. To fix, simply move the camera further from the campfire. The inverses square law will cause less light to reach your camera the further away you are. If you want to frame a shot with strong artificial light and still have beautifully exposed sky, experiment with the distance of your camera to your subject.
If you're lighting a tipi or tent in the foreground, then hang a small LED lantern on THE LOWEST SETTING for starters. If it's a very dark night, then you might overexpose the tent on the lowest setting. If the tent is washed out (i.e. nothing but white light) in your photo, then you might try covering the light source in a small stuff sack to provide additional dimming.
Conversely, if you’re shooting with a lot of light in the sky, then you will need to brighten that tent up. Trial and error.
These techniques will produce good JPEGs. I occasionally use JPEGs out of the camera, but I mostly shoot RAW and develop my own pictures. Due to the extreme dynamic range inherent to night photography, you can get remarkably better results if you shoot in RAW and use a good program (like Photoshop or Lightroom) to develop your own pictures. There is a steep learning curve, but it’s mercifully short if you devote a little time to the hobby. Further discussion of post-processing techniques is beyond the scope of this article.
Best of luck in your photographic endeavors. Share your best pic if you go out on a night shoot.
Eric

Photography is a hobby of mine. I’ve been flattered to have a few of my photographs used commercially to sell outdoor products, and one of my night photos won 3rd place in the 2013 BHA Hunting Photo Contest, but I'm not a pro. Several people on this site and other sites have asked how I take night photographs, so I’m posting this in hopes that it might enrich your ability to take photographs and share memories.
Approximately 33% of your time in the backcountry is at night, so why not document some of that time which is typically spent in camp (base camp, spike camp, or bivy camp). I’m an adventurer as much as I am a hunter, and I savor the entire backcountry experience. Good photos let me share the experience with others.
Choice of Camera:
For night landscape photography, you’ll need a camera with a micro four-thirds, APS-C, or full-frame sensor (or other equivalent sensor). The larger sensors are needed in order to gather more light per pixel. The camera should have the ability to shoot in full manual mode.
I often carry an Olympus micro 4/3 camera, because it’s weather-sealed and the micro 4/3 lenses will be the smallest of the bunch. However, this is not intended to be a camera review. You’ll get incrementally better dynamic range as you step up to the APS-C and full-frame sensors. The difference probably isn’t too important unless you need very large prints for commercial purposes.
It is important to understand what size sensor your camera uses, because you’ll need that information in order to calculate exposure times (more on this later).
Choice of Lens:
Generally speaking, you’ll want the widest (i.e. a wide angle lens between 16mm and 24mm full frame equivalent is ideal) and fastest (i.e. wide aperture) lens you have for night landscape photography. My personal experience is that kit lenses are usually OK for night photography, but wider are best. I suggest using what you’ve already got.
Ideal Shooting Conditions:
Choose a night within 3-4 days on either side of a new moon. It's very difficult to photograph stars during a full moon, although it allows good photos of the landscape. Cold weather is good because the air is drier, creating less chromatic aberration (which results in poor picture quality). I like to have a quarter-moon low in the sky behind me, because that lights up the landscape just enough for a time exposure, and the stars will still be bright.
Primary Camera Settings:
Shoot in M (manual mode).
Focus on Infinity using manual focus. If you're lucky enough to have an infinity setting on your lens, then set to infinity. My lens has an infinity marking but it's inaccurate and I actually have to adjust the focus to find infinity. Figure out how to focus in the dark before you go out on a photo shoot. When I turn the manual focus ring on my lens, my camera is set up to show 10x zoom in the viewfinder, which allows me to focus crisply on a bright star (infinity). After getting my focus set, I place the camera down on the tripod without disturbing the focus ring, and forget about it.
If you focus on a bright star, then everything else will be in focus beyond a certain distance away from your camera. Thus, if you are also photographing a tent or another subject in the foreground, then that subject must be far enough away to also be in focus. If the stars look good but your tent is blurry, then you need to have the tent further away from the camera.
Set to the widest aperture on your lens in order to gather maximum light for shorter exposure time. The aperture on my lens can be set anywhere between f2.0 and f22, so I always start at f2.0. Your kit lens may be f3.5 or thereabouts when wide open, and while not optimally wide, it will work.
Set an initial exposure time based upon the Rule of 500. The Rule of 500 says that you can shoot for a certain period of time before stars will start leaving trails in your photos. The Rule of 500 works like this: (500 divided by (focal length) equals X seconds). Let’s say you’re shooting an APS-C sensor, which has a 1.5x crop factor. If you’re shooting at 16mm, then the Rule of 500 says you can shoot for 20 seconds before the stars leave trails.
How did I get to 20 seconds? Here's the math: 16mm multiplied by 1.5x crop factor equals 24mm equivalent lens (on full frame). The "Rule of 500" says that 500 divided by 24 (i.e. 24mm) equals 20 seconds.
If you are shooting a M4/3 sensor instead, then the crop factor is 2.0x. I shoot a 12mm lens on M4/3, which is also a 24mm full frame equivalent lens, and gives me 20 seconds before I have star trails. If you’re shooting full frame, then there is no crop factor.
Start with an ISO of 1600, take a test shot, and adjust the ISO incrementally up and down. At this point, you simply take a ton of pictures, running the ISO up and down the whole range. This is called "bracketing" and is the secret to getting at least one useful picture.
If you’re shooting on a bright night (close to full moon or a lot of light pollution), then you might adjust your initial exposure time down to something like 10 seconds, and your ISO to 800. Take a test shot and then bracket your ISO accordingly.
Take photos from different angles and perspectives, and one or two pictures will stand above the rest when you review them later. You will not know which photo looks the best until you get home and put them on a larger computer screen. If I post one good picture on Rokslide, you can bet I had at least 15 pictures that I deleted.
Other Settings and Shooting Tips:
Use a tripod. Lower to the ground is more stable. I backpack with a tiny Manfrotto Pixi Mini tripod. It’s small and light. I improvise by finding a large rock to set up on.
Turn off image stabilization if your camera has it.
Switch on mirror lock up feature if your camera has this setting.
Set self-timer to at least 2-seconds to prevent shaking/blurring.
Consider turning noise reduction off if you are shooting in RAW, because you can eliminate most noise later using Photoshop or Lightroom. Software will usually do a better job eliminating noise from RAW pics than the camera. If you are using JPEGs right out of the camera, then leave your noise reduction turned on.
If you're having difficulty property exposing individual parts of the image (like a campfire or person with headlamp in the foreground) because of uneven light levels, try moving a couple steps away from the light, or move the light source further away from the camera. For example, a very bright campfire close to the camera will tend to dim any stars in the sky. To fix, simply move the camera further from the campfire. The inverses square law will cause less light to reach your camera the further away you are. If you want to frame a shot with strong artificial light and still have beautifully exposed sky, experiment with the distance of your camera to your subject.
If you're lighting a tipi or tent in the foreground, then hang a small LED lantern on THE LOWEST SETTING for starters. If it's a very dark night, then you might overexpose the tent on the lowest setting. If the tent is washed out (i.e. nothing but white light) in your photo, then you might try covering the light source in a small stuff sack to provide additional dimming.
Conversely, if you’re shooting with a lot of light in the sky, then you will need to brighten that tent up. Trial and error.
These techniques will produce good JPEGs. I occasionally use JPEGs out of the camera, but I mostly shoot RAW and develop my own pictures. Due to the extreme dynamic range inherent to night photography, you can get remarkably better results if you shoot in RAW and use a good program (like Photoshop or Lightroom) to develop your own pictures. There is a steep learning curve, but it’s mercifully short if you devote a little time to the hobby. Further discussion of post-processing techniques is beyond the scope of this article.
Best of luck in your photographic endeavors. Share your best pic if you go out on a night shoot.
Eric


")