- Banned
- #1
Newtosavage
WKR
Big Howa Mini fan here. I have two now, a 7.62x39 that I bought as a barreled action, and a 6.5 Grendel I bought as a whole, new rifle. I spent about 3 evenings working down a Boyd's laminated stock for the 7.62x39 and finally got it where I want it. The factory plastic stock however, it's not quite as easy to work with as that Boyd's stock was, for various reasons.
I took the wood rasp, sander and saw out and went to work on it. First I slimmed down the forend to remove a lot of unnecessary weight, then I lopped off the pistol grip for the same reason. Those two things helped a lot, but it still had a ridiculously long forend for a mini action rifle, even with the 22" barrel.
Here it is after the intial reduction.
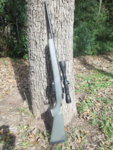
Eventually, I painted the stock, and this is how she rode the first season. 6 lbs. 13 oz. with a 3-9x40 Leupold, 22" barrel, full length stock and original (complete overkill) recoil pad were all adding unnecessary length and weight. The rifle was as long as my Tikka, and handled like it too. Not really what I thought a 6.5 Mini should be.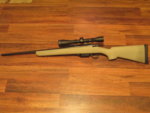
Having time to kill yesterday, I got out my saw, rasp and sander and set myself to turning this rifle into what it should be.
Since this isn't a long range hunting rifle, I swapped the 3-9x40 for a 2-7x33. 7x is all I need out to 300 yards. That saved me 2 oz.
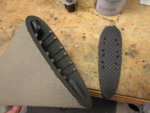
First thing to go was the complete overkill, fat recoil pad. Who would need that on a mini-action anyway? That got replaced with a Wal Mart flip flop for $0.98. That saved another 3 oz.
Then I chopped off 2" out of that ridiculously long forend, drilled four holes in each part, epoxied in steel pins, and epoxied it all together.
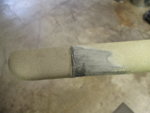
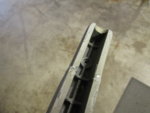
Another hour or so on the sander, and I got it shaped up and looking good. After a couple coats of textured paint, you can't even find the seam now. I figure that was good for at least an ounce.
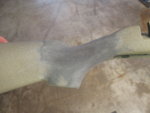
Last bit of sanding/shaping was around the grip. I never had gotten that grip how I like it. Even though I have huge hands, I hate fat grips. Now the grip area closely resembles that of my Bansner stock on my Howa Alpine, which is my favorite stock of all time.
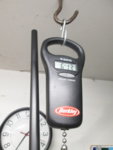
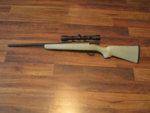
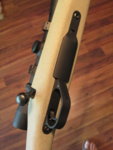
Here she is in her finished form. 6 lbs. 5 oz. total. If you look closely, you'll noticed a couple other changes. I took 2" off the barrel, going from 22 to 20", and what's that underneath? A hinged floorplate on a Howa Mini? Yup. Sure is. Those two mods probably cancelled each other out weight-wise.
Off to the range next to see if she still puts up the same tiny groups as before. Only thing left to do is have a smith do a crown job on it if it doesn't shoot well enough with my home-brew crown. This is the 4th barrel I've cut and crowned with hand tools, and all of them have shot as good or better than the factory crown, so I'm not too worried.
Thanks for following along!
I took the wood rasp, sander and saw out and went to work on it. First I slimmed down the forend to remove a lot of unnecessary weight, then I lopped off the pistol grip for the same reason. Those two things helped a lot, but it still had a ridiculously long forend for a mini action rifle, even with the 22" barrel.
Here it is after the intial reduction.

Eventually, I painted the stock, and this is how she rode the first season. 6 lbs. 13 oz. with a 3-9x40 Leupold, 22" barrel, full length stock and original (complete overkill) recoil pad were all adding unnecessary length and weight. The rifle was as long as my Tikka, and handled like it too. Not really what I thought a 6.5 Mini should be.


Having time to kill yesterday, I got out my saw, rasp and sander and set myself to turning this rifle into what it should be.
Since this isn't a long range hunting rifle, I swapped the 3-9x40 for a 2-7x33. 7x is all I need out to 300 yards. That saved me 2 oz.
First thing to go was the complete overkill, fat recoil pad. Who would need that on a mini-action anyway? That got replaced with a Wal Mart flip flop for $0.98. That saved another 3 oz.

Then I chopped off 2" out of that ridiculously long forend, drilled four holes in each part, epoxied in steel pins, and epoxied it all together.


Another hour or so on the sander, and I got it shaped up and looking good. After a couple coats of textured paint, you can't even find the seam now. I figure that was good for at least an ounce.
Last bit of sanding/shaping was around the grip. I never had gotten that grip how I like it. Even though I have huge hands, I hate fat grips. Now the grip area closely resembles that of my Bansner stock on my Howa Alpine, which is my favorite stock of all time.

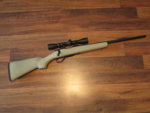
Here she is in her finished form. 6 lbs. 5 oz. total. If you look closely, you'll noticed a couple other changes. I took 2" off the barrel, going from 22 to 20", and what's that underneath? A hinged floorplate on a Howa Mini?


Off to the range next to see if she still puts up the same tiny groups as before. Only thing left to do is have a smith do a crown job on it if it doesn't shoot well enough with my home-brew crown. This is the 4th barrel I've cut and crowned with hand tools, and all of them have shot as good or better than the factory crown, so I'm not too worried.
Thanks for following along!


