Franken Sitka Apex

Idaboy

WKR
Joined
Oct 22, 2017
Messages
497
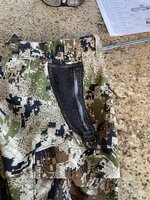
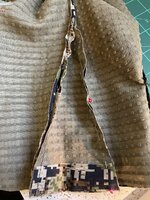
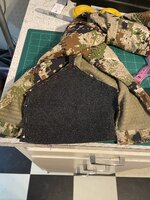
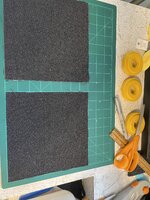
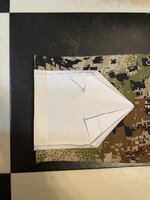
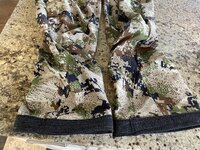
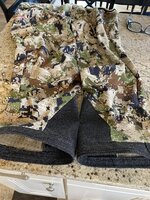
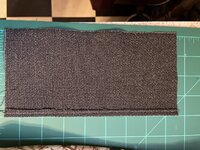
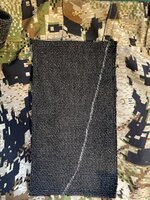
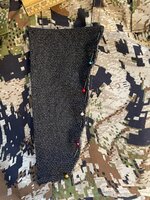
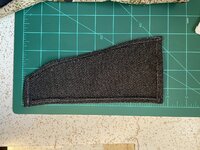
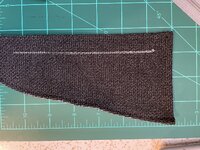
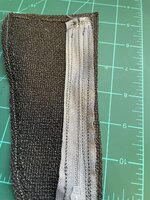
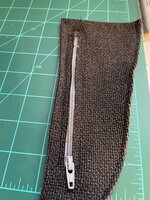
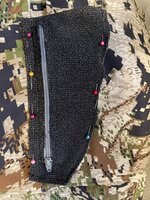
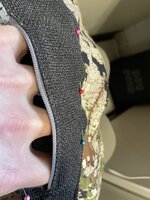
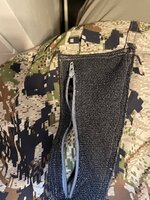
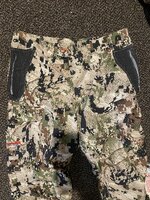
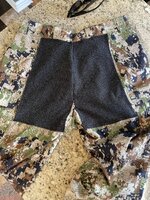
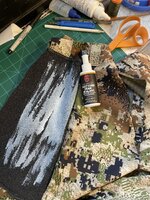
I love my Timberline pants but I overheat in them too often. Got some Apex pants 40% off, and wanted to add some of the Timberline features..so added zipper closure to upper pockets, added reinforced cuffs and made into boot cut to fit better over my boots.
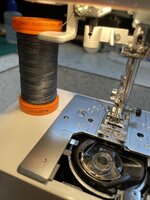
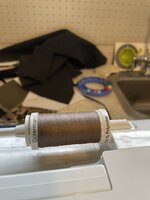
First rodeo with a sewing machine...can post photos of the step by step....next might be adding zipper vents to my Timberlines...might consider trying to add butt patch to the Apex as welk
 

Attachments

  • 7C1971DA-3AFF-4BFB-BC9B-035DBAD1173A.jpeg
    7C1971DA-3AFF-4BFB-BC9B-035DBAD1173A.jpeg
    566.4 KB · Views: 96
  • 2C935050-C8D4-4905-8B63-1910BCC93C4B.jpeg
    2C935050-C8D4-4905-8B63-1910BCC93C4B.jpeg
    580.6 KB · Views: 95
  • 35FF6389-B218-4867-83E0-65EFA8A9A689.jpeg
    35FF6389-B218-4867-83E0-65EFA8A9A689.jpeg
    566.7 KB · Views: 95

nnmarcher

Lil-Rokslider
Joined
Jun 11, 2019
Messages
178
Looks great @Idaboy! Doesn't look nearly as bad as my first tango with the sewing machine. I've seen many people on the forum wishing Sitka put hip vents in, so I think a step-by-step of that work would be appreciated
 

feanor

WKR
Joined
Aug 15, 2018
Messages
1,049
Location
Colorado
That looks pretty nice. I’m also in favor of a detailed walk through zipper pant for those. I have the apex pants too, and really like them. I think they do quite well for a wide variety of temps, but zippers are always a nice option.
 

htlt_surfboards

Lil-Rokslider
Joined
Jun 27, 2020
Messages
110
Location
Ventura, CA
I love the apex pants but have worn out the cuffs exactly where you put the black material and had to sew them back together. I think Im going to have to give this a try on my new pair.
 
OP
Idaboy

Idaboy

WKR
Joined
Oct 22, 2017
Messages
497
L
That looks pretty nice. I’m also in favor of a detailed walk through zipper pant for those. I have the apex pants too, and really like them. I think they do quite well for a wide variety of temps, but zippers are always a nice option.
Unfortunately I didn't take photos of the zipper process but basically you just cut out piece of fabric that traces seams and pocket opening, hem up the edges (so they don't fray), sew in zipper, sew in the facric but double or triple stitch around the edges
(can poet later some photos)

For pant cuffs
1- trace out cuts out and remove seam on outside of pants about 12 inches up
2- cut out 2 equal pieces
3- pin fabric with 1/4 of seam of each fabric so sew together
4 - sew in fabric patches and then measure where you want hem to lie, and estimate your boot cut
5- use left over pants fabric to put in small triangle of fabric to gusset into the pants on outside to make bootcut
6 -sew in boot cut and measure hem
 

Attachments

  • 0539E847-EFBF-4946-ABF3-63F707A8DB95.jpeg
    0539E847-EFBF-4946-ABF3-63F707A8DB95.jpeg
    608.3 KB · Views: 21
  • C1FE1C65-113E-4355-A6E1-9168183B2655.jpeg
    C1FE1C65-113E-4355-A6E1-9168183B2655.jpeg
    474.7 KB · Views: 24
  • 8D75389C-FB67-4E76-951C-0465E508E3C2.jpeg
    8D75389C-FB67-4E76-951C-0465E508E3C2.jpeg
    587.4 KB · Views: 24
  • 47058E98-B2EA-4CDD-8A9C-451EE7F5910B.jpeg
    47058E98-B2EA-4CDD-8A9C-451EE7F5910B.jpeg
    329.3 KB · Views: 27
OP
Idaboy

Idaboy

WKR
Joined
Oct 22, 2017
Messages
497
Continued (bottom cuff after patches sewn in)
1.Take a 3 inch strip of fabric and hem top and bottom edges
2 pin strip around cuff and fold over on inside of pants
3- tack down lower edge with single running stitch at the very bottom of pant cuff
4 turn pants inside out, fold the outside cuff out of the way and sew in the inside of hem (hi folding the outside down, when you do this stitch it will hide the stitch
5 fold back up the outside cuff and sew a stitch up along the top and then again along the bottom
Looks great @Idaboy! Doesn't look nearly as bad as my first tango with the sewing machine. I've seen many people on the forum wishing Sitka put hip vents in, so I think a step-by-step of that work would be appreciated
will let you know if I try...there was this other post on side vents


Attachments

  • 8CCB3183-A1ED-424E-BAAE-B675744CC2E4.jpeg
    8CCB3183-A1ED-424E-BAAE-B675744CC2E4.jpeg
    600.3 KB · Views: 17
  • 08531B12-5AE5-4804-8803-51F8FBB17AD3.jpeg
    08531B12-5AE5-4804-8803-51F8FBB17AD3.jpeg
    566.7 KB · Views: 17
OP
Idaboy

Idaboy

WKR
Joined
Oct 22, 2017
Messages
497
Also, make your patch you want to sew on 1/2 to 1/4 inch larger than the actual hole you cut/piece of fabric you remove to give you room to make the seams

Save the piece of fabric you cut out to use opposite side if you want to widen/put in a boot cut like fit as the Apex pants cuffs are kinda narrow at the bottom
 
OP
Idaboy

Idaboy

WKR
Joined
Oct 22, 2017
Messages
497
Pocket
Hem/oversew straight rear seam
 

Attachments

  • 4AA65E03-D3B9-4370-92AE-F5B4A9FC20CC.jpeg
    4AA65E03-D3B9-4370-92AE-F5B4A9FC20CC.jpeg
    501.5 KB · Views: 11
OP
Idaboy

Idaboy

WKR
Joined
Oct 22, 2017
Messages
497
Layout fabric and trace over front seam
 

Attachments

  • B2745E14-ED83-4F94-B363-9C0E8D4C2EF1.jpeg
    B2745E14-ED83-4F94-B363-9C0E8D4C2EF1.jpeg
    501.5 KB · Views: 11
  • 25B52643-D894-4A87-8CA1-C7D096E07A91.jpeg
    25B52643-D894-4A87-8CA1-C7D096E07A91.jpeg
    648.1 KB · Views: 12
OP
Idaboy

Idaboy

WKR
Joined
Oct 22, 2017
Messages
497
Check fit, pull rear seam back about 1/2 inch to check fit of front curved edge . After you over sew the curved front seam things will shift back forward
 

Attachments

  • D8E86CE8-C610-4AD6-B048-AF9274A25B86.jpeg
    D8E86CE8-C610-4AD6-B048-AF9274A25B86.jpeg
    421.2 KB · Views: 22
  • B38D1884-CEDA-4846-B114-5F82DE24D319.jpeg
    B38D1884-CEDA-4846-B114-5F82DE24D319.jpeg
    610.2 KB · Views: 23
OP
Idaboy

Idaboy

WKR
Joined
Oct 22, 2017
Messages
497
Oversew/hem (not sure the sewing term), by folding over and pin to hold.....(so that none of the edges will fray when finished) View from bottom side of fabric
 

Attachments

  • D375FDD4-464A-495E-B423-ADAD9C3BEAF7.jpeg
    D375FDD4-464A-495E-B423-ADAD9C3BEAF7.jpeg
    421.3 KB · Views: 17
Last edited:
OP
Idaboy

Idaboy

WKR
Joined
Oct 22, 2017
Messages
497
Zipper...probably didn't do this the correct way but I just traced a straight line, then cut 1/8 inch slit out...sew zipper in and double/triple stitched down each side so it's good and secure and to limit any fray of where the slit was cut...put some sewing glue on the edge next to zipper where slit was cut since this edge was not sewed/folded over and could fray
 

Attachments

  • 9C69F5D7-89F3-4261-A075-6413775978E8.jpeg
    9C69F5D7-89F3-4261-A075-6413775978E8.jpeg
    504.1 KB · Views: 13
  • 7C7BD71D-34EE-490F-A930-AFADFD867C32.jpeg
    7C7BD71D-34EE-490F-A930-AFADFD867C32.jpeg
    446.3 KB · Views: 13
  • D1418393-0DF1-4E57-87DF-842EDE44D7EE.jpeg
    D1418393-0DF1-4E57-87DF-842EDE44D7EE.jpeg
    400.3 KB · Views: 14
Last edited:
OP
Idaboy

Idaboy

WKR
Joined
Oct 22, 2017
Messages
497
Layout over pocket
1) sew the front FIRST and be careful not to sew the pocket closed (don't ask)
-- double stitch seam now before moving on to the other 3 sides
2)sew across the top next
3) sew the rear seam starting from top. The bottom I just kinda Jerry-rigged to make things fit
4) double or triple stitch down the curved seam and the back seam
 

Attachments

  • 50EF95F0-4D4C-49EF-989E-D731ADA02BF4.jpeg
    50EF95F0-4D4C-49EF-989E-D731ADA02BF4.jpeg
    561.1 KB · Views: 15
  • F6C997E0-978B-4B01-BB15-338EAD657D7E.jpeg
    F6C997E0-978B-4B01-BB15-338EAD657D7E.jpeg
    311.7 KB · Views: 15
  • AACED623-2E2D-40AC-A138-DE5B88C2E7A7.jpeg
    AACED623-2E2D-40AC-A138-DE5B88C2E7A7.jpeg
    489.9 KB · Views: 16
  • C5830BD1-B93E-4C42-8F08-FD62727BCF0F.jpeg
    C5830BD1-B93E-4C42-8F08-FD62727BCF0F.jpeg
    685.4 KB · Views: 16
Last edited:
OP
Idaboy

Idaboy

WKR
Joined
Oct 22, 2017
Messages
497
I used a bonded nylon for the bobbin thread (underside thread). My machine is a basic not heavy-duty machine, and wouldn't handle bonded nylon for both threads (despite fiddling with needle size, tension etc)...having had to rip out a few seams for stuff like this I think it's more a matter of good seams/technique than thick/stronger thread. The top thread was just regular 100 polyester thread.

Other options:
1)A real handy person/seamstress would likely take apart seams along the back of pocket and that way it's incorporated into the seam rather than tacked over the top
2) same for the cuffs, you could have one large piece of fabric contiguous with the patches I sewed on, and then sew a seam circumferenally around (that might be how to properly attach a cuff to pant bottoms) as seams are less likely to catch than fabric that is tacked over the top. I just ran lots of stitching to keep things attached tightly as didn't care about the looks
 

Attachments

  • BEE95605-1890-430B-9173-919724CCCF3A.jpeg
    BEE95605-1890-430B-9173-919724CCCF3A.jpeg
    233.1 KB · Views: 18
  • 493F1630-1C9B-4A8E-BB3C-CAC0E94DC169.jpeg
    493F1630-1C9B-4A8E-BB3C-CAC0E94DC169.jpeg
    149.1 KB · Views: 16
Last edited:
OP
Idaboy

Idaboy

WKR
Joined
Oct 22, 2017
Messages
497
Update

This mod did well this season and I love the pants...Had bought the apex on sale and maybe $30 of materials. Got Second pair of apex cheap and making second pair. For weather over 35 degrees this will be my hunting pant.

-Added reinforced seat, used some tent sealer to waterproof butt (underside of fabric)
- held up great during season and cuffs were not noisy
- adding hip vents with zippers this off season
 

Attachments

  • IMG_2795.jpeg
    IMG_2795.jpeg
    705 KB · Views: 18
  • IMG_2792.jpeg
    IMG_2792.jpeg
    572 KB · Views: 18
Top