Pic rail? If so, use a set of feeler gages to level the bottom of the scope to the top of the pic rail. Don't tighten them all the way, tight enough that it won't move on its own but loose enough that you can move it. Hang a plumb bob off a fence or something in back yard. Level the action. See if the reticle is plumb to the bob. If not move it until it is. Tighten screws to torque in stages. I use a set of calipers or the feeler gages again to stage tighten the screws. I get consistent gaps between top and bottom ring caps this way.
Or buy this.
 www.shortactionprecision.com
Or buy this.
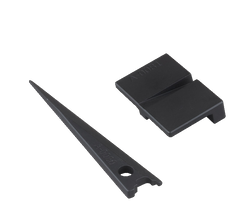
SPUHR Scope Installation Leveling Tool - Short Action Precision
The SPUHR two piece scope mount leveling tool is the proper tool to get your scope mounted perfectly level with any brand of two piece ring set up to 1.535" high. Perfect scope level tool for mounting Works with All Brands of two piece ring sets 7075 Aluminum Construction Sealed hardcoat finish...


 I would tell them to look at their level and it would always be off. If they had not purchased a level, I would take the scope off, remount it the same way but add a level clamped to the barrel (designed for leveling firearms) and have them look again. Most people hold their rifles out of plumb offhand and that is why they miss shots or hit animals poorly on top of being unpracticed from those positions. These same people are often great shots from prone due to using a level and trusting it to be right and not their eye.