weisenbu
Lil-Rokslider
- Joined
- Aug 24, 2017
- Messages
- 203
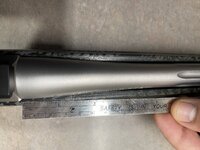
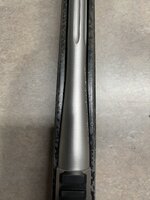
Hi. I recently picked up a T3x and am doing some mods to it. I have opened up the barrel channel a bit to ensure the barrel is fully free floated. This was quite easy when using a deep socket wrapped in sandpaper. It only took 20 minutes and turned out great.
However, now that I’m putting things back together, I noticed the first 2.5” of the barrel is not free floated. I’d like to remove that plastic on the stock. What is the best method for doing so? It isn’t as easy as the main barrel channel because it is angled. I’d like the finished job to look professional and not like a dremel hack job.
Any advice would be much appreciated. Thanks.