Formidilosus
Super Moderator
- Joined
- Oct 22, 2014
- Messages
- 8,268
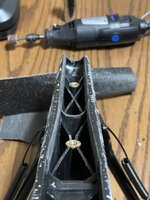
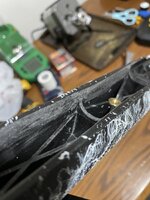
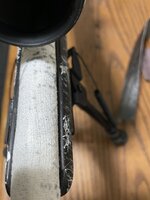
So, you’re removing the circled knobs and widening the barrel channel?View attachment 555809
Yes. There is the gap you see in the pics I posted all the way around the barrel to the shank.