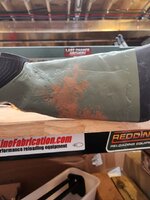
How I Modify My Tikka Factory Stocks

Joined
Jan 26, 2017
Messages
2,713
Location
PA
This is the start to finish process I use on my tikka factory stocks to help them have a consistent POI and improve shootability. None of this is completely new information, but there are a few unique things I do, and this is a consolidation post.

This is stuff that I'm capable of doing to my personal possessions - if you try this and mess up your own stuff, that is on you. Step 1 is basically fool proof, even if you quit halfway through the stock will still function. The rest of the steps, once you start, your stock will not function until the step is finished.

Step 1: Free Float
Step 2: Install Pillars
Step 3: Bed action and lug
Step 4: Create negative drop at heel, negative comb angle, and flatten the bottom of the butt stock.

If you want to debate whether any of this is necessary, take it up with Patches, he handles my complaint hotline:

Anyhow, back to the stocks.

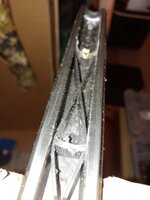
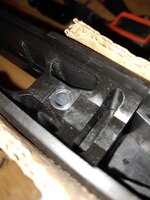
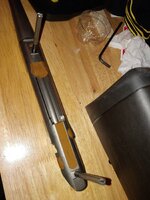
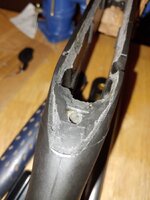
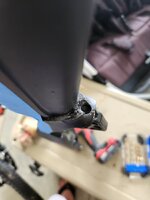
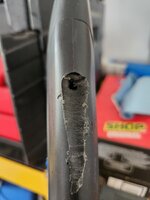
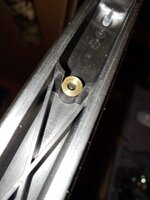
1. Free floating - this prevents barrel contact and POI changes when used in various positions and on various rests. I use a combination of the dremel tool with a sanding wheel to nock down the pressure points, and sand paper wrapped around deep drive sockets to open up the barrel channel. You really can't have too much clearance.
factory pressure ridges:
1120221539.jpg

fixed:
1120221544.jpg

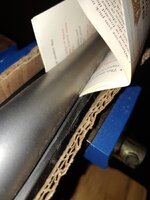
Floated, this booklet is about 1/16" thick.
1125220907.jpg
 
OP
ResearchinStuff
Joined
Jan 26, 2017
Messages
2,713
Location
PA
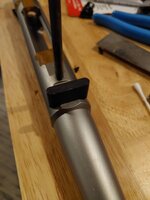
Step 2: Adding pillars. I do this because the first Tikka action screws I torqued to 65 in-lbs went straight through the metal washers in the factory plastic bottom metal. Others torque that tight without issue, but I choose to prevent the issue by installing pillars that are "proud" on the bottom, allowing a full metal to metal load bearing tube around the actions screws.

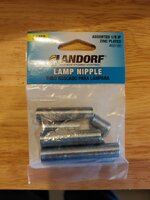
first, pick out what you'll use for pillars. I like lamp nipple, because it's cheap and has threads, which are good for epoxy adhesion:
1120221415.jpg

The factory screw holes are too small for the lamp nipple to fit, so you'll need to drill out the holes. I do this by hand, it goes crooked, then I adjust until things fit. If you have a drill press it's much easier to drill a straight hole.

The pillar length is absolutely essential for a couple of reasons. If they're too long, the bolt is going to slide right over the mag without picking up a shell, and your recoil lug engagement will be minimal. that's bad. too short and you won't be able to seat the mag, and the trigger will stick down too far, that's bad too.

To get the pillar length correct, start from the bottom up. First, remove some of the plastic around the trigger guard washer so your pillar can actually make full contact with the metal washer. Do that front and back, then put the bottom metal back into the stock.

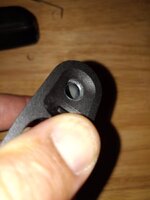
This is what perfect fit looks like - there is no gap whatsoever between the pillar and the washer, and the holes are aligned.
1120221442.jpg
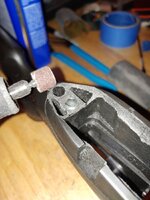
Next, drop the pillars down the enlarged holes, making sure you have full contact at the bottom with the trigger guard. Mark the pillars at the top of the stock, and cut to length, plus a little bit. Using the dremel, progressively grind down the pillars until they are long enough that the top is at exactly the same height as the plastic.
Starting point: End:
1120221456.jpg 1120221518.jpg

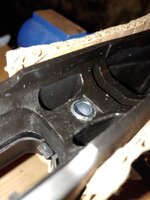
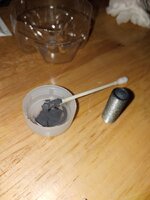
With the length set, it's time to lock those pillars in place. I use just a small amount of epoxy on the outside of each pillar, just a dab around the middle, slide it down into the hole, install the action, and torque it down to whatever you are ultimately going to use (for me, that's 65 in-lb), walk away and come back tomorrow.
1126221304.jpg
 
Last edited:
OP
ResearchinStuff
Joined
Jan 26, 2017
Messages
2,713
Location
PA
Step 3: Epoxy bedding. This creates a stress-free home for your action, and adds a bunch of contact area to minimize slippage. The way I do this makes the recoil lug a permanent part of the stock - one less thing to lose. Read all these steps before you mix the epoxy - once they mix you're on the clock.

First, take off the bottom metal - you might not want to glue that into the stock forever.

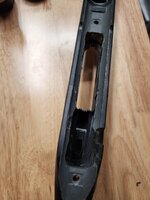
Next, grind out the factory inlet. I use a dremel with 60 grit sanding wheels, and take out a lot of material. Opening up those internal cavities gives more room for epoxy to flow and bond. Open up the sides, front, and bottom of the recoil lug groove to make room for epoxy too. the action should just go right down onto the pillars with no resistance, clicking, or popping. Leave things rough, create dimples/stipling to promote bonding, and wipe everything down with acetone when you're done.
1125221434.jpg

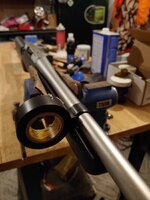
Now, wrap the barrel towards the end of the stock with electrical tape until it fits in perfectly, resting on 3 points, the top of each pillar and the barrel tape wad. I typically end up needing around 8 wraps.
1203221919.jpg
Remove the trigger assembly and bolt stop. Use modeling clay (not playdough) to fill in any and all crevices. Including that silly S. A fresh utility knife blade works great for cutting off excess. With the clay, fill in any divot or cavity that could allow epoxy to create a mechanical on your barreled action.
1126221342a.jpg

Now, apply your release agent. I've tried 3, and the only one that actually worked was kiwi neutral shoe polish. Put it on and buff it a few times, any globs or swirls are going to imprint on the epoxy. FAILURE TO USE A RELEASE AGENT WILL GLUE YOUR (triggerless) BARRELED ACTION INTO THE STOCK.

The action screw holes are a unique challenge. Some folks use the factory action screws for this job, but I bought some Forester action screws that are headless and minimally threaded. I did this to minimize the likelihood of gluing my action to the stock without a trigger. Whatever you do, make sure it has release agent applied.

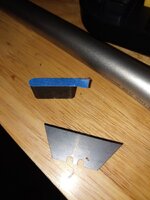
Now the recoil lug. I put a piece of tape on the top of it, cut as precisely as I can with a sharp utility knife blade. Then, I turn the barreled action upside down, place the recoil lug exactly where I want it (fully bottomed and pushed as far forward as possible), then apply a dab of super glue to hold it in position. That tape on top is important - without it you risk creating a high point that bends your action when this is all done. Unlike the rest of the metal, the recoil lug is degreased - I want that thing to stay in the epoxy forever.
1126221342.jpg 1203221939.jpg

Prepare for the mess, lay some cardboard under the action area, have your rags, patches, and q-tips handy.

Now, mix up your epoxy. I've used Pro-Bed 2000 and JB weld, lots of people like Devcon but that stuff is $$$. I'd probably buy a KRG Bravo before I spent 100 plus on the bedding epoxy........

Spread the epoxy around the action inlet generously. Some people use a straw piece to keep epoxy out of the pillars, but I haven't found a straw that fits lamp nipple. Too much epoxy is way better than too little, the mess cleans up easy enough in the first hour or so with the epoxies I use.

Once you're sure there's enough, grab the barreled action and press it in place. Be smooth, press firm. You want full contact on top of the pillars, and nice contact between the stock and the electrical tape wrap.

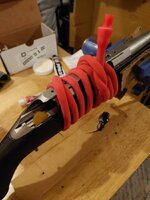
Using one hand to apply down pressure, wipe up external drips, and then wrap around the action with some surgical tubing. I borrow this one from my wife's random exercise bag.

1203221956.jpg

Come back in about 16 hours, take off the surgical tubing, and jiggle your barreled action free.

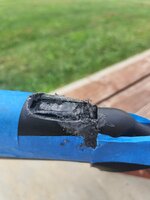
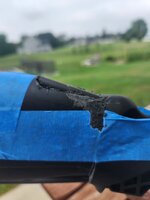
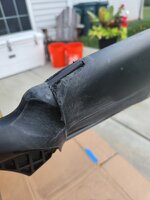
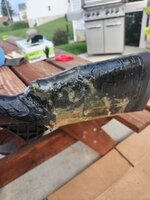
If it doesn't come, try laying the largest possible deep well socket in the magazine area, then hit it with a hammer. You'll rip out chunks, but it's actually still recoverable. You just have to drill the recoil lug free and repeat every part of this step.
1206221716.jpg

The finished product should look like this:
20230804_155256.jpg

Lots of cleanup from this step. Get all the shoe polish and clay off your barreled action, reinstall the trigger and bolt stop, and be ready to grind out overflowing epoxy that messes up magazine installation and feeding. If there's epoxy inside the pillars, drill it out from the bottom (high rotational speed, very little applied pressure. Remove that piece of tape from the top of the recoil lug. Don't stop until it's perfect again.
 
Last edited:
OP
ResearchinStuff
Joined
Jan 26, 2017
Messages
2,713
Location
PA
Step 4: fixing the stock geometry. This is where what I do differs significantly from what I've seen anyone else try. The objective is to achieve negative drop at the heel, negative comb angle, keep the factory butt pad, and be able to remove the bolt with the action fully torqued.

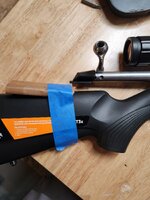
First, mark the location where the bolt is furthest back when removing or reinstalling it from the action. Mess this up and you're in for a lot of sanding, or you have to remove screws to remove the bolt. I used tape and cardboard:
20230804_154705.jpg

Now, remove the action and find something you can reference off the nice bedding job you did to that same point. This big nail and a few wraps of electrical tape worked for me.
20230804_155249.jpg

Now that we know what has to stay clear, it's time to cut.

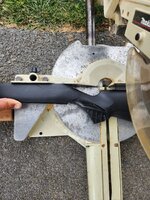
First cut, mitre saw at 0 degrees. You might want to go a bit further back than I did here, depends on how much you value a continuous top angle vs really wanting the flattest possible bottom.
20230804_160008.jpg

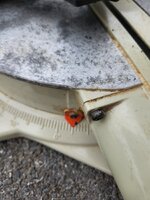
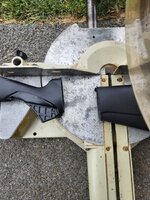
After that, set a slight angle on the saw, set aside the butt pad piece, and cut again, with the cut starting from the bottom edge of the first cut. I used 5 degrees.
20230804_160139.jpg
20230804_160111.jpg

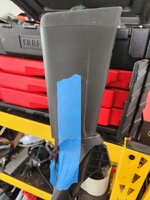
After making the cuts, it's time to start fitting stuff back together, making sure to leave room for the bolt to be removed, while achieving a negative drop at the heel. That 5 degree angle already guaranteed negative comb angle. Using some tape can help you out, and the seems work well for making sure nothing is twisted.
20230804_172759.jpg

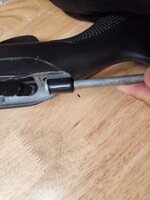
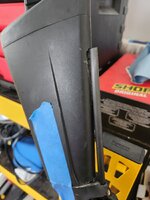
The last geometry fix is to flatten the bottom. Perfectly flat is best, but any amount flatter is an improvement. Pick out a stiff carbon arrow you don't like (250 spine rampage), and find a drill bit a smidge larger. Drill a divot forwards to make a pocket to hold the arrow piece at the bottom back of the pistol grip.
20230804_173328.jpg

Then, at the vestigial sling stud screw hole, cut a notch with a Dremel cut off wheel, and make a channel so that arrow shaft can lay in flush.
Midway
20230804_173743.jpg
Not quite
20230804_174009.jpg

Good
20230804_174951.jpg
 
Last edited:
OP
ResearchinStuff
Joined
Jan 26, 2017
Messages
2,713
Location
PA
Now, we need a better transition and load transfer up top.
Use your bolt removal marker to figure out how far back the transitional angle needs to go, and then cut a notch in the butt pad piece. Adjust the arrow shaft to fit exactly, including a notch so it catches on the underside of the forward plastic.
20230805_081501.jpg
20230805_082012.jpg

And now, use some super glue to hold those arrow pieces in place, let it all dry, and remove the tape.
20230805_083724.jpg

Now, it's a basic fiberglass job to put it back together. I use woven fiberglass roving and bondo reain/hardener. After cutting all your fiberglass patches and making sure they lay flat (cut triangles out as necessary), prep the area by wiping it down with acetone. Put on at least 3 pairs of rubber gloves, lay down some cardboard, and mix a small batch of resin. Wet the mat in resin, wrap it around, and repeat until you're done. Remove your outermost gloves as they get too gunky. Let it all harden, and come back in a few hours.
20230805_092435.jpg

At this point, it's a good idea to install the barreled action, torque it down, make sure you can remove the bolt, and do some drop tests to make sure the butt stock is sturdy. Once you pass that, sand it down smooth, and use bondo puddy if necessary to fill in any gaps. Remember, it's a gun stock, not a show car.

Now onto paint. Tape off your nice bedding area, remove the butt pad, grip, and tape off the forward grip pad areas. Figure out a way to suspend the stock, wipe it down with acetone, and spray on some primer. Sand if you feel necessary, and then paint to whatever you deem. My kids liked helping with this part.

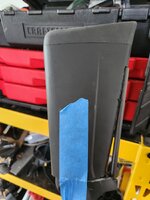
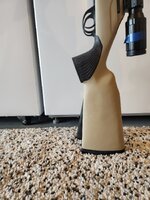
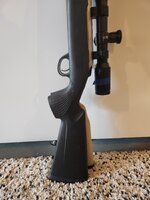
When it's done, you have a stock with perfect bedding, no barrel contact, and greatly improved geometry, flatter bottom, negative comb, negative drop at heel:
20230806_155018.jpg

Take the time to properly mount your scope: https://rokslide.com/forums/threads/scope-mounting-to-maintain-zero.78482/
Spend 10-30 rounds getting zeroed:
Drop test to make sure everything is solid: https://rokslide.com/forums/threads/scope-field-eval-explanation-and-standards.246775/
Work on your practical marksmanship skills: https://rokslide.com/forums/threads/scope-field-eval-explanation-and-standards.246775/
Brag a bit about your 10 shot groups: https://rokslide.com/forums/threads/show-your-tikka-ten-round-groups.172391/post-3199951
And remember to add your photos to the kill threads: https://rokslide.com/forums/threads/223-for-bear-deer-elk-and-moose.130488/
 
Last edited:

Geologist

FNG
Joined
Oct 25, 2016
Messages
52
Location
Coloma, California
I'm looking forward to the rest of your post past step 1. I just free floated my .30-06 T3X stock and I'm excited to see if there is any noticeable change (upcoming Saturday range session).
 

Harvey_NW

WKR
Joined
Feb 13, 2019
Messages
1,549
Location
WA
Interested as well, I'm about to do a bed job on one of mine soon so maybe you'll convince me to attempt pillars while I have it apart.
 

NSI

WKR
Joined
May 19, 2021
Messages
509
Location
Western Wyoming
Fabulous post. Looking forward to the rest. Bedding is still an area of low confidence for my smithing.

-J
 

atmat

WKR
Joined
Jun 10, 2022
Messages
2,632
What’s the total estimated time investment to complete all four steps? Not including waiting/drying time, of course.
 
OP
ResearchinStuff
Joined
Jan 26, 2017
Messages
2,713
Location
PA
What’s the total estimated time investment to complete all four steps? Not including waiting/drying time, of course.

The first time probably about 8 hours. It gets a lot faster with practice, and good directions. Step 4 took me 2.5 hours the last time.
 
Joined
Dec 4, 2018
Messages
2,291
This is awesome. Wish I would have seen this before spending a couple grand on aftermarket stocks that I end up beating the hell out.

It also has my DIY wheels turning…

Think it would be possible to cut the but stock off and install a rear folding mechanism? Some way to rigidly install, say an XLR folding butt into the front half of the tikka?
 
Joined
Jul 30, 2015
Messages
5,734
Location
Lenexa, KS
Do you have issues with the epoxy sticking to the stock? Local gunsmith won't bed factory Tikka stocks because he says the epoxy won't stick over time.
 

atmat

WKR
Joined
Jun 10, 2022
Messages
2,632
The first time probably about 8 hours. It gets a lot faster with practice, and good directions. Step 4 took me 2.5 hours the last time.
Step 4 took you 2.5 hours? What are you down to now for all four steps combined?

I think this is super cool and I would love to try it. Where I struggle is that I have young kids, so time is a premium and a Stocky’s only costs me a net $400 shipped. Heck I don’t even have a saw or dremel lol.
 

Rob5589

WKR
Joined
Sep 6, 2014
Messages
6,243
Location
N CA
When I saw the saw hovering over the stock I was cringing. But it came out really good, nice work.
 
OP
ResearchinStuff
Joined
Jan 26, 2017
Messages
2,713
Location
PA
Do you have issues with the epoxy sticking to the stock? Local gunsmith won't bed factory Tikka stocks because he says the epoxy won't stick over time.

It needs to be rough, and stipled/divoted, but so far so good. I've only lost epoxy that ripped out when I initially removed the barreled action.
 
Top