sndmn11
WKR
Q&A here https://www.rokslide.com/forums/threads/maven-rs-3-5-30x50-ffp-mil-mil-q-a.251009/
Maven RS.3 5-30x50mm evaluation. The test rifle is a 22BR Tikka T3 with 200ish bullets down the tube. It has shown to group under 1.5" for 10 shots at 100 yards in that time. The scope was sent to me by Maven to fiddle with and I had permission to drop it. @HawkinsPrecision rings, a Talley rail, and Grayboe Phoenix completed the setup. I had talked to @Ryan Avery a few weeks ago and he said that @Formidilosus was working on other Maven RS.x evals as this scope was being shipped.
Weight
The scope is listed at 26.9 ounces, I weighed it at the post office and it was close enough I did not take a picture. https://mavenbuilt.com/collections/riflescopes/products/rs-3-riflescope-5-30x50
Turrets
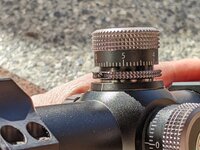
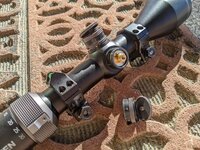
Both elevation and and windage are exposed and reset without tools by the end 1/4 of the cap unscrewing. Elevation has 6mils per revolution, marked 0-5,revolutions are not indicated, and windage has 0, 1L, 2L, 3, 2R, 1R. Click for both are .1mil and marks on both turrets exist for each click. Parallax is marked 20, 30, 40, 50, 60, 70, 100, 150, 200, 300, 500, 1000, infinity. The zero stop is a jam nut with a slotted screw for tightening, a WIHA slotted bit is included for the zero stop.
SHR-Mil Reticle
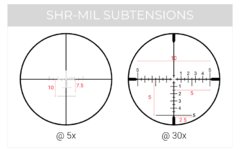
5X 113yds
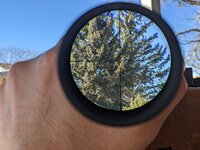
5x
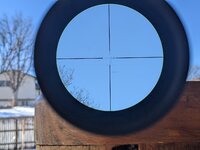
10x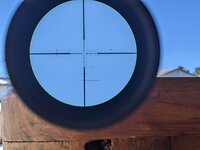
20x
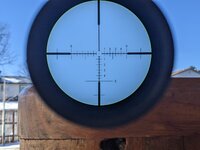
30x
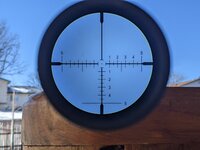
Zero and Return to Zero
@HawkinsPrecision rings and the built in level on the stock co-witnessed, when mounting I am as certain as I can be that the reticle was leveled to match. I had put a few on target earlier in the week and knew the zero was really close. The evaluation was done with a front and rear bag, outdoors near Como, Colorado at about 9500'asl and 40degrees temperature variable wind throughout.
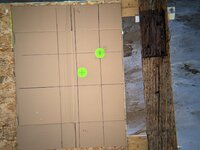
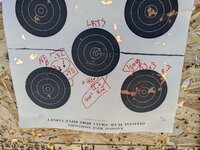
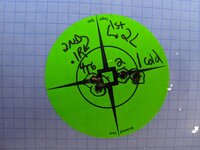
These stickers are 3" across, and the inner marked circle is 1.5". Cold bore and follow up were shot (1, 2), adjustment of .2mil to move impact left was made, three shots (marked 4-6) were then taken. A final .1mil adjustment to move impact right was made. The caps were reset to indicate zero and the zero stop set. I just now realized that we forgot the number 3 existed (doh!), but only 5 shots were made on this spot.
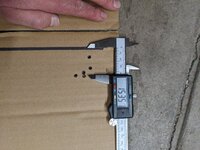
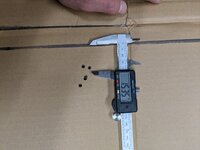
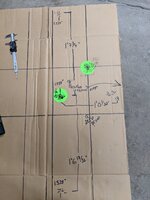
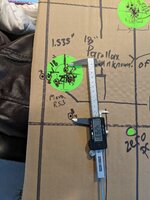
I took a 3' carpenter's level and marked the carboard with plum and level in a few different areas once the cardboard was mounted. From zero, there was about 3.4 full revolutions left on the adjustment. The elevation turret was turned until it stopped at the top end and then returned to zero at least five cycles accounting for a little over 20mils of adjustment each way. So, 20x2 = 40, 40x5 = 200mils adjustment at a minimum, if I got distracted talking or lost count I started over on the count. A picture was taken through the spotter after each shot, and the first four shots were marked because shot 4 was hard to see through the spotter. Shots 5-10 were not marked as it was easier to see their holes through the spotter.
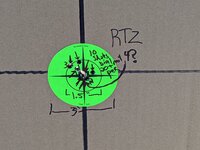
CONTINUED photo limit reached
Maven RS.3 5-30x50mm evaluation. The test rifle is a 22BR Tikka T3 with 200ish bullets down the tube. It has shown to group under 1.5" for 10 shots at 100 yards in that time. The scope was sent to me by Maven to fiddle with and I had permission to drop it. @HawkinsPrecision rings, a Talley rail, and Grayboe Phoenix completed the setup. I had talked to @Ryan Avery a few weeks ago and he said that @Formidilosus was working on other Maven RS.x evals as this scope was being shipped.
Weight
The scope is listed at 26.9 ounces, I weighed it at the post office and it was close enough I did not take a picture. https://mavenbuilt.com/collections/riflescopes/products/rs-3-riflescope-5-30x50
Turrets
Both elevation and and windage are exposed and reset without tools by the end 1/4 of the cap unscrewing. Elevation has 6mils per revolution, marked 0-5,revolutions are not indicated, and windage has 0, 1L, 2L, 3, 2R, 1R. Click for both are .1mil and marks on both turrets exist for each click. Parallax is marked 20, 30, 40, 50, 60, 70, 100, 150, 200, 300, 500, 1000, infinity. The zero stop is a jam nut with a slotted screw for tightening, a WIHA slotted bit is included for the zero stop.


SHR-Mil Reticle

5X 113yds

5x

10x

20x

30x

Zero and Return to Zero
@HawkinsPrecision rings and the built in level on the stock co-witnessed, when mounting I am as certain as I can be that the reticle was leveled to match. I had put a few on target earlier in the week and knew the zero was really close. The evaluation was done with a front and rear bag, outdoors near Como, Colorado at about 9500'asl and 40degrees temperature variable wind throughout.
These stickers are 3" across, and the inner marked circle is 1.5". Cold bore and follow up were shot (1, 2), adjustment of .2mil to move impact left was made, three shots (marked 4-6) were then taken. A final .1mil adjustment to move impact right was made. The caps were reset to indicate zero and the zero stop set. I just now realized that we forgot the number 3 existed (doh!), but only 5 shots were made on this spot.

I took a 3' carpenter's level and marked the carboard with plum and level in a few different areas once the cardboard was mounted. From zero, there was about 3.4 full revolutions left on the adjustment. The elevation turret was turned until it stopped at the top end and then returned to zero at least five cycles accounting for a little over 20mils of adjustment each way. So, 20x2 = 40, 40x5 = 200mils adjustment at a minimum, if I got distracted talking or lost count I started over on the count. A picture was taken through the spotter after each shot, and the first four shots were marked because shot 4 was hard to see through the spotter. Shots 5-10 were not marked as it was easier to see their holes through the spotter.

CONTINUED photo limit reached
Last edited:

