Epoxy River Table

Tremain4414

WKR
Classified Approved
Joined
Jan 15, 2021
Messages
478
Location
Oregon
This project has been in the works for about 7 months now. It all started while my wife was browsing Pinterest and found some pretty cool epoxy river tables that someone was building and selling.

Now our current kitchen table is a $25 deal we found at goodwill, including 6 chairs. I sanding everything down, painted the chairs and coated and sealed the top but with 5 kiddos, it’s taken quite a bit of abuse and is starting to fall apart.

I started researching epoxy river tables and quickly learned some of them go for north of $10k. The more I looked into it though, I became convinced that with my nonexistent woodworking background, I could probably build one of these things.

First thing I did was went down to a local hardwood/lumber store and found a large slab of Myrtlewood which I figured would work great. It has some awesome splits and cracks which I thought would look awesome IMG_4472.png

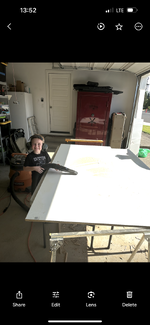
After sanding the slabs, chipping away most of the dead pieces and sanding some more, I sealed the edges and with the help of my youngest boy, built the melamine forms and set it inside.

img_4468-png.666327
IMG_4473.png
This is where the first problems started. I used tyvex tape on all the corners and edges, I went crazy with the tyvex tape to ensure the form didn’t leak but what I failed to do was use the Form Release spray that I had previously purchased and had sitting on a shelf 4’ away from the table. I later paid for that mistake with hours of routering and sanding when I went to remove the forms.

Gotta go pickup the boy from school but will try and continue this evening…
 

Attachments

  • IMG_4468.png
    IMG_4468.png
    785.5 KB · Views: 577

Geewhiz

WKR
Joined
Aug 6, 2020
Messages
2,079
Location
SW MT
What are the dimensions of this table going to be? and What are you planning to do for a base/legs?
 
OP
Tremain4414

Tremain4414

WKR
Classified Approved
Joined
Jan 15, 2021
Messages
478
Location
Oregon
When it’s all said and done and I trim and router the edges it should be 84” long and 40” wide. A buddy of mine knows a local guy who fabricates and sells table legs and bases. Were going to go with this style IMG_4455.png
 

sram9102

WKR
Joined
Oct 31, 2018
Messages
1,009
Location
IN
Did you bowtie any of the cracks? I would be worried about that one in the bottom right hand corner growing over time.

Sent from my SM-S911U using Tapatalk
 
OP
Tremain4414

Tremain4414

WKR
Classified Approved
Joined
Jan 15, 2021
Messages
478
Location
Oregon
I didn’t, but there’s four metal U shaped brackets I routered in on the bottom side and one of them is screwed into that floating crack so I think it’ll be alright? I’m honestly kind of winging most of this based on my extremely limited woodworking skills and YouTube lol

IMG_4459.png
If you zoom in on the picture here you can see one of the brackets. There’s a total of four of them now. This is the bottom of the table
 

TX_Diver

WKR
Joined
May 27, 2019
Messages
2,260
you probably found this already, but Blacktail studios has some cool stuff and helpful videos on YouTube.

An epoxy coffee table is on the list but not super urgent so we’ll see when it gets started. I’m finishing a picture frame and have some bookshelves to do next.

Looking forward to more pics!
 
OP
Tremain4414

Tremain4414

WKR
Classified Approved
Joined
Jan 15, 2021
Messages
478
Location
Oregon
Alright so continuing on….the next major self inflicted issue I had was the expoxy pour itself. I don’t have a shop or anything like that and was basically carving out space in my already cluttered garage to do this project. In my infinite wisdom I decided that two plastic folding tables side by side would be great as a mobile workspace. I got the forms set, leveled I was pretty happy with how it was looking.

I started the pour and after about 10 gallons of epoxy, it became clear that I was going to have a major issue keeping this thing level due to the amount of weight on the plastic tables, causing them to bow and flex. IMG_4474.pngOnce I figured this out, I figured if I over poured it significantly I could cover the entire table since there was no way to move it at this point and no way really to level it that I could figure out. The end result of the pour looked like this:

IMG_4475.png
I spend the first 8 hours or so going out every hour and popping air bubbles with a heat gun. Then went out occasionally and popped them until approximately the first 72 hours or so when the epoxy became tacky. I put several fans over top of the table while it setup. I was impressed with the amount of heat this thing put off while it setup. It’s crucial to keep them cool to keep them from cracking!
 
OP
Tremain4414

Tremain4414

WKR
Classified Approved
Joined
Jan 15, 2021
Messages
478
Location
Oregon
I let the table sit for about 3 weeks or so before I even tried to move it. I eventually got up the courage to try and remove the form. The sides popped off no issue, likely due to the tyvex tape but as I mentioned before the lack of form release or tape on the bottom cause it to be solidly stuck. I chiseled for hours before I finally called it quits and decided to router it off.

The next challenge was gonna be the actual routering of the table. All I have is a hand router. After the plastic table debaucle, I convinced the wife to let me buy a decent kobalt workbench. On the bench, I built another plywood form for the table to sit inside then built a homemade “router sled” to start the laborious and extremely messy leveling and epoxy removal process.

IMG_4478.png
It cannot be understated how messy this process is. It kicks up an egregious amount of epoxy and wood shavings. I tried to figure out a way to rig the shop vac up to the router but couldn’t figure out anything that worked worth a dang. I started this process with a 1.5” straight routing bit I picked up a Home Depot. It did not work well. I had the speed on the router up wayyyy too high and tried to move the router back and forth way too fast. This resulted in big chips in the epoxy which later had to be sanded out…which took forever.

I have probably tried about 7 different router bits on the table and finally found the one that works best for me. I keep the router at 10k rpm and use a 3” wide 4 blade router bit. I’ll try and find the link for the one I bought but it’s got two blades on the bottom at an angle and two on the sides which are straight up and down. Router bits are not cheap at all and I figured out pretty quickly this is one spot you get exactly what you pay for. I tried and tried to make the cheap ones work but finally had to pony up and get the one I have now.

IMG_4479.png
If you look closely you can see the chipping in the epoxy
 

SCHUNTER73

Lil-Rokslider
Joined
Aug 25, 2021
Messages
169
That’s quite an undertaking, but I’m sure the end result will be worth it. I’ve been messing around will smaller charcuterie boards in the river table style. Amazing how much temperature and humidity will affect cure time of the epoxy The first one I smoothed out with my router had some small chips but I found that my flood coat filled them in nicely. Good luck, looking forward to the finished product.
 
OP
Tremain4414

Tremain4414

WKR
Classified Approved
Joined
Jan 15, 2021
Messages
478
Location
Oregon
After getting the bottom of the table sanded down, (I started with 60 grit and moved my way up to 150 for the bottom, I’ll likely go to 220 on the top), I routered in four channels for the metal U pieces in the picture above. I drilled holes and set them into the table then flipped it over to start working on the top of the table.

I then immediately realized the table was bowed with the sides being approximately 1-1.5” higher than the middle (thanks again plastic tables). If I tried to router the table like this, I would have been lucky to end up with a 1/4” veneer of epoxy table left.

What I decided to do instead was slowly start bending the table back to true, or as close as I could get it. The first thing I did was steal every heat lamp or space heater I could from friends and family to heat up the epoxy. As I was heating the table, I placed four 2x4 brackets across the top with clamps on either side to start bending it back into place.

IMG_4459.png
I don’t really have any decent pictures of the “straightening” contraption I came up with other than this one. Even with it pulling back to flat with every clamp I had, the sides would still pop back up when released from the clamps. I ultimately had to place a 2x4 long ways up the center of the epoxy river and “over bend” it past flat so it was actually bending the opposite direction. I left if like this for about a week before slowly cooling it and loosening the tension on the clamps. The end result of this was the table was close to flat, maybe a 1/8” off or so but good enough for me.

I started on the process of removing excess epoxy and flattening the top of the table this week. So far this is as far as I’ve gotten and what the table looks like right now sitting in my garage:

IMG_4480.png
I’ve still got more routering to do obviously, then hours and hours of sanding, finishing, sealing, etc before she’s finished but I’ll try and update this thread as it progresses.

This is by no means at all even a little bit meant to be a tutorial on how to build one of these things. If anything it’s an example of what not to do. But I’ve had a ton of fun with this project and found it uniquely challenging and rewarding. I have no clue how it’s gonna turn out but I’m glad I did it and would recommend it to people who are on the fence or who think it’s cool. I definitely suggest starting out with something smaller though like a charcuterie board or maybe a coffee table! Thanks for reading!
 
Joined
Jan 26, 2013
Messages
977
Location
Colorado
A for effort, and keeping a seemingly cool head.

Definitely a tutorial on how not lol…
but the end result will undoubtedly still be awesome, just a few dozen extra hours:)
 

packer58

WKR
Joined
May 28, 2013
Messages
994
Yep, that's quite the undertaking for someone without a fair bit of woodworking skills. Deff want to see the progress and final product .............
 
OP
Tremain4414

Tremain4414

WKR
Classified Approved
Joined
Jan 15, 2021
Messages
478
Location
Oregon
IMG_4481.pngI think I went through two bottles of this stuff, a little goes quite a ways


IMG_4482.pngAnd I ordered 8 of these, I ended up using 6.5 of them and used the rest to make a charcuterie board for my wife and one for a friend as a house warming present
 
OP
Tremain4414

Tremain4414

WKR
Classified Approved
Joined
Jan 15, 2021
Messages
478
Location
Oregon
IMG_4483.pngAlso this is the route bit I finally found that worked best for me for those who are curious. Guess it’s 2.5” but so far it’s leaps better than anything else I’ve tried
 

TX_Diver

WKR
Joined
May 27, 2019
Messages
2,260
View attachment 666582I think I went through two bottles of this stuff, a little goes quite a ways


View attachment 666583And I ordered 8 of these, I ended up using 6.5 of them and used the rest to make a charcuterie board for my wife and one for a friend as a house warming present
10-4. 72 hours is a long time so I was curious if you used a deep pour epoxy or not. Looks like you did.

I'm taking notes for when I get around to my project.

Thanks!
 

Cady Creek

Lil-Rokslider
Joined
Jul 25, 2020
Messages
113
Location
Upper Michigan
Cool project and kudos on the patience and stick-to-itiveness. I'd have introduced that thing to my chainsaw, gas can, and infamous bic lighter in short fashion after the first couple issues!:LOL:
 
Top