


Early Season Elk Tactics “Go High or Go Home”
By Aron Snyder
The peak of the rut is by far the most sought after time to head out west and harvest an elk. The cows are going into estrus, bulls are screaming all night long and the potential to get face to face with a rut-crazed bull is very likely. Now I agree that encountering all if these things in the wilderness is certainly an elk hunter’s dream, but for a real kick in the pants adventure, early season at 11,500 feet is where it’s at!
FINDING YOUR AREA
Preseason scouting is always your best bet, but if you don’t have the option of putting boots on the ground, then Google Earth and Internet hunting forums are the next best things. You’re not going to get free hand outs to honey holes on hunting forums, but you will get enough info to get you pointed in the right direction. Once you get a decent idea of the general area you want to hunt, kick Google Earth into gear and start getting specific.
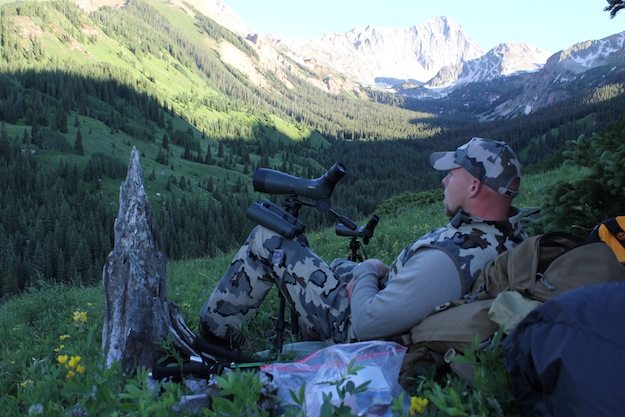
When I’m looking at aerial photos and imagery, I’m concentrating on three things; bedding areas, feeding areas and water. Once I’ve determined those areas, my next step is to locate vantage points that will put me in areas that allow my optics to do the majority of the work for me. Finding glassing points like this is imperative when hunting elk before the rut kicks in. Glassing is your biggest advantage.

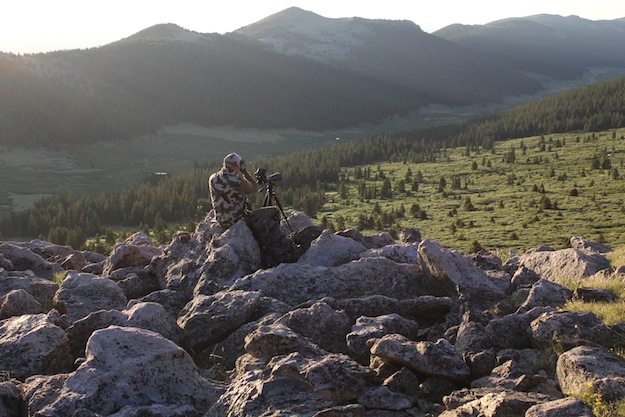
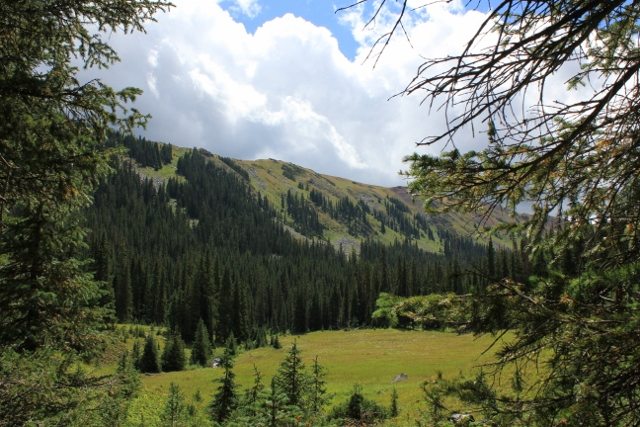
These early season areas (depending on the state your hunting) are going to look more like sheep and goat country than elk, and pinpointing high basins and large meadows with patches of trees will be the key to success. Once you have a few potential areas picked out on the map, you’ll want to check the access. If it’s relatively easy to get there, then your chances of running into other hunters as well as granola packing hikers is pretty good. This is not a deal breaker by any means, but make sure that you’re not going to be wasting your time on an area filled with people.


After all those things are considered and you have you’re new spot picked out, then I highly suggest taking a 4-day weekend and burn up some boot leather. This may not be an option due to time constraints and money, but Google Earth and maps will only take you so far and getting an “eyes on” the area is hard to beat.
SPOT AND STALK TACTICS
There are several ways to skin this cat, but my preferred method before the rut is a spot and stalk bivy style hunt. This means catching the elk in large groups while still in summer feeding patterns. It’s amazing the amount of elk you’ll see above treeline in the late August/early September months and sightings of 50-100 elk a day are not out of the question. Using the spot and stalk method is going to require a good amount of physical conditioning, but above and beyond that, you’re going to need patience and a decent amount of time behind your optics!

The second weekend of my 2011 Colorado elk hunt is a great example of what can happen when everything (everything but patience anyway) is implemented. I spotted 23 cows and 1 large bull 3 miles from my glassing position and these elk were right below tree line at 11,500 feet. I glassed for over 2 hours keeping track of their movements and position in hopes to make a stalk that afternoon. Just before noon, I gathered my gear, shot an azimuth and started making my way to them. Just before 2 pm I found myself just below their last position.
I could see the elk clearly now and they were about 600 vertical feet above me and for the most part, all of them were bedded. I knew that the amount of eyeballs would be a potential issue and I couldn’t get a good fix on the bull, so I slowly made my way up to tree line keeping myself in the middle of the largest strip of trees I could find. Around 4 pm I decided to drop my pack and move out with rolling gear only, this would definitely give me an advantage in close quarters and in reality I was flat out tired of hauling all of my gear anyway.
I now had closed the distance to 400 yards and felt this was as close as I should get until the wind stopped swirling. So I crawled underneath an overhanging branch, checking the wind every few minutes, with eyes on the target at all times. My current set up and position would be as close to textbook as you could find for a spot and stalk ambush situation, but the wind would be the biggest deciding factor for success.
Just after 5 pm I got my first close up look at the bull and the excitement of the 340 inches on his head got the best of me! I quickly checked the wind and it seemed good enough at the time to make a move on him. I pushed my way up the mountain, closing the distance to 65 yards without the bull having any idea of my presence. All I needed to do now was sit tight and hope he fed towards me.
Well, being patient was about to show its importance and the wind started to swirl with cows less than 25 yards from my position. Knowing the swirling wind was about to crush the last 5-hours of work, I quickly poked my head out to get a range on the bull. He was 43 yards away with a steep angle, so I deducted a few yards in my head and went to full draw. At that moment my draw stops hit my limbs and the earth erupted and elk were turning inside out all over the mountainside.
I obviously didn’t get a shot at the bull, but a few minutes later the wind died down and in reality, a bit more patience would have landed me a trophy public land bull!
COLD CALLING
The basic idea behind cold calling is simple; set up in a good area that holds elk and do several calling sequences with hopes a nearby elk would stroll in to find out what’s going on. This is a great tactic in the early season, but I’ve always hated doing this in the middle of dog hair thick timber, wondering if anything is within half a mile. My visibility is limited and in reality I have no idea if something is coming my way or not, but when applying this tactic at high altitude, it can be down right deadly!
Here’s how I integrate cold calling and above tree line hunting to my advantage:
If I have glassed up elk in an area that looks to be to thick for a realistic stalk, then I will try and get as close to that area as possible and start my calling sequence. This is not exactly cold calling since I already know there’s elk close by, but I don’t have a pin point location on them, so it’s really not much different than calling in an area that you know holds elk, with the only difference being you’ve seen these elk in the recent past with your own eyes. You just need to make sure the wind is right (or what you think is right anyway) and get in a good covered position that allows for multiple shooting lanes.
As far as calling sequences go, a little goes a long way in the early season and blowing on an estrus call or bugle every ten minutes is going to do more harm than good. Try to use soft cow and calf calls with an occasional soft bugle. This is usually more than enough to perk the interest of any elk within earshot. If anything responds to your calling sequence, use that elks’ demeanor and excitement level as your guide for what to do next. To be honest, once you see or hear an elk getting somewhat close (and you’re and inexperienced caller), it may be best to just set the call down so you don’t screw anything up. This will be hard to do, but it may be a better option than guessing what call to use when elk are in close quarters.
Something else that I have found that works miracles when using this tactic is a decoy. I pack my Heads Up decoy everywhere I go and it can definitely make a difference in getting an elk within bow range, especially if your hunting solo and need some type of distraction 50-60 yards behind you. Anything you can do to get the bulls eyes of your position is going to be a bonus, but make sure you take the wind into consideration when setting up the decoy and use both of them to your advantage.

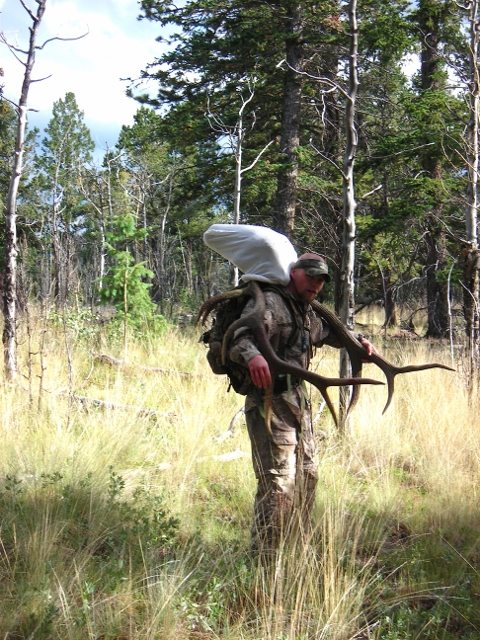
TAKING CARE OF THE MEAT
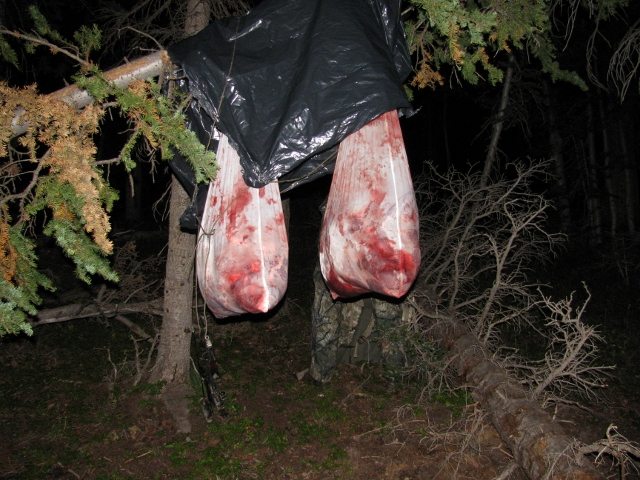
If you get lucky enough to harvest an animal, your work has just begun and you’ll be better off if you have a plan ahead of time rather than making things up as you go! Like I said, this part of the hunt isn’t easy and each situation is going to be different, but I highly suggest that you debone your animal to get rid of extra weight. If you’re solo and you have 5 miles to the trailhead and temps during the day of 70 degrees, then you better start looking for patches of snow or a nice cold creek to set you meat in. At any rate, get the meat cooled off as fast as possible and do everything you can to keep it cool.
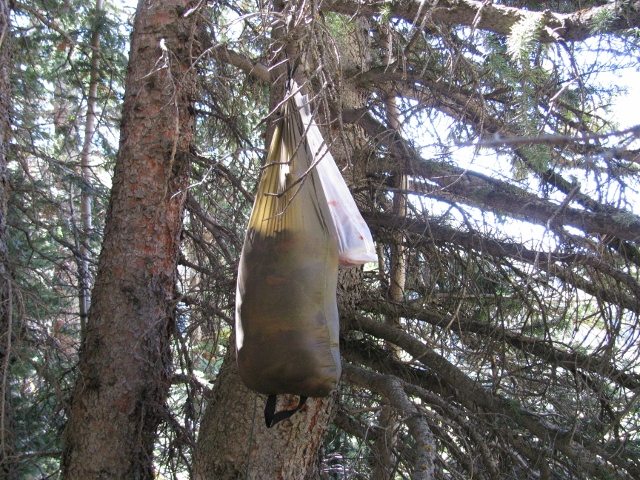
I have left game meat laying in a creek for over 5 days on many different hunting trips without issue, just make sure you have contractor bags to put the game bags inside. Another option is hanging the meat in a tree, but this will only work for a short amount of time unless you’ve found a real cool area in north-facing timber.
After the animal is broken down your going to need to figure out how many trips it’s going to take and how many trips you can handle. If you’re solo and feeling froggy, then 3 trips is possible, but I would say that’s more the exception than the rule! You just want to make sure you don’t bite off more than you can chew! Either way, you need to take your physical conditioning, distance to the truck and daily temps into consideration and then plan accordingly from there.

Gear for the hunt
These early season hunts can be extremely physically demanding and with that in mind, I try and keep them less than 5 days. The good thing about a short backpack/bivy trip is the amount of gear needed and for these short excursions I really go with a bare bones mentality.
Backpack
I would recommend a pack with a minimum volume of 4,800 cubic inches with the ability to carry at least 80lbs. The Kifaru Timberline 2 is an easy choice for me, weighing in at 5 lbs 9 oz’s, it also has ability to haul 100+ lb loads with relative ease. This type of lightweight and versatile pack is going to be perfect on hunts like this.
Badlands, Kifaru, Kuiu, Eberlestock and Mystery Ranch all make great hunting packs and have proven themselves many times over, just make sure you get the pack that fits your needs and hunting situation best.


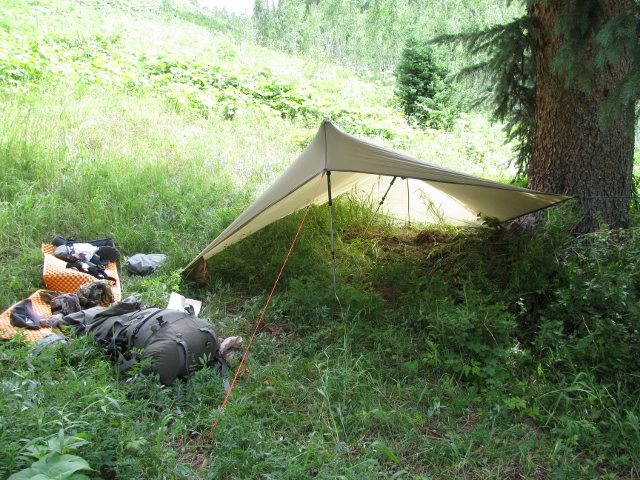
Shelter— Big Agnes 3 Wire and Kifaru Supertarp
I will usually take a bivy sack or tarp for these hunts, but the general idea is keeping your shelter weight under 2 lbs. If the forecast looks bad, I will take both the tarp and bivy to allow for more protection and versatility, but when I need to go as light as possible, the bivy is all I will bring.

Sleeping Bag—Kifaru 20 degree Slik Bag, Western Mountaineering Sycamore
Since I’m usually bringing a bivy sack, I will normally pack along a 20 or 30-degree bag to lighten the load. Just remember that most bivy sacks will add 5-10 degrees to the comfort rating of your sleeping bag and any amount of weight you can drop from your pack is a bonus.
Sleeping Pad— Exped UL Syn7 and Thermarest RidgeRest
Since these hunts are normally in some really rough country, I always take a foam pad at a minimum, but sometimes I will take an air pad and double it up with the foam pad for extra durability and comfort. You do get an added weight penalty with this, but the comfort is usually worth it.
Stove— JetBoil SOL or SOTO OD 1-R (sometimes)
The weather is usually pretty favorable in the early season and eating warm food is something I can do without, so a stove is generally not on the packing list for this type of hunt. The other downside to a stove and freeze dried food is that it takes 16 oz’s of water to cook them and anyone that has ever hunted in the high country knows that water can be scarce in some areas. I know that elk need water every day, but elk are in much better shape than humans and the local watering hole could mean a 1000-foot drop and a lot of wasted energy. If you do need warm food, then the JetBoil SOL will be worth its weight in gold.
Clothing
I don’t bring much more than the clothing on my back, but here’s my standard packing list for clothing on a 5-day hunt.
2 pairs of socks (Darn Tough), 1 worn in and 1 in my pack
1 set of underwear (Merino wool)
Kuiu 185 Zip or FirstLite Llano
Kuiu Attack pants
Kuiu Guide Jacket
Kuiu Chugach rain pants
Kuiu Spindrift (cold weather depending)

If you factor in the low amount of rain that Colorado gets and the DWR finish that Kuiu’s guide jacket offers, I rarely need to bring a rain jacket along, but if I do, than the Kuiu Chugach is my first choice. This will obviously vary depending on the area or state your hunting and other items may need to be added accordingly.
Boots
This hunt is going to be in the early season, so a lighter weight synthetic boot is always my suggestion. The Mountain Light from Lathrop and Sons is my choice every time.
Miscellaneous
Game Bags—Caribou Bags, Kifaru Meat Baggies or TAGS bags will work perfect; just make sure you have enough to handle the entire elk. I would also suggest taking a couple contractor bags in case you need to leave your game lying in a creek to keep it from spoiling.

Knife—The Havalon knife is something I never leave home without. These knives allow me to save several ounces compared to a regular knife and sharpener, and whenever they get dull you just swap out the blade. I would also bring along a camp/survival knife to for heavy use. I’ve been using a folding knife from Lone Wolf lately and it has served me well.
GPS— I don’t always carry a GPS, but when I do, it’s a Garmin Oregon 550T. You need to keep in mind that you’ll be coming back to camp after dark and finding a bivy sack at night can be more difficult than you think.
Headlamp—One headlamp will be fine on hunts like this, but bringing two won’t hurt either. Anything from Petzl is worth its weight in gold, just make sure one offers a red lens option and the other puts out 170+ lumens.

Water Filter— I have used a Katadyn Hiker Pro and Aquamira water drops for several years and they have saved my bacon on many occasions.

Communication— If I’m going solo and my wife is worried I may die, then I will pack along my Iridium 9555 satellite phone. This very expensive piece of equipment, but has probably saved my marriage many times over! Just remember that you may be able to afford a new wife for what you paid for it. If you’re looking into getting a sat phone and will only be using it for 1 trip a year, then I would highly suggest renting one. You can get these for about $10 a day and texting is free.
The other option is the SPOT locater beacon. This is a great way to let your family know that your alive and kicking, but also have the options to call in rescuers if needed.
Optics
Spotting Scope—I’m pretty much addicted to the 85 mm Zeiss Diascope, but it does add some weight to the pack. Most guys I know choose a 65mm over the 85 for weight savings, but I like the added light gathering and field of view so the extra weight is worth it.
Tripod—The Outdoorsman medium tripod has proven itself many times over and is my top pick for any backpack style hunt.
Binoculars—I carry 10×42 Zeiss FL’s, but keep in mind, the spotter is doing most of the long distance work, so 8 power binoculars are plenty powerful enough when combining the two.

Bow and Arrow Rig
Arrow Weight—It seems the ultralite arrow and super speed bow mentality is taking over the bowhunting industry, but I strongly disagree with this thought process. Elk are large animals and a heavy arrow flying down range at a moderate speed is going to out penetrate a lightweight fast arrow every time. I would recommend sticking with a minimum arrow weight of 430 grains and keep your benchmark for speed above 265 fps. This will give you plenty of KE with the added momentum needed for big game.

Bow—I currently shoot an Athens Afflixtion, but whatever the bow you choose, make sure it’s tuned and leveled correctly. The high country has very little flat ground so be prepared to shoot at steep angles with poor footing.
Broadhead—The never-ending debate between mechanical and fixed broadheads is still going strong, but for elk, I always suggest a good fixed blade broadhead.
My Current Archery Set Up
Bow—Athens Afflixtion
Poundage—74 lbs
Draw Length—29
Arrow—Gold Tip Kinetic 300’s (489 grains flying at 284 fps)
Broadhead— Wacem 125 Exit
Arrow Rest—Trophy Taker
Stabilizer—B Stinger
Release—Carter Quickie
Quiver—Tight Spot
Sight—Montana Black Gold Ascent 7 pin


“Plan B”
Several of the OTC units in Colorado offer something called a “list B” tag. Having this in your pocket during a hunt will allow you to drop a cow and still keep your bull tag unfilled. I buy list B tags every chance I get!

Summary
The general idea behind early season elk hunting is seeing the elk before they see you and capitalizing on this advantage. This gives you the upper hand when the elk aren’t vocal as well as the confidence in actually knowing the elk’s location. I will say that you shouldn’t be choosing this type of hunt because you’ll be knocking down a monster bull each trip, but more for the experience, scenery, physical challenges and the potential to hunt unpressured elk.


