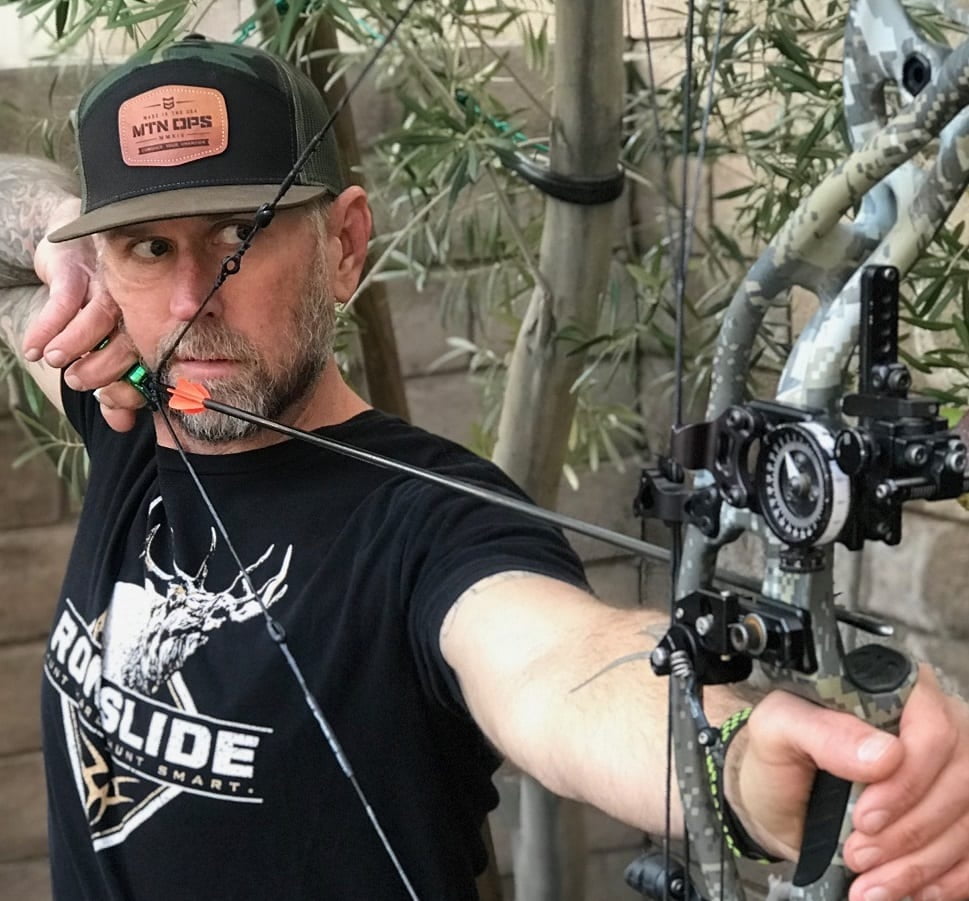
Whether you are starting out shooting a compound bow or are an experienced compound shooter that just needs to get back to the basics, this article is for you. The steps leading up to the release of an arrow are crucial in consistently hitting your targeted mark. In this article I will walk you through step-by-step the correct order to help with proper form and execution of the shot. Before starting these steps, we will assume that you are set up with correct draw length and peep height (some good tips at the 6:00 minute mark here if needed). After following some of these steps, though, you might find that you need to raise or lower your peep or maybe even adjust your draw length.
As I explain the shot sequence, only two kinds of releases will be demonstrated.
- An index finger trigger release
- A thumb barrel release.
Both releases are great for bow hunting, but it really comes down to personal preference. Back tension or resistance activated releases won’t be used in this article, but the basic principles still apply if that is your preferred style of release.
There is a lot of information out there on the web at your fingertips that explain the steps to shooting a bow. About 80-90% of all articles have the same basic principles, but I have my own little variations that relate to bowhunting. Being that I am a teacher, hopefully my explanations on the how-tos and diagrams reach minds a little differently. Here are the steps in the order that I take each and every shot.
Stance
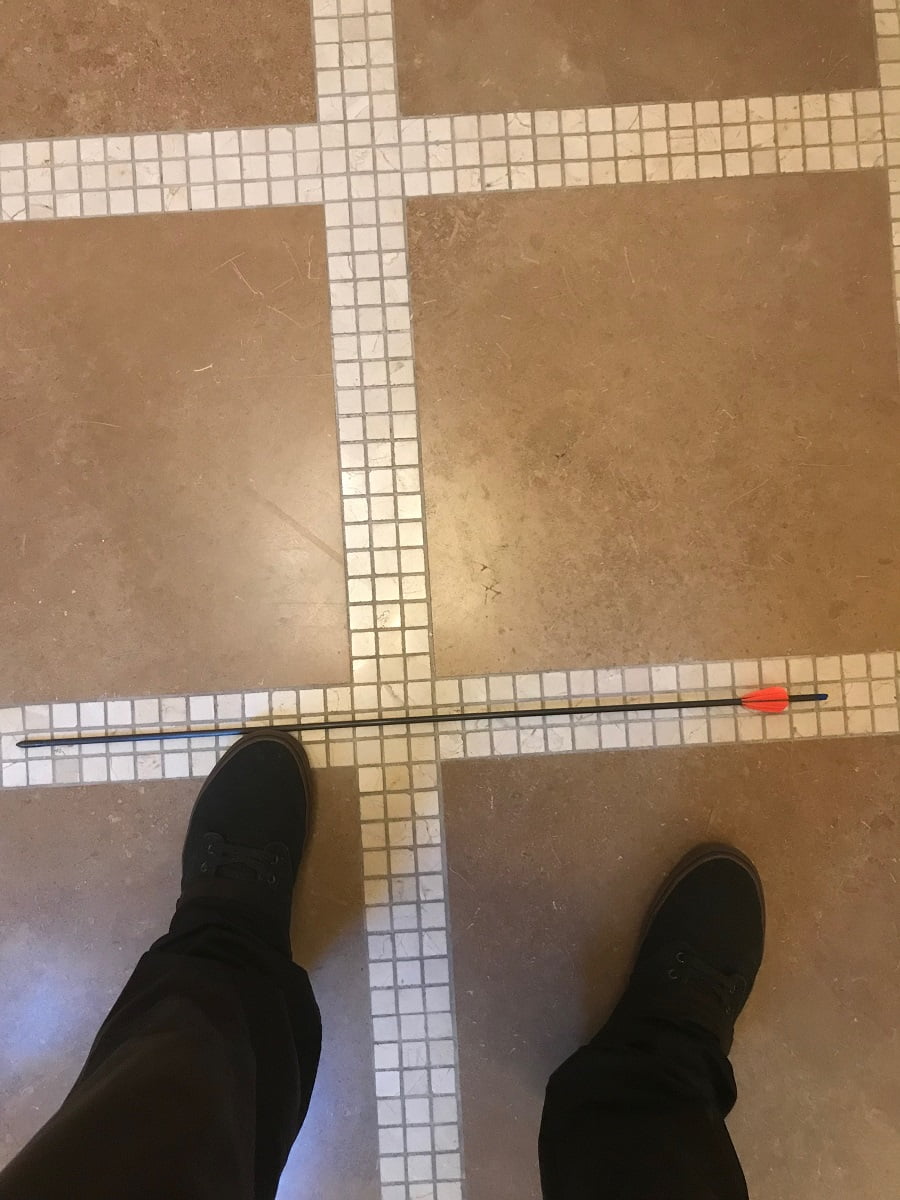
First is your feet or your “base” when shooting a bow. This is where you want to start each and every shot. Like many sports, if your feet aren’t right, the rest of your form will suffer. Look down and check to make sure that your feet are hip width apart when standing perpendicular to the target. Your front foot should point at 11 o’clock for righties and 1 o’clock for lefties. The back foot will be straight up at 12 o’clock. You don’t want your front foot pointing at the target as that will cause you to open up at full draw. You also don’t want your front foot turned in because that will close you off, keeping you from being able to posture. Both of these will cause incorrect alignment at full draw. As you can see in these pictures, the first image is the only correct foot alignment. For lefties all of these photos would be mirrored.


When hunting on uneven ground or maybe on a knee, a lot of that goes out the window right? Not really, but kind of. If you need to shoot from the knees, do your best to shoot from both knees and not one. This will give you a much better base like standing on two feet.
If you are standing on a steep slope/sidehill, try to make sure the downhill foot that is your base doesn’t shift your hips and allow them to “hitch”. You need to keep erect if at all possible so that your upper body form doesn’t suffer and create a bad shot. We won’t get into shooting uphill and downhill angles where you need to pivot without hitching the hips. That is another article
Grip
This is REALLY important. You want the grip to sit right down the heel of your thumb in your palm. Do not let it cross your lifeline or center of palm. Make sure that your thumb is pointing in the 1 o’clock position for righties and 11 o’clock for lefties. Now don’t actually point the thumb but if you were to that would be the direction.
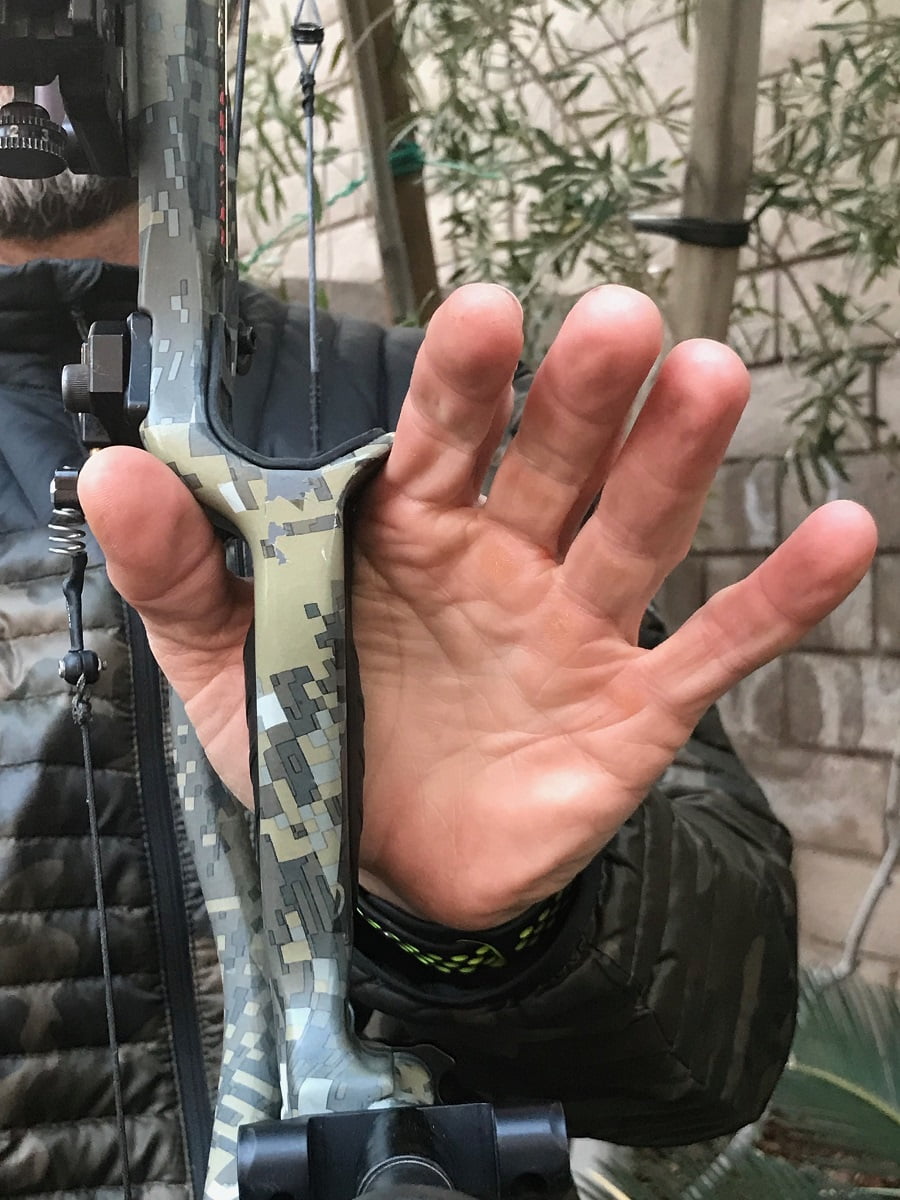
With the grip in this position, the force of the bow will line up through your arm all the way to your shoulder which we will get into in the next step. One thing that I try and help people with when it comes to grip is when at full draw, you want your fingers to act dead like. No flex whatsoever in the digits or you will cause torque in the bows riser and that can and will cause erratic arrow flight and a bad POI.
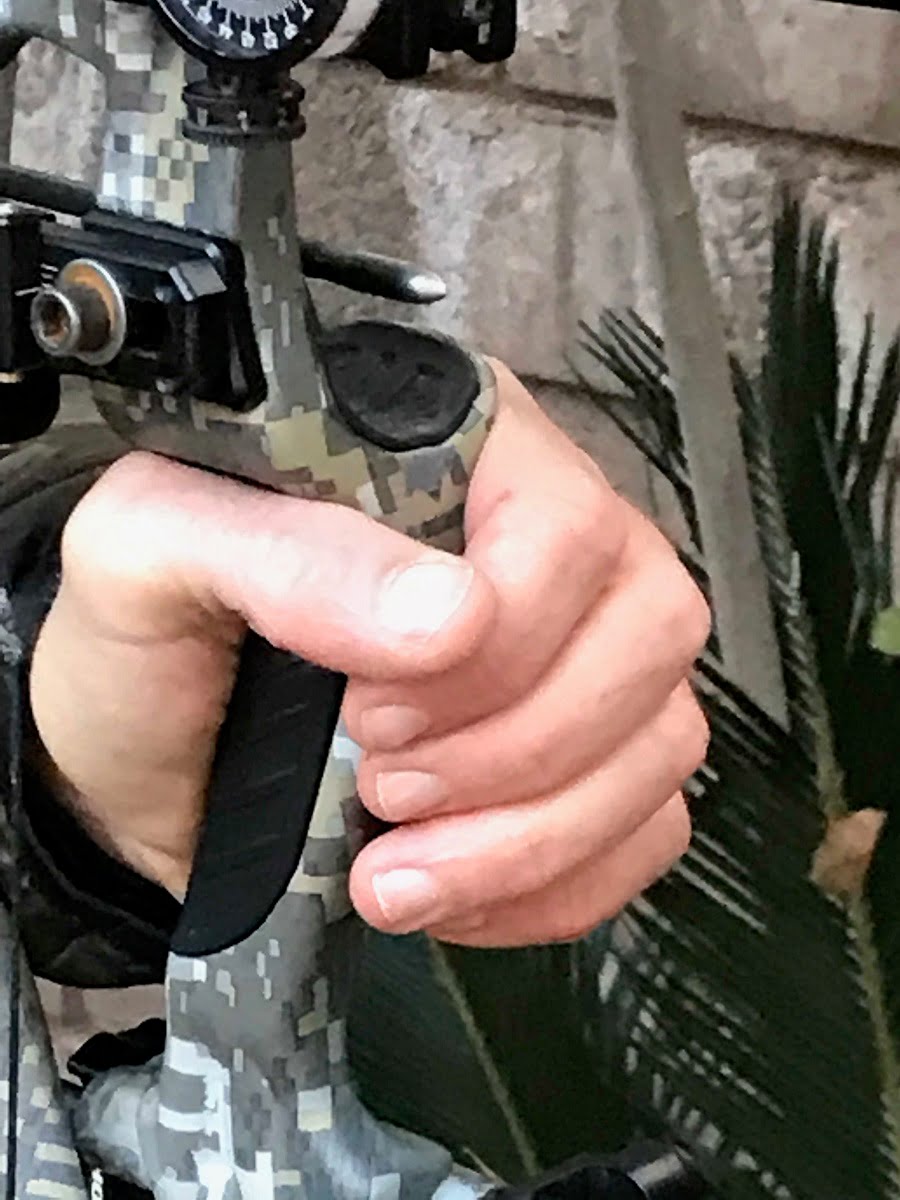
I will usually demonstrate for them and let them flick my grip fingers at full draw to show them how limp and dead like they are. This is when my brain shifts to the next step: bow arm and shoulder.
Bow arm and shoulder
Now that you understand the grip, we can start on the draw cycle. What I like to do because I am a bowhunter is nock an arrow, clip on the release, and set the grip. All of this is done with your bow down in front of you with your front arm straight.
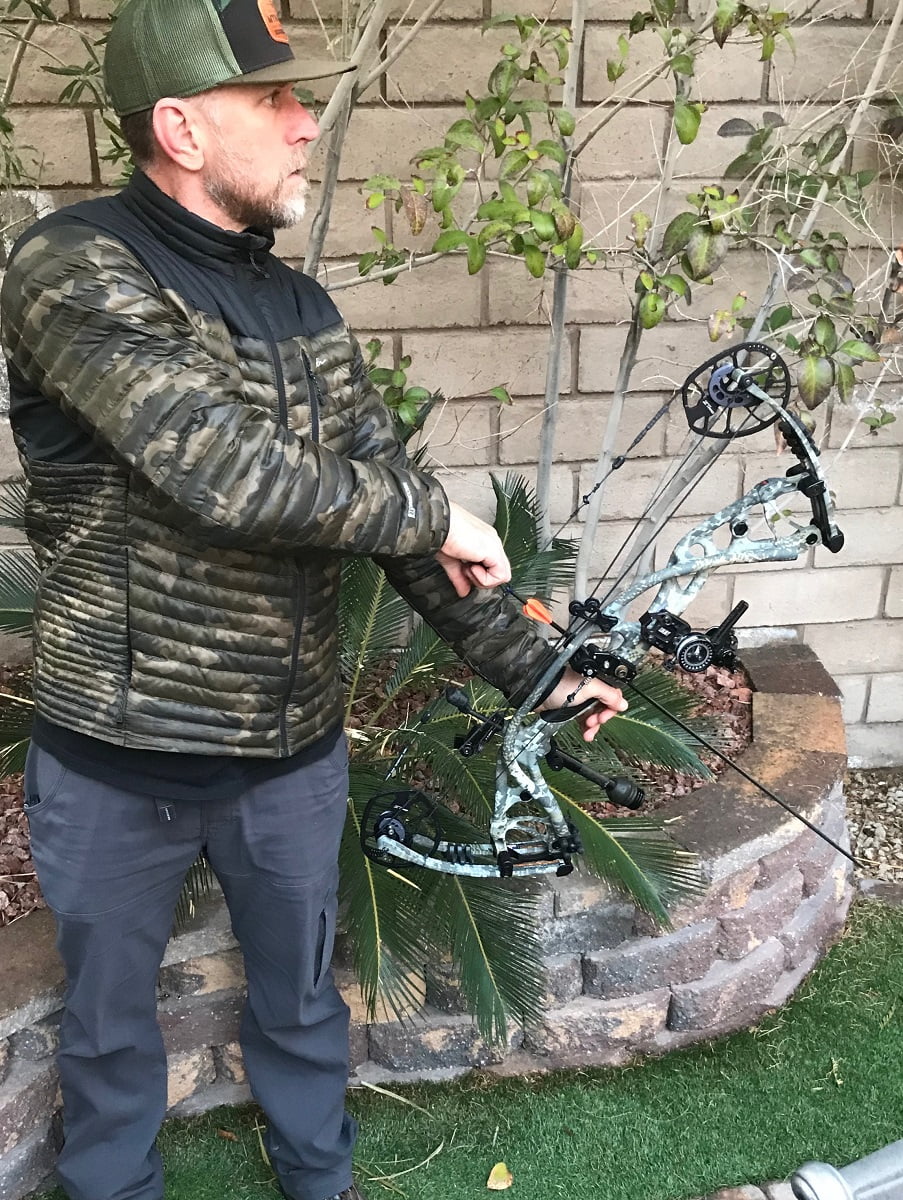
Now raise your bow level with the target. Make sure that your elbow isn’t facing down but out at 8 o’clock for righties and 4 o’clock for lefties. This keeps you from locking out and taking a string lashing. In this pic you can see what I mean. Your arm should never be bent.
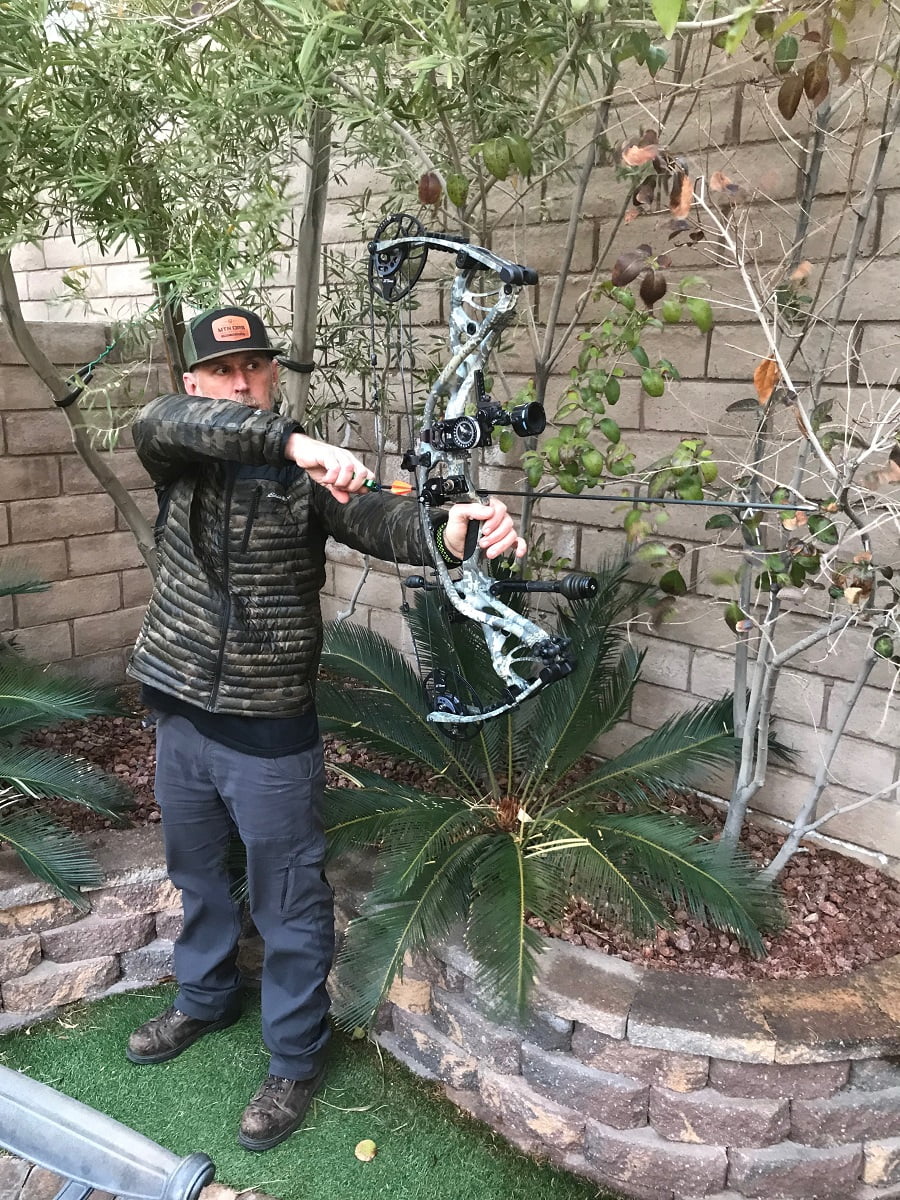
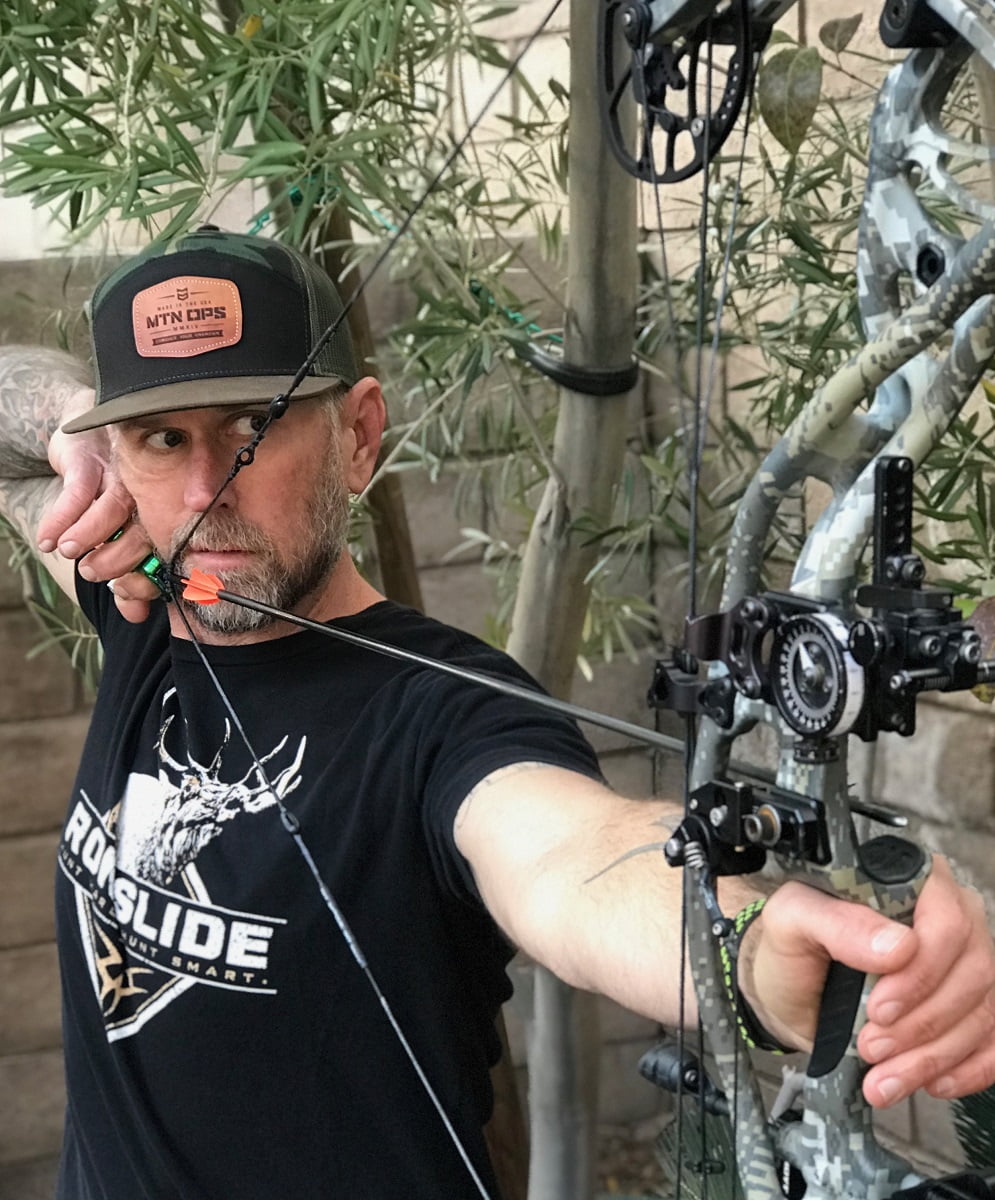
I don’t recommend starting high and coming down on the target. As a bowhunter, less visible movement the better. Now with your arm out level with the target, draw straight back until you hit the back wall. Make sure that your shoulder is down and away forward and not turned in the entire time you are pulling back.
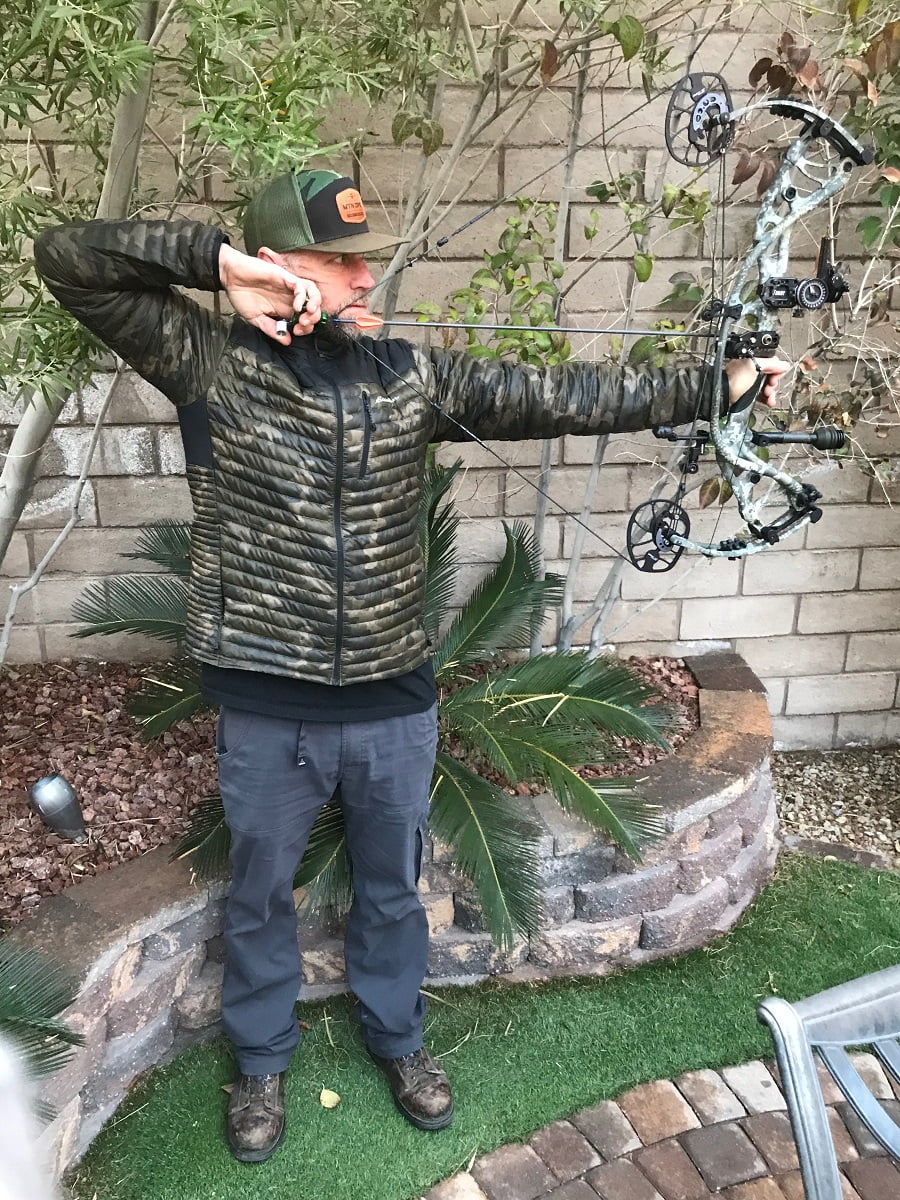
The arm straight and shoulder down will make a huge difference when pulling through the shot. If your shoulder gives in or your arm bends, it will hinder pulling through the shot. It isn’t a give and take but more like a push and pull.
Anchor and alignment
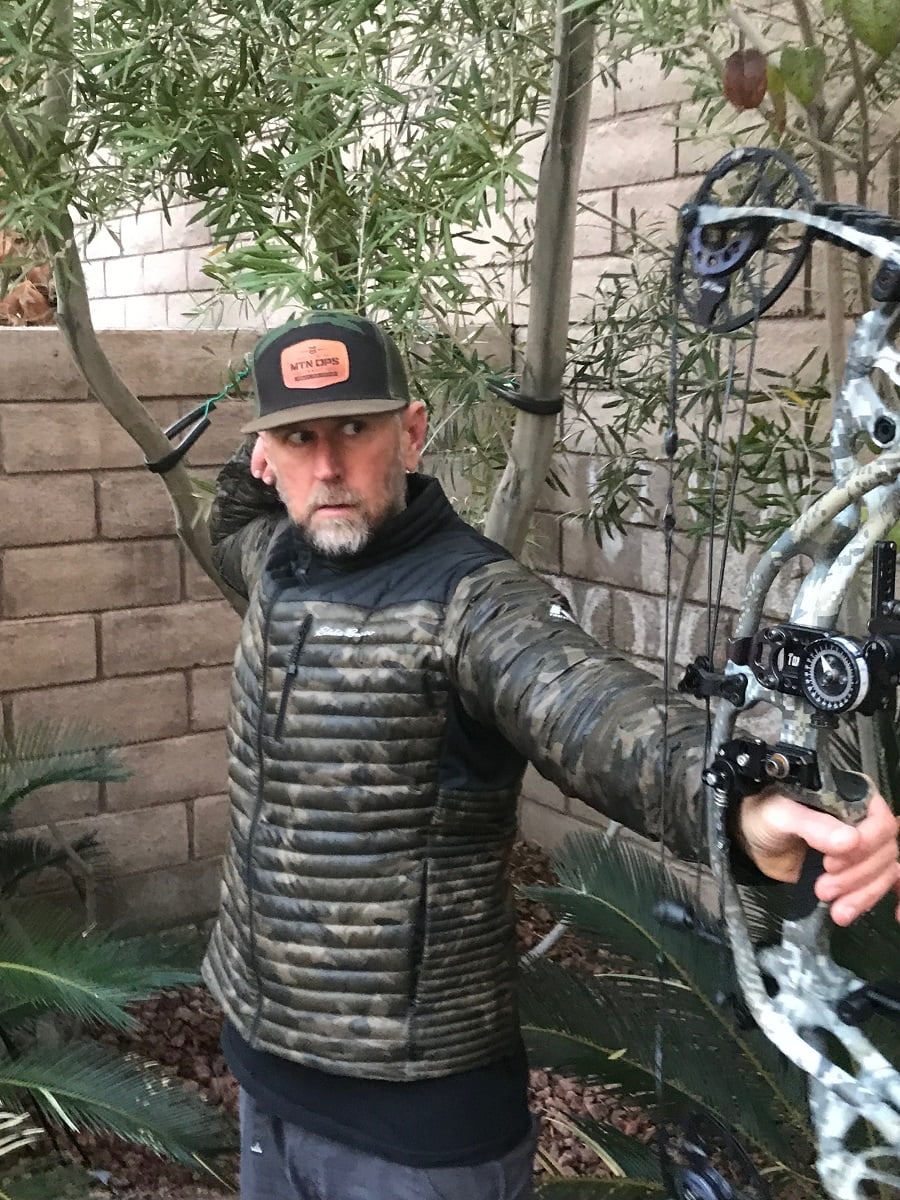
At full draw, make sure that your bow arm and rear elbow are in alignment and you are fully postured in T-form (like the photo above) and arms aligned from above as in this diagram:

Postured is when you are upright with chest out and not rolled or caved in (standing proud). This is very important in keeping a tight draw that will help with a solid anchor and a pull through with the scapular muscles.
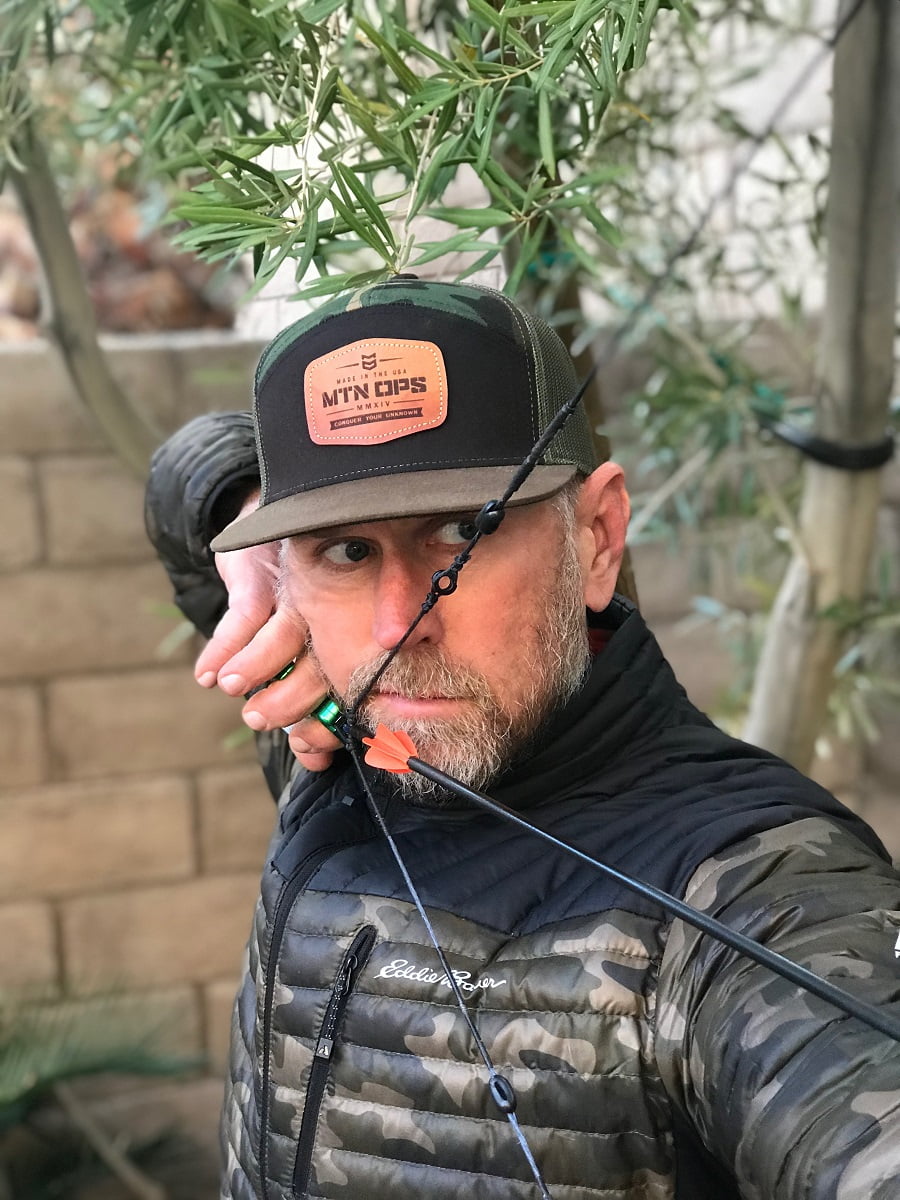
Now that you are postured and against your back wall, it’s time to anchor. Repeating the same steps to anchor every time will eventually build muscle memory and consistency. Now bring your release hand up and into your anchor location with your head upright and not leaning forward or back (a slight tip towards the string is okay.) For finger triggers, the index fingers’ third knuckle should lock right under your earlobe and into the pocket behind the bend of jaw bone and your finger over the trigger at the second knuckle.
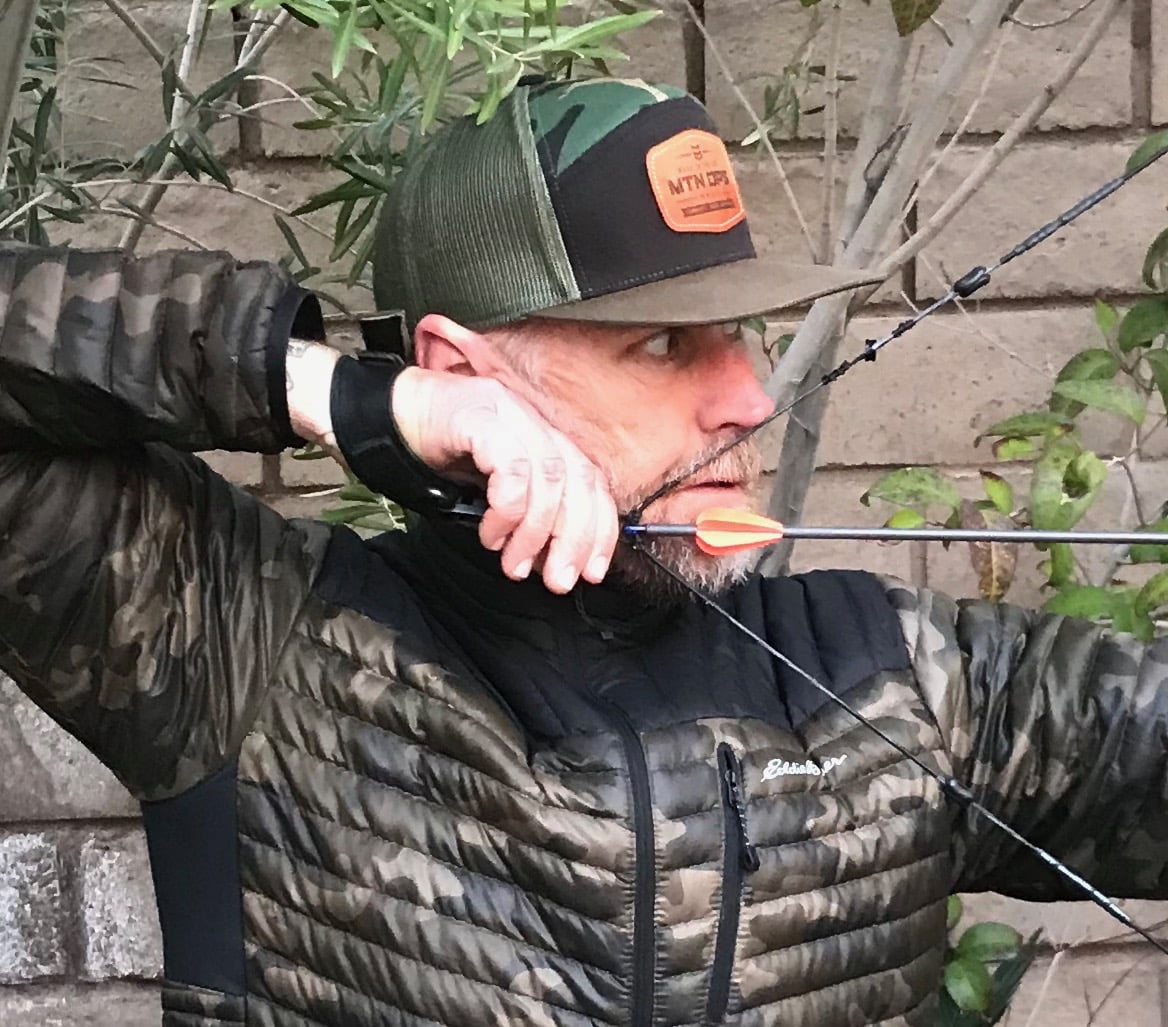
For thumb barrel hand releases, make sure your hand is flat and curled at the second finger knuckles. When the hand comes to the face, have the index finger under the jaw line and the middle finger over the jaw line so that you can ride the jaw line when pulling through of the shot.
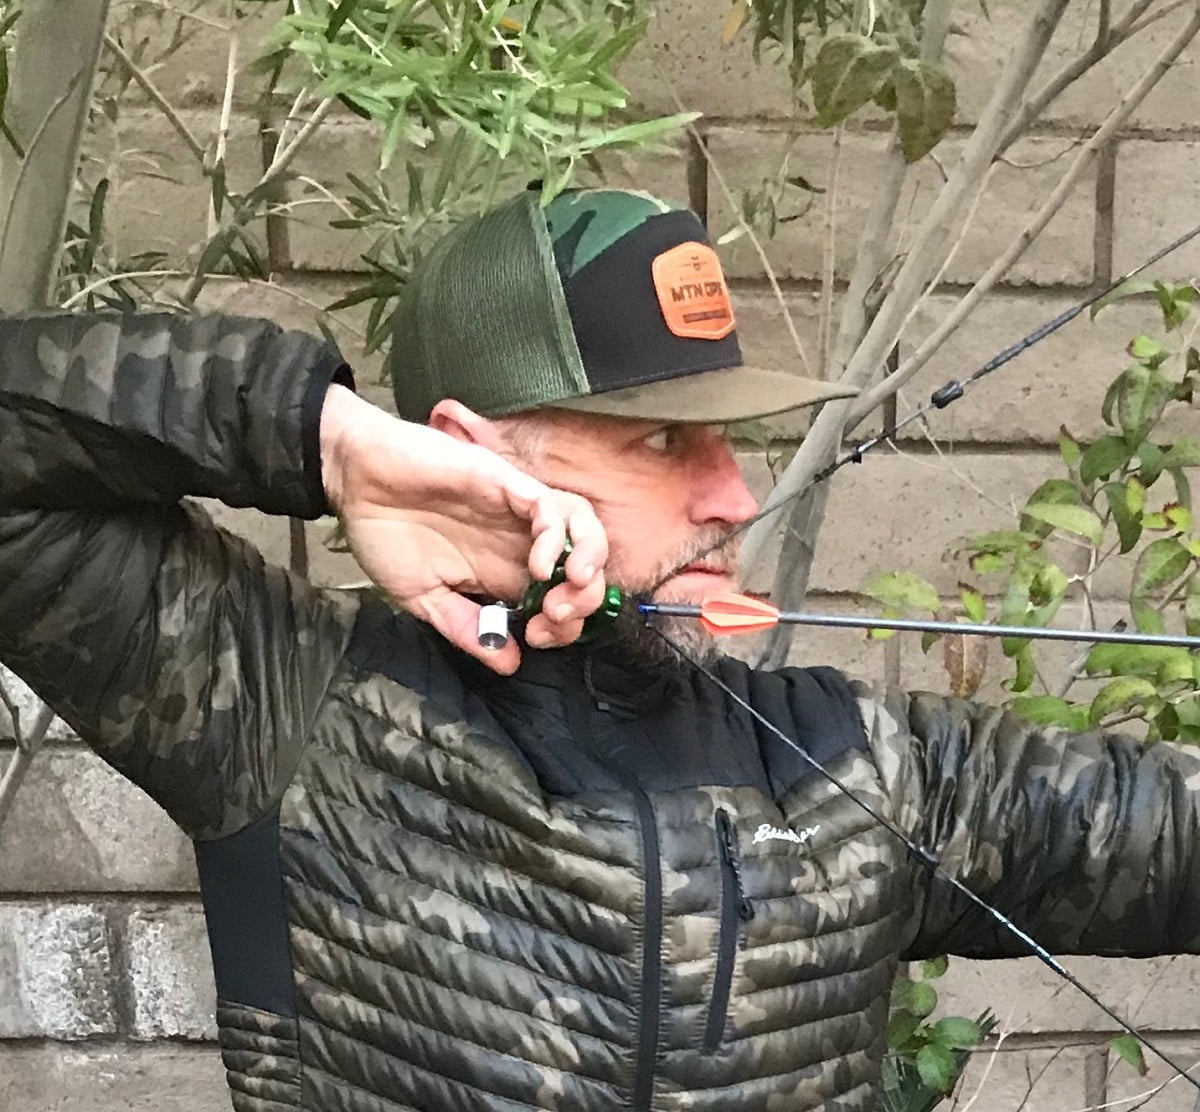
With the release hand properly anchored on the face, you want the string to just touch your face next to the mouth and come up and touch the center tip of your nose. Make sure your face isn’t too tight against the string because that can cause erratic arrow flight similar to torque. Also make sure that the string isn’t to one side or the other of your nose because that is improper head alignment and cause bad peep and sight alignment.
Shot execution/pull through
Now that we are fully anchored the last thing to do is execute the shot. With the index finger release, you want to make sure that the index finger is wrapped around the trigger at the 2nd knuckle and not your fingertip. The fingertip will command a shot instead of allowing to pull through it.
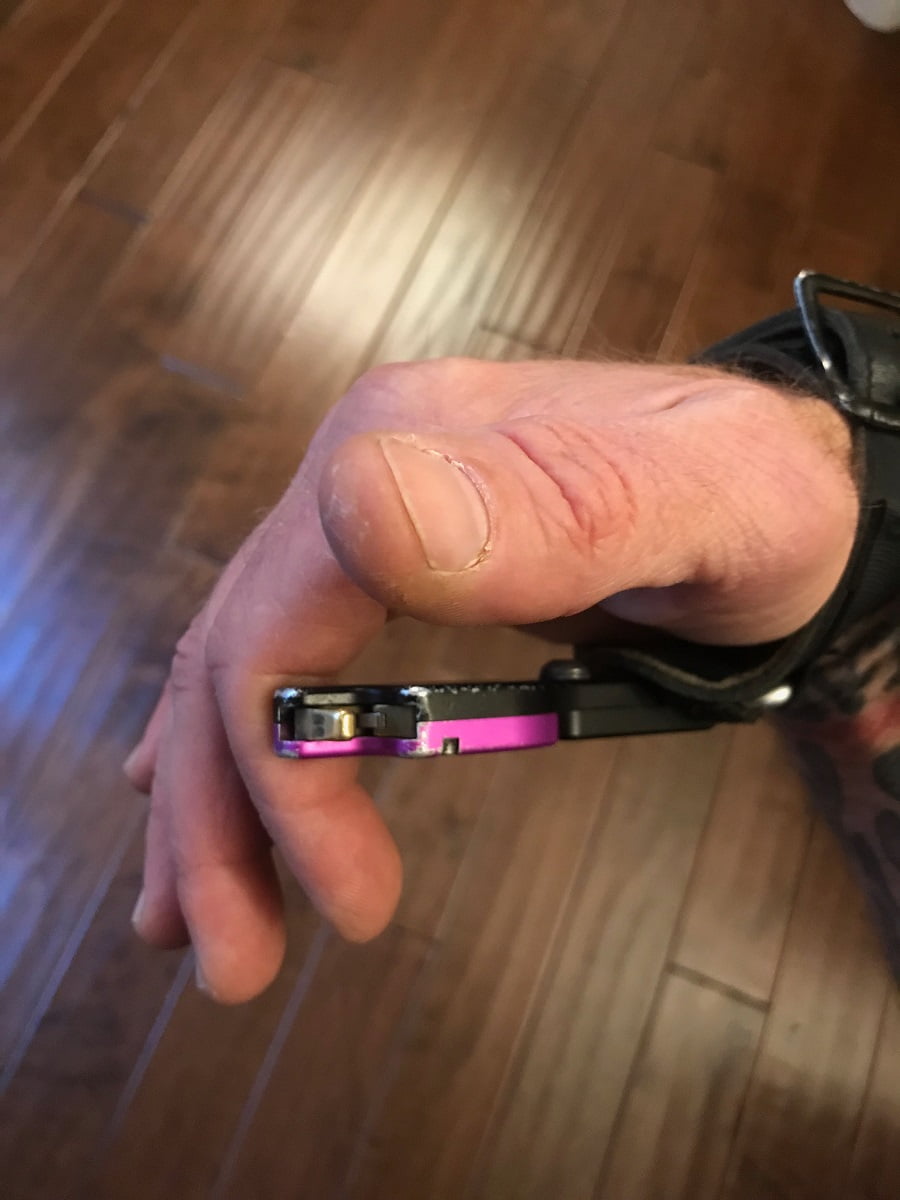
With the thumb barrel, you want the thumb located on the trigger between the first knuckle and the center of your thumbprint. I don’t like to have the barrel behind the knuckle because the hand begins to flex or tighten up which will cause or develop a punched shot.
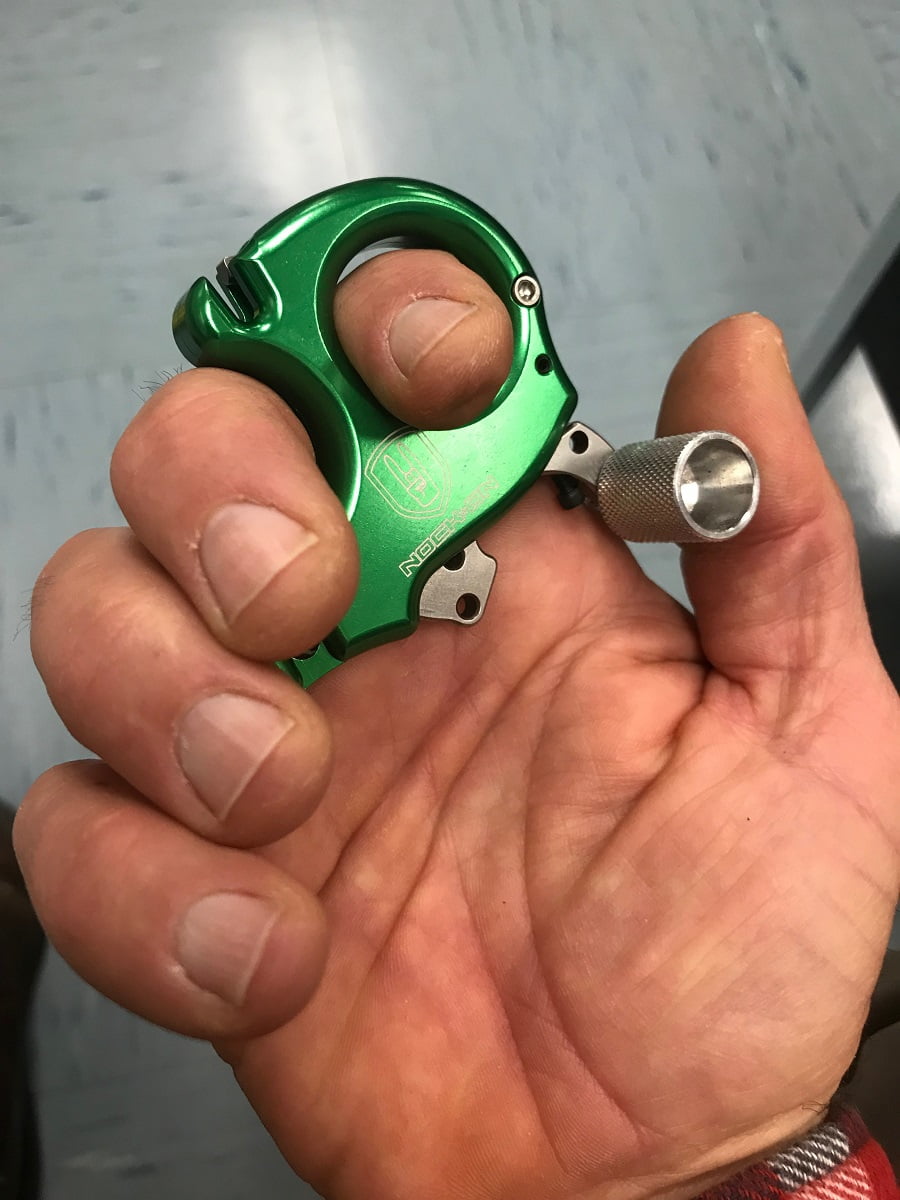
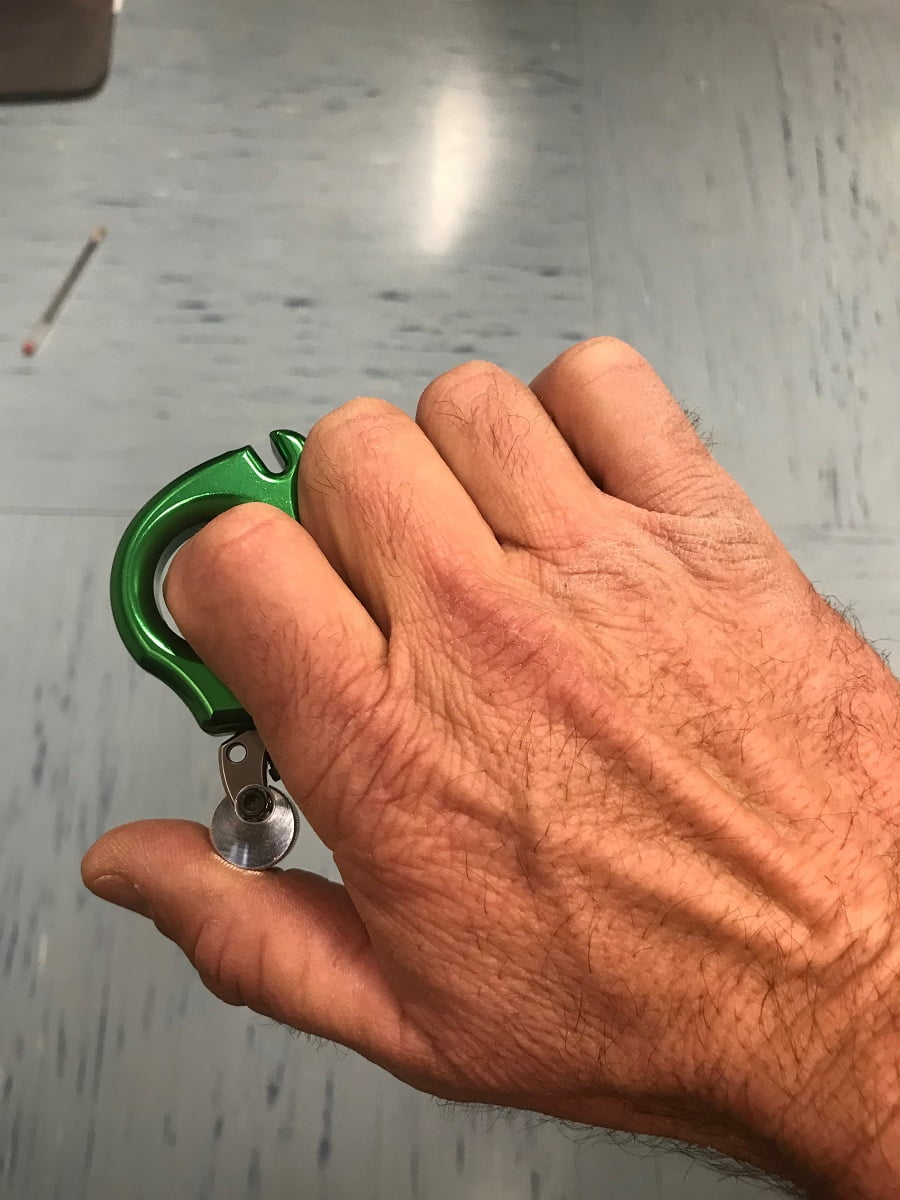
Now you are ready to execute the shot! With a good stance, posture, alignment, and anchor, your pin float will be minimal, allowing for a clean shot as long as you do one last thing: PULL THROUGH THE SHOT!
What I do at this point is concentrate on squeezing my scapular muscles and pull through the shot with the rear elbow pulling straight away and flex the bicep (only after the break) with your hand over your rear shoulder. You don’t want to pull with your arm (hand, forearm, triceps, and rear delt). When pulling through the shot, make sure that your bow arm stays put and shoulder doesn’t cave in.
Finish the Shot
We are not done, we still need to finish the shot. Once the shot breaks and the arrow starts heading towards it’s mark, it is really important that your bow arm stays on target and doesn’t drop or pull away at the break. Even if your pin isn’t sitting perfectly on your target, trust the pin float unless you are all over the place.
If you are all over the place, just let down and start the step process again. Once the shot breaks, watch the arrow fly all the way to its mark. Do this by seeing the arrow fly to its mark through the peep and sight and do not grab the bow whatsoever throughout the process. Your fingers on the bow hand should stay dead-like even after the break. Now the shot is complete!
Conclusion
Whether you are a beginner or a veteran archer, following these steps over and over with countless reps, you will soon begin to see consistent results. The process will eventually become second nature without even giving much thought. Just remember that it’s a marathon and not a sprint. Trust the process and in time your shot will begin to start breaking without much effort and hitting its mark consistently. I like to compare it to baseball or golf. When hitting the sweet spot of a bat or club, or in this case releasing an arrow, it just feels effortless.
Now go out and put in the daily reps so that when it comes time to harvest that trophy you’ve been watching all scouting season, you’ll be ready!
You can comment or ask Jimmy questions here.


