Rok Blog followers have met Kurt Racicot from Stone Glacier Ultralight Backpacks several times. His company is a leading backcountry pack manufacturer and his technical advice is both practical and cutting-edge. Recently, we’ve fielded more than a few questions on load shelves and their use. No better person to ask than Kurt himself. Enlighten us, Kurt!
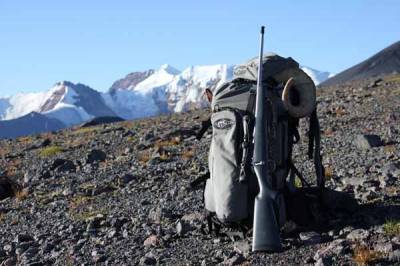
Load Shelf Use
So why use a load shelf compared to loading the meat high in the main bag? Below are two of the main reasons the load shelf is included on every Stone Glacier pack as an option for packing meat:
1) When loaded correctly, the load shelf positions the pack center of gravity closest to our center of gravity both horizontally and vertically compared to any other load configuration. This includes loading the meat higher in the main bag itself (load shelf CG is 25% closer, all things being equal.) This also means it creates the least amount of extra force on our bodies compared to other techniques. An example of these calculations can be derived from the scale CAD drawings on the previous blog post Stone Glacier: Understanding the Physics of Pack Load.
2) The load shelf allows you to keep the meat separate from gear, which I have found to be a major advantage especially on multiple day packs back to the strip or trailhead. You also do not need to use a waterproof game bag to try and keep blood from saturating your gear, which reduces coagulated blood in the bag and the possibility of losing meat in warm conditions.
This being said, how the load shelf is loaded is extremely important. The load shelf itself does not reduce extra force created by a load, it is the positioning of the very dense meat load that creates more or less force. The load shelf is simply a tool to help keep the meat an even thickness the height of the frame, as close to your spine as possible. This position creates the closest center of gravity possible and subsequently the least amount of extra force and most stability. You can attain the same pack center of gravity angle when loading the meat higher in the main bag, but the load center of gravity is approximately 25% farther from your center of gravity. This can equate to as much as 25% more leverage proportionally whenever the load is not perfectly vertical, like when you need to lean to navigate in thick country or catch your balance after a misstep. While these numbers can vary depending on load size and the weight of meat you are carrying, this example shows the impact of meat placement in the pack. Below are some tips I have found helpful when using a load shelf.
Guidelines to loading the shelf:
1) When loading the load shelf, lay the pack flat on the ground, harness and belt down, with the pack bag rolled back to expose the frame. The pack bag should be already loaded with your gear, the load shelf is the last part of the pack to load. If packing a cape (deer/sheep shoulder), I have found good placement is at the bottom of the pack bag as they are generally very light for their volume.
2) Lay the meat bag on the frame and distribute an even thickness the height of the frame, approximately 25” tall by 12” wide. For example, a boned sheep load will generally be about 4” thick if loaded to these dimensions and weigh approximately 70 pounds.
3) Roll the loaded pack bag back on top of the load. Make sure your gear is spread an even thickness the height of the pack bag, it is better to go up than out with your gear volume. Then work your way around the frame compressing the load evenly with the compression straps. Good compression will keep any meat from migrating down and prevent load shift.
4) Horns can be strapped to the top of the meat in the load shelf using the top compression straps or lid. They will ride right behind your head, high and close to your back.
5) Video instructions can also be found on the Instructions page at Stone Glacier
Choosing a technique to load your pack is personal decision depending on your pack, load, and gear configurations. However, if you plan to use a load shelf this fall, particularly on a Stone Glacier, these are some of the finer points I have found to maximize the load shelf function.
Best of luck this fall,
Kurt Racicot
Feel free to ask Kurt any questions in the comments section below or fire Kurt an email at [email protected]








thanks Robby and Kurt for always keeping all of us up to date and helping everyone have a better time in the woods with your expertise
Comments are closed.