


Arrow building? Have you ever thought to yourself “I’d like to build my own arrows someday but it seems like a daunting task?” Building your own arrows isn’t really too tough and it can actually be gratifying. When someone else builds your arrows, they are probably just cut from one end and slapped together like an assembly line assuming everything is perfect. If you are a perfectionist like myself, you will want all of your arrows to be as straight and of equal weight as possible.
Why Build Your Own Arrows?
Most don’t even think about how a couple of grains will even make a difference. But imagine you take a shot at your personal maximum effective range, launching a perfect arrow only to hit an inch above lungs into the “no zone”. Little did you know that that arrow was two or three grains lighter than the rest of your arrows. If that arrow was a few grains heavier, then that broadhead most likely catches just enough of the lung for a lethal shot. This is just one of many thoughts that go through my mind while I am building arrows. In this article, I’ll explain how simple it really is to build your own arrows.
For this article, I’ll be using straight carbon shafts. If you have tapered arrows, you can only cut from one side so you’ll need to skip the first step on where to cut shafts.
Building your own arrows does require some tools:
Here is a list of the tools that I use
- Arrow saw
- Fletching jig with clamp
- Adhesives
- Sandpaper 400 grit
- Acetone or denatured alcohol
- Q-tip, toothpick, and paper towels
- Arrow spinner
- Weight scale for grains
- Rule
- Magic marker
- Primer pen if using a rigid vane that doesn’t adhere well
- Squaring tool (optional)


My Arrows
Everyone has different arrow weights and setups (wraps, inserts, collars, FOC, etc.) but building them is pretty much all the same. Here are the components for my arrows.
- Easton 330 carbon injexions
- Easton titanium half outserts
- Q2i Fusion X-II 2.1 vanes
- Ironwill outfitters S125 broadhead

My finished arrow is 28-1/4” long @492 grains with a 14.9% FOC. After years of changing and tinkering around with varying weights and sizes, this so far has been my favorite set up for the poundage and speed of my bow. Since we have everything we need and know exactly what we are building, let’s get started!
Determining Arrow Length
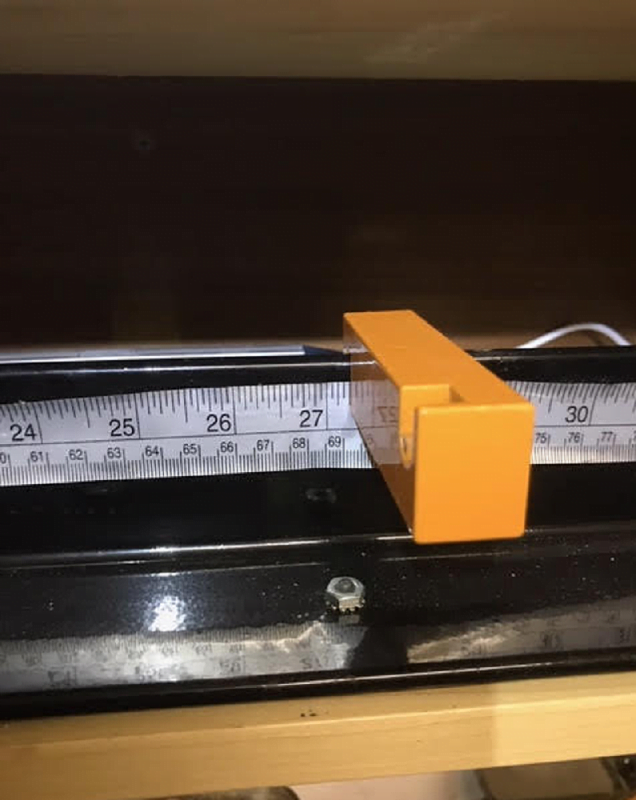
Make sure you know the actual length of your arrow so that you’ll know how much to cut from the stock shafts. Understand that your arrow length is determined by the front end of a raw shaft to the throat of your nock. If you have a half outsert like myself, then make that length adjustment as well.
Spin Testing
Now take all of your arrows and spin test them one at a time.

If most of the wobble is on the back end of a shaft, mark with your magic marker, the total length to be cut from that end.

Vice versa if all of the wobble is at the other end. If there is a slight wobble on one end and quite a bit more on the other, mark ¼ of length to be cut from the slight wobble end and then mark the other 3/4 of length on the other end. But if the wobble is about equal at both ends, mark it so that the same length from both ends are taken. Once everything is marked, it’s time to take the marked shafts to the arrow saw.
Cutting The Arrows
Set the saw to the correct length to cut. When I cut, I will spin and score the shaft at the same time it’s cutting so that it squares the end. Before you start cutting, grab all shafts that have marks on both ends. You will want to cut one side of all of those shafts first. Once you have cut one side of those, you can cut the final length of all shafts at the same time. Now that all of the shafts are cut, square the ends cut with an arrow squaring tool and take 400 grit sandpaper to sand your soon-to-be fletched ends of the shaft.

Prepping To Fletch
The shafts should now be cleaned up. Take your acetone and dip a Q-tip into it so that we can clean the inside of the cut ends of shafts. If you have a micro diameter shaft like myself, then you’ll have to take some of the swab off of the end of the tip in order for it to fit into the shaft. Next, take a paper towel and soak it with acetone and clean the entire outside of the shaft. Since the branded logo on the shafts will sometimes be in different locations after the cuts, I will take those off as well with the solvent. Your arrows are now ready for the build!

Sort Your Components
Time to break out the scale and weigh everything–and I mean everything. Shafts, collars, inserts, vanes, nocks, broadheads, wraps, or whatever else you’ll be adding to this arrow build. With each item, separate from lightest to heaviest and group them. Everything is usually really close but there will be some parts that will be a grain off here and there. This is where it gets really important. You need to group arrow parts so that total arrow weight is of equal weight for all arrows.

Example: Heavy insert with the light shaft or maybe a light group of vanes with a heavy broadhead and so on. This might sound like we are messing with FOC but we are talking a total of a grain or two of total arrow weight.
Time To Build
Start assembling all of the arrows by gluing and screwing inserts and weights if you have them.

Make sure that they are in tight by pushing them in and down onto a solid surface unless you are using a HIT insert. Try not to use too much insert glue or you’ll have a lot of squeeze out and clean up. If you do have a lot to clean up, just use a soaked paper towel with some acetone and wipe clean.
Next, install the nocks and collars. The last thing to do on the build is to install a wrap if you decide to use them, and then fletch. You can even get Rokslide wraps from the Rokstore! If you do like using wraps because of looks, balance, or vane adhesion, use a computer mouse pad to help with it. When I use wraps, I lay the wrap down on the pad with the sticky side up. Then lay your shaft right next to the wrap and make sure it’ll make contact all at the same time when you roll the shaft over the top of the wrap. Roll the arrow until the whole wrap has wrapped the shaft.

The Fletching Jig
Now take the fletching jig and set the degree of vane orientation (3 or 4 fletch, 6 would be same as 3). For my build, I’ll be using 90* for a four fletch. (Insert pic 15) Next, use the correct clamp (straight or helical) and set the degree of offset if any. I like to use about a 2-degree right offset with the straight clamp. With the Bitzenburger, there isn’t a measurement to set offset degree. So for a 2” vane, I know that 1/16” = 2-degree offset. With a 2.1” vane I set the bottom dial just a touch over 1/32” off of center and the same with the top dial except on the other side of center.

With the jig all set for fletching, let’s glue them up. Put a nocked arrow into the jig and a vane in the clamp at desired height location. I like to use the 4th line on my clamp.

Take the clamp with a vane in it in one hand and fletching glue in the other hand. Put two drops of glue on the vane about 1/4 in from the ends.

Now take a toothpick and spread the glue evenly across the whole edge and set the clamp onto the jig. Make sure to apply even pressure of vane onto the shaft.

Let each vane dry about a minute before moving onto the next one. You can use a blow dryer to help speed up the process but be careful to not heat the vanes and warp them (use cool air). If for some reason you put on too much glue, try and wipe it off of the shaft with a Q-Tip.

The very last thing that I always do is spin test all my arrows when finished and number them 1-12. I will use arrows 1-6 for broadheads and 7-12 for field points. All arrows are now complete!
Building arrows is easier than you think as long as you have the right tools. I would even say that it is therapeutic and gives me great confidence when I release an arrow from my bow. Now if you are just starting out, I would try different point weights after a build to see what will group the best. Spine and flight are a little more important than FOC in my opinion. As long as you are anywhere in that 10-15% FOC you are all good to go. So if you’ve ever contemplated building your own arrows, just dig in and go for it! You’ll be glad you did.
You can comment on this article or ask Jimmy questions here.


